On the Level again: assisting on a second Level 2 Sea Kayaking course

Featured

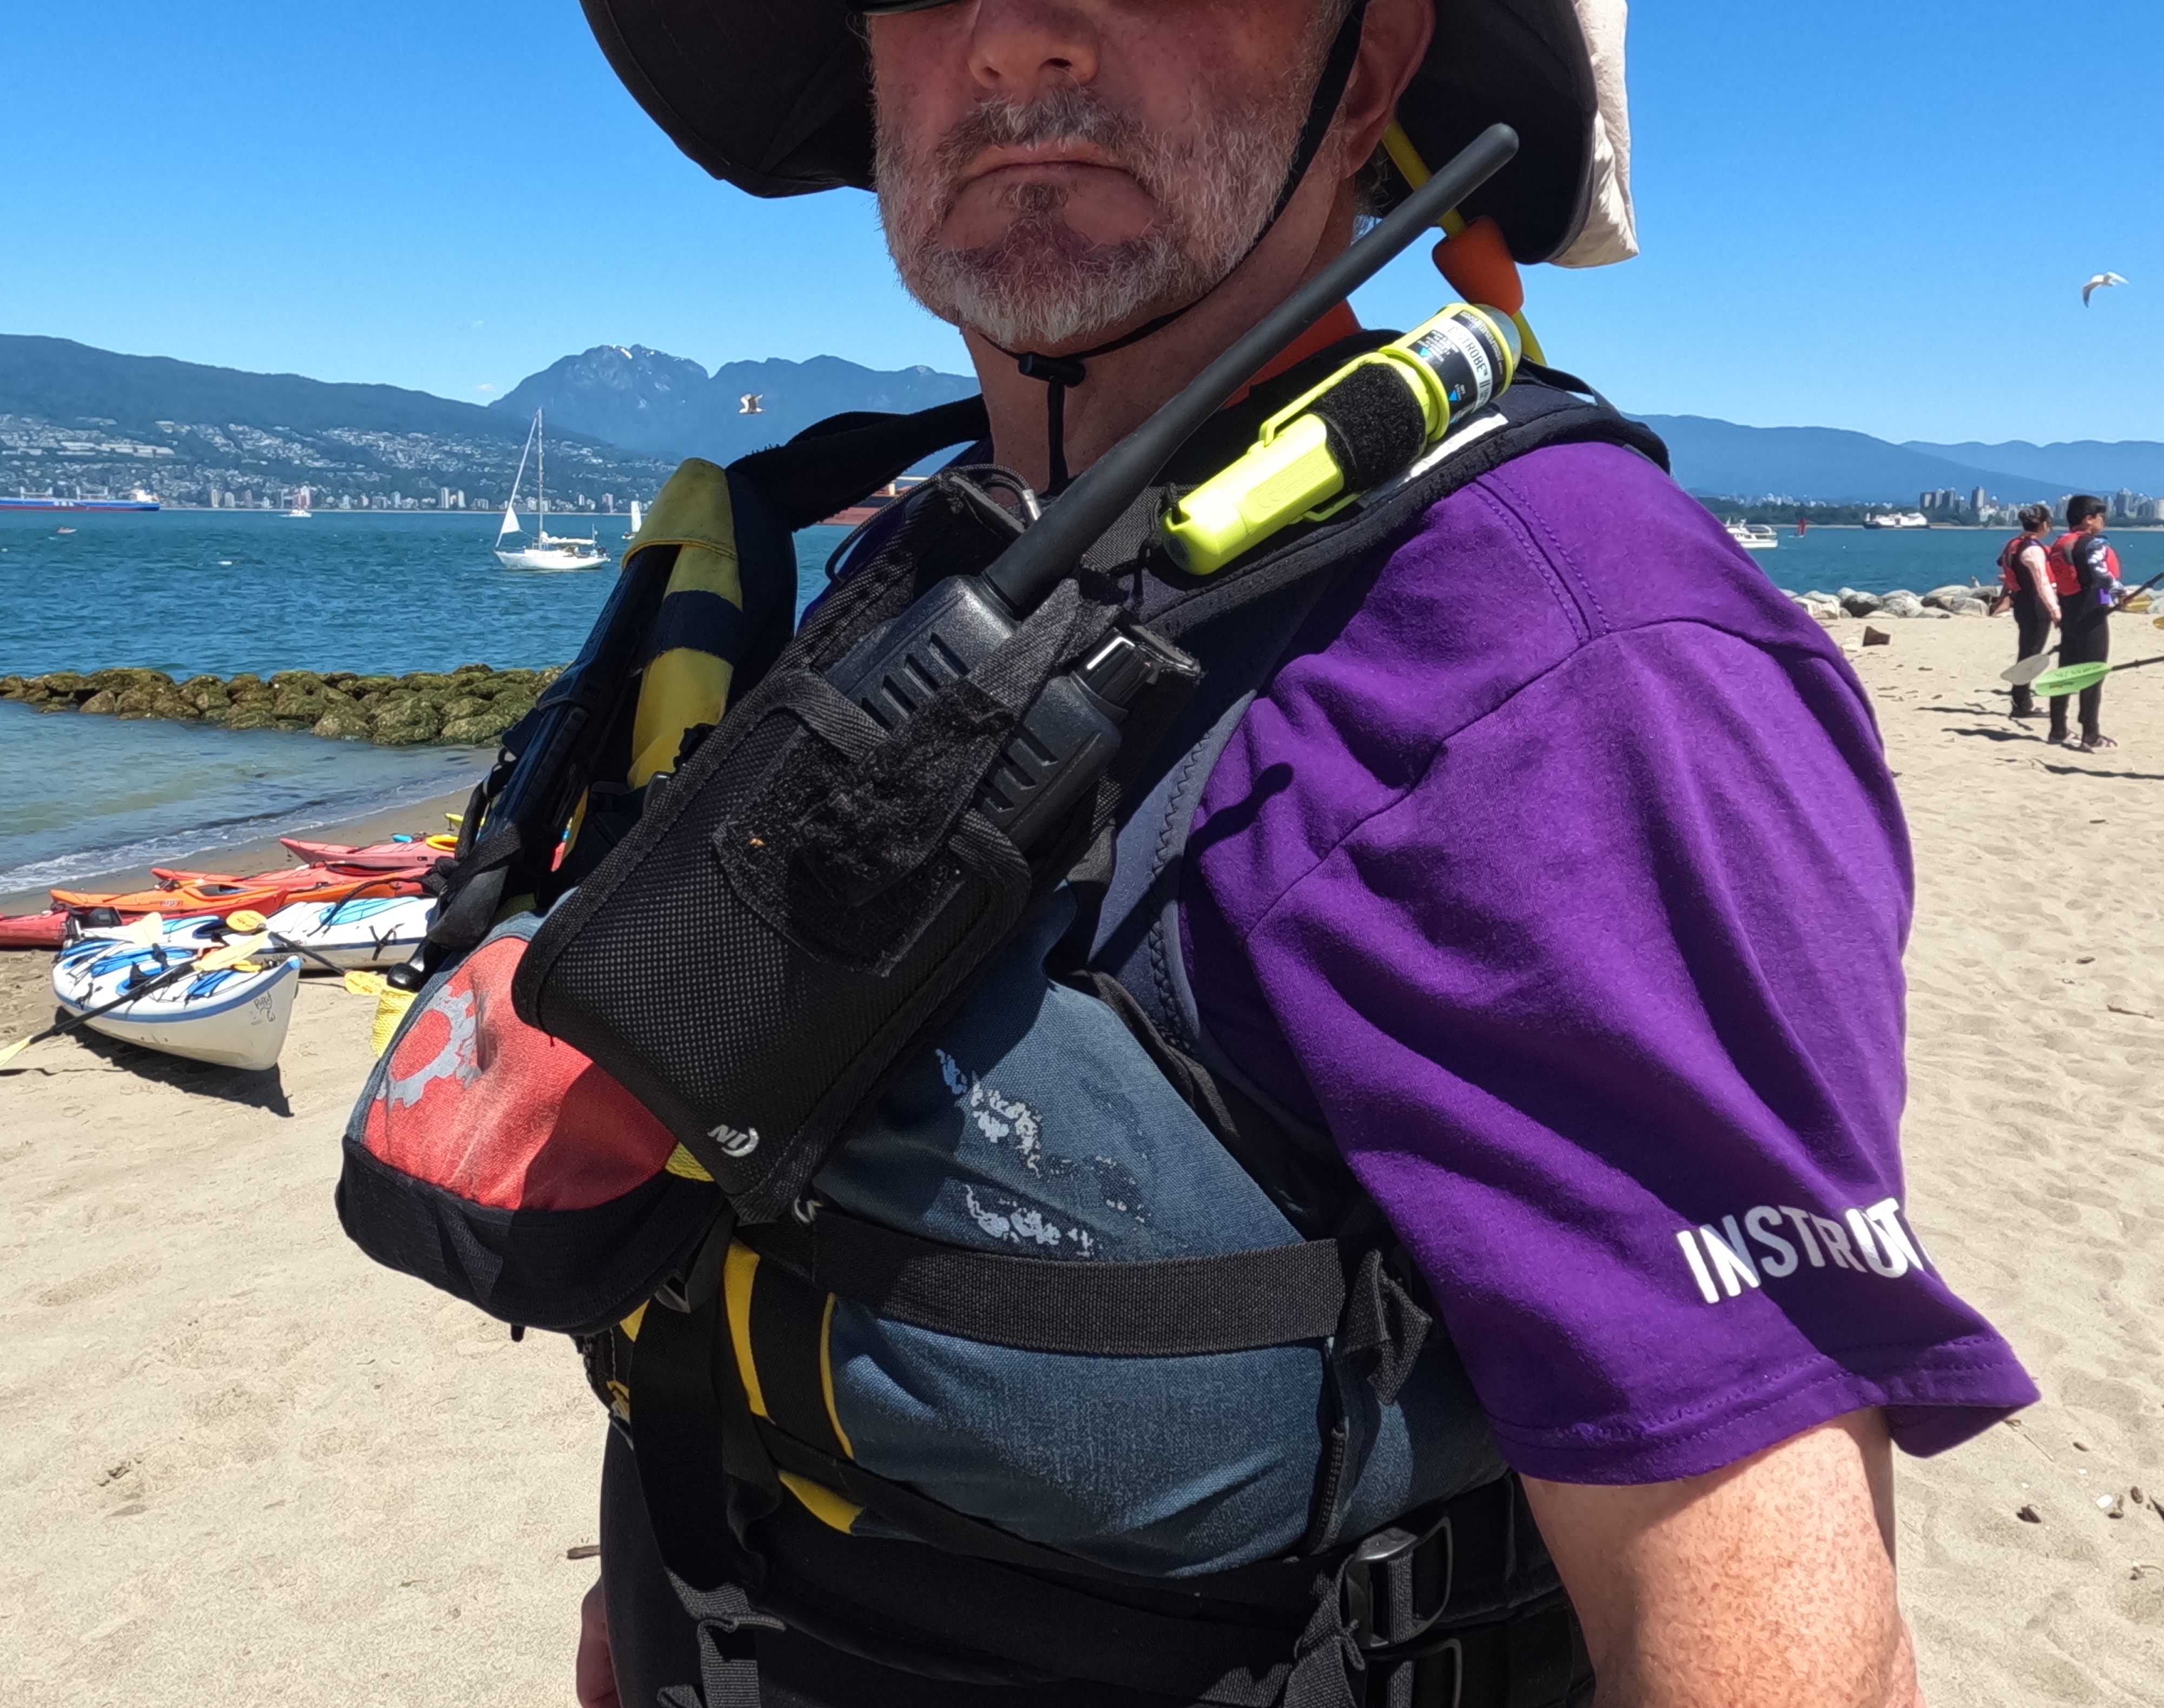
Prologue: Once again the stars (or students) aligned for me to assist my colleague Mike McHolm on a Paddle Canada Level 2 sea kayaking course. Prior to this three day/two night camping trip, we’d done an intense weekend of pretraining with our students at Jericho Beach, heavy on both theory and practice.  

Friday, May 16, 2025

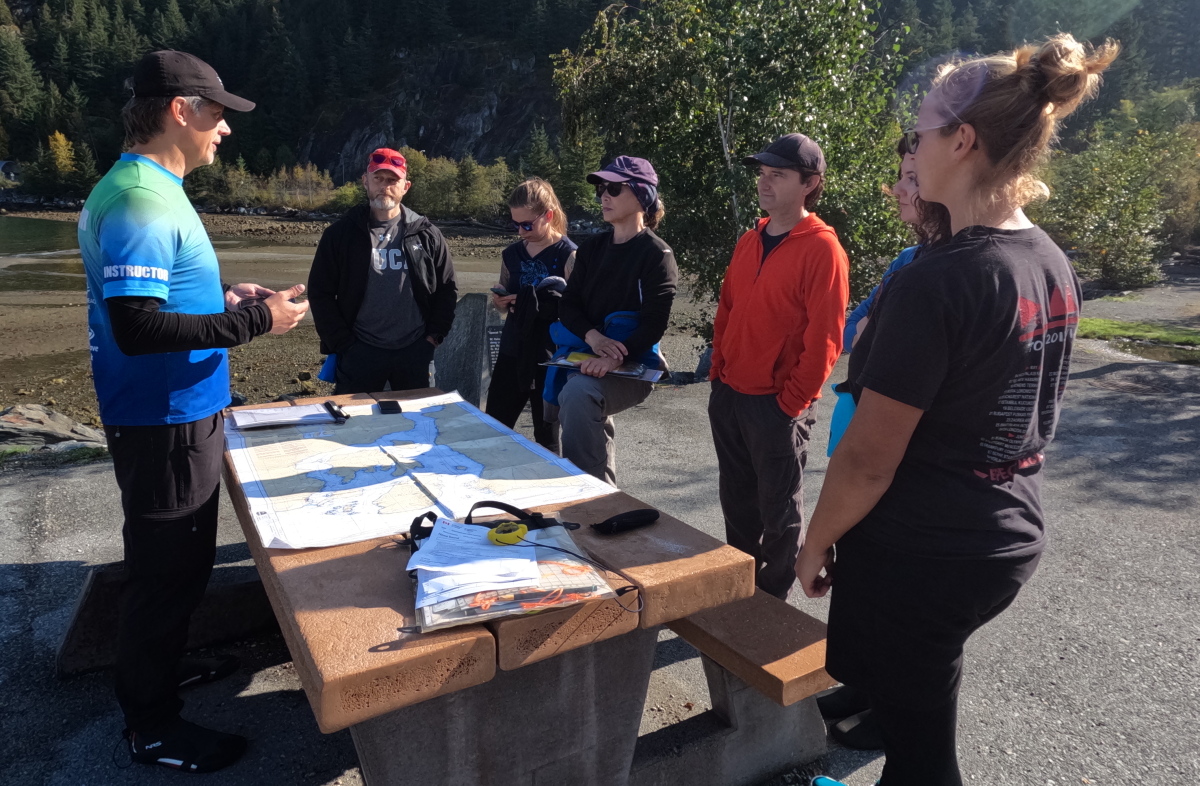
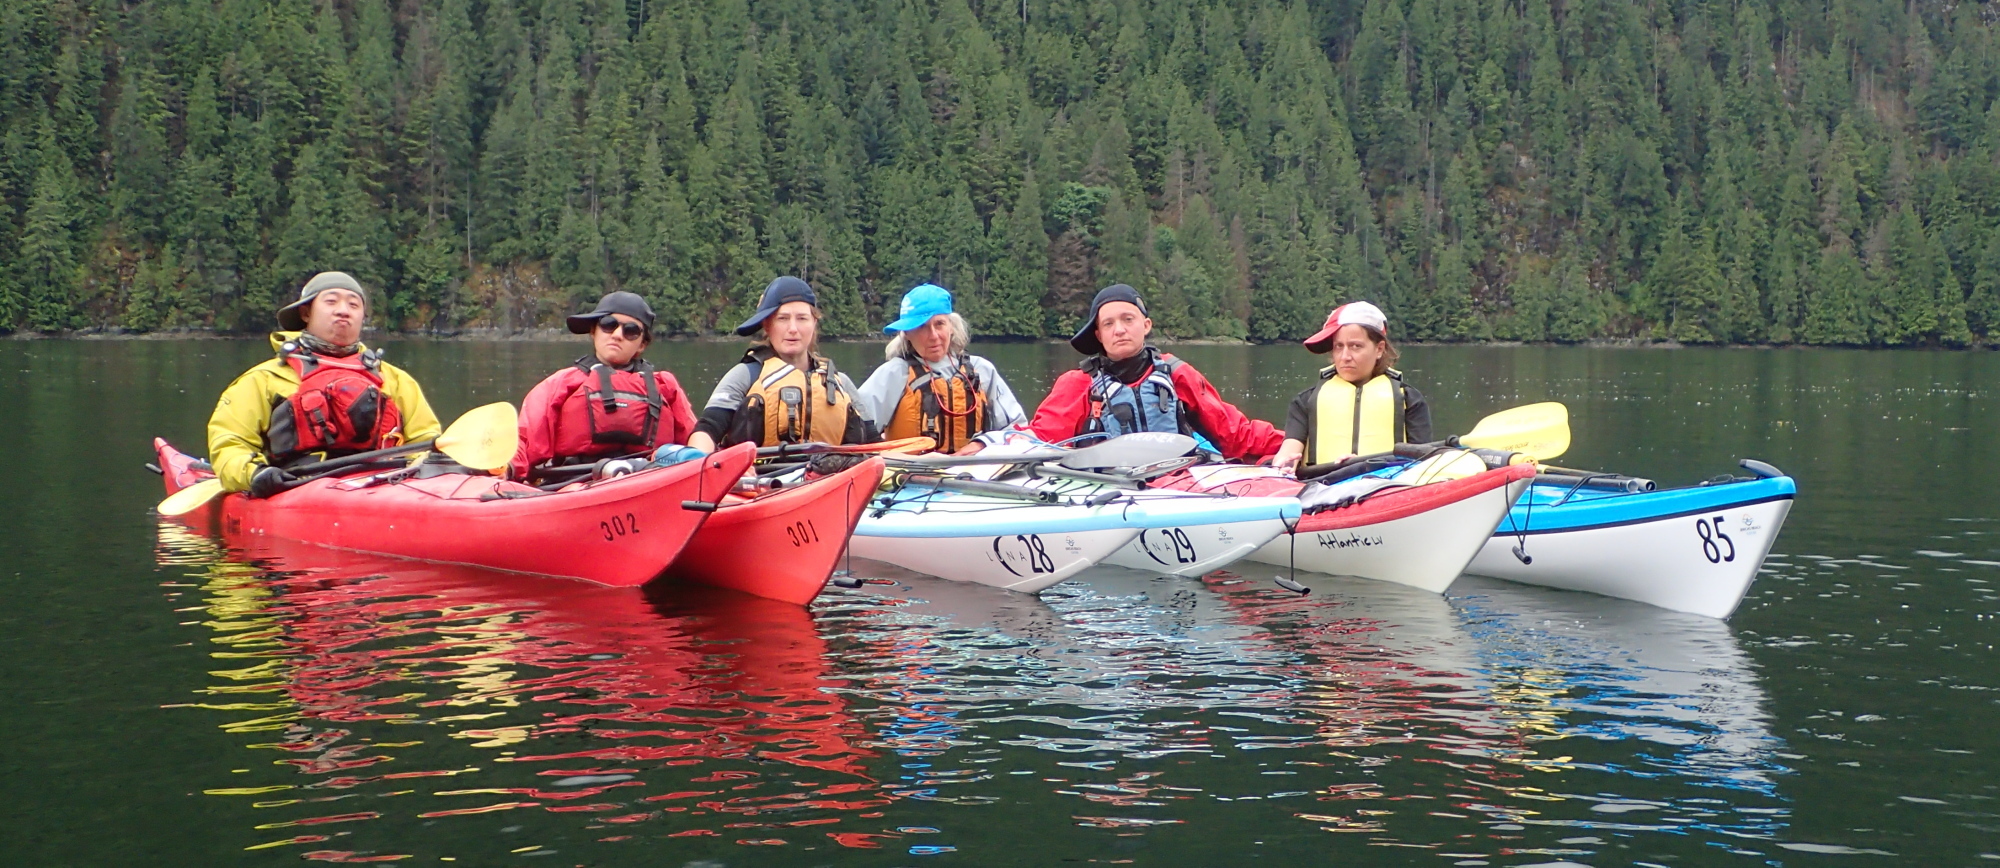
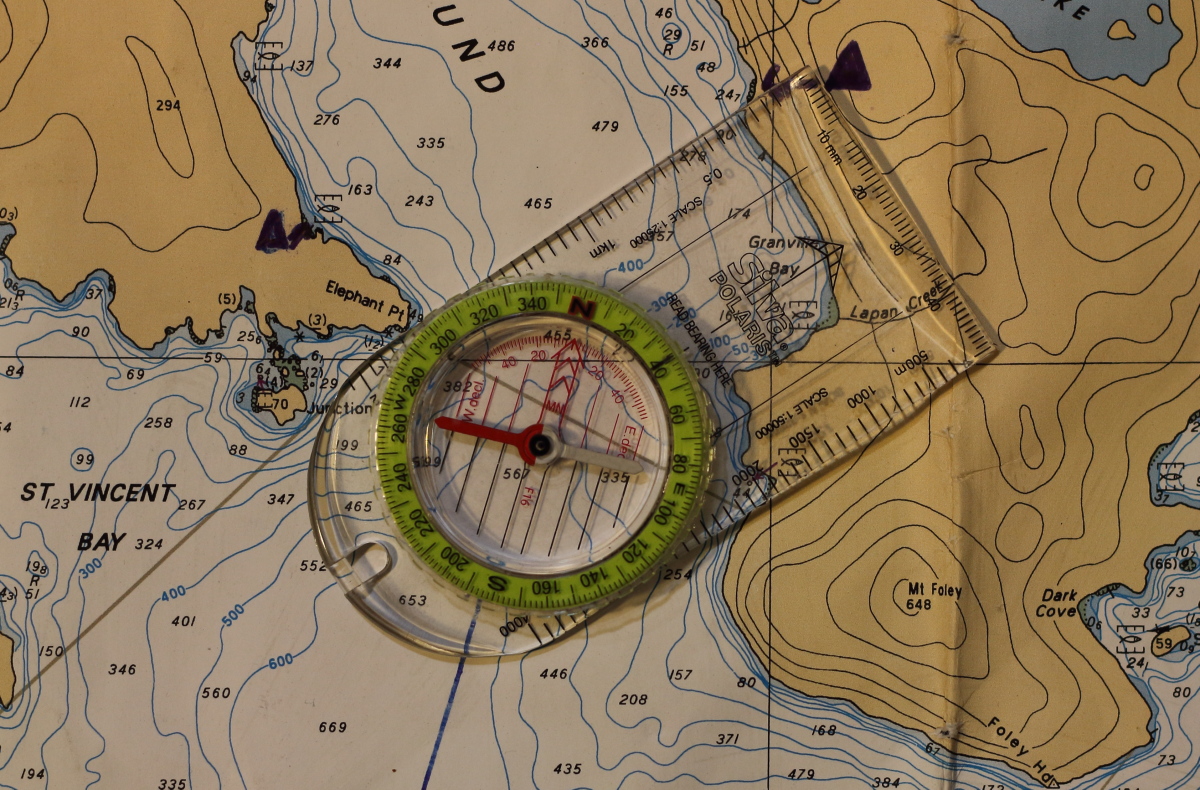
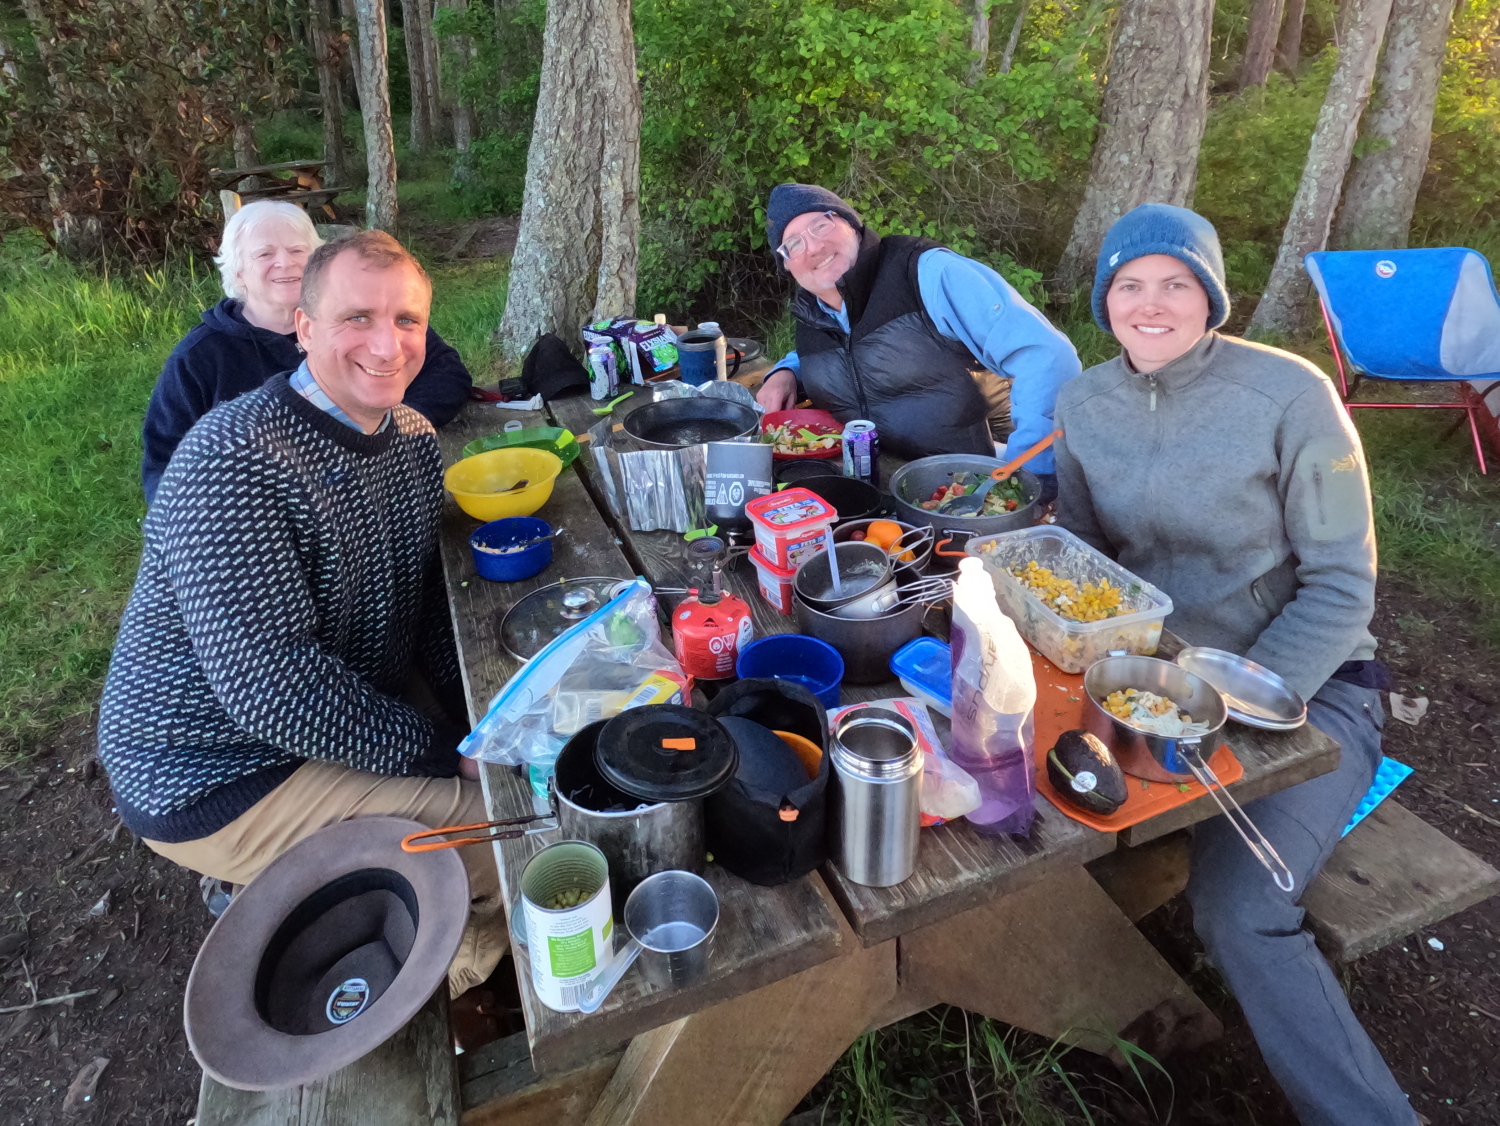
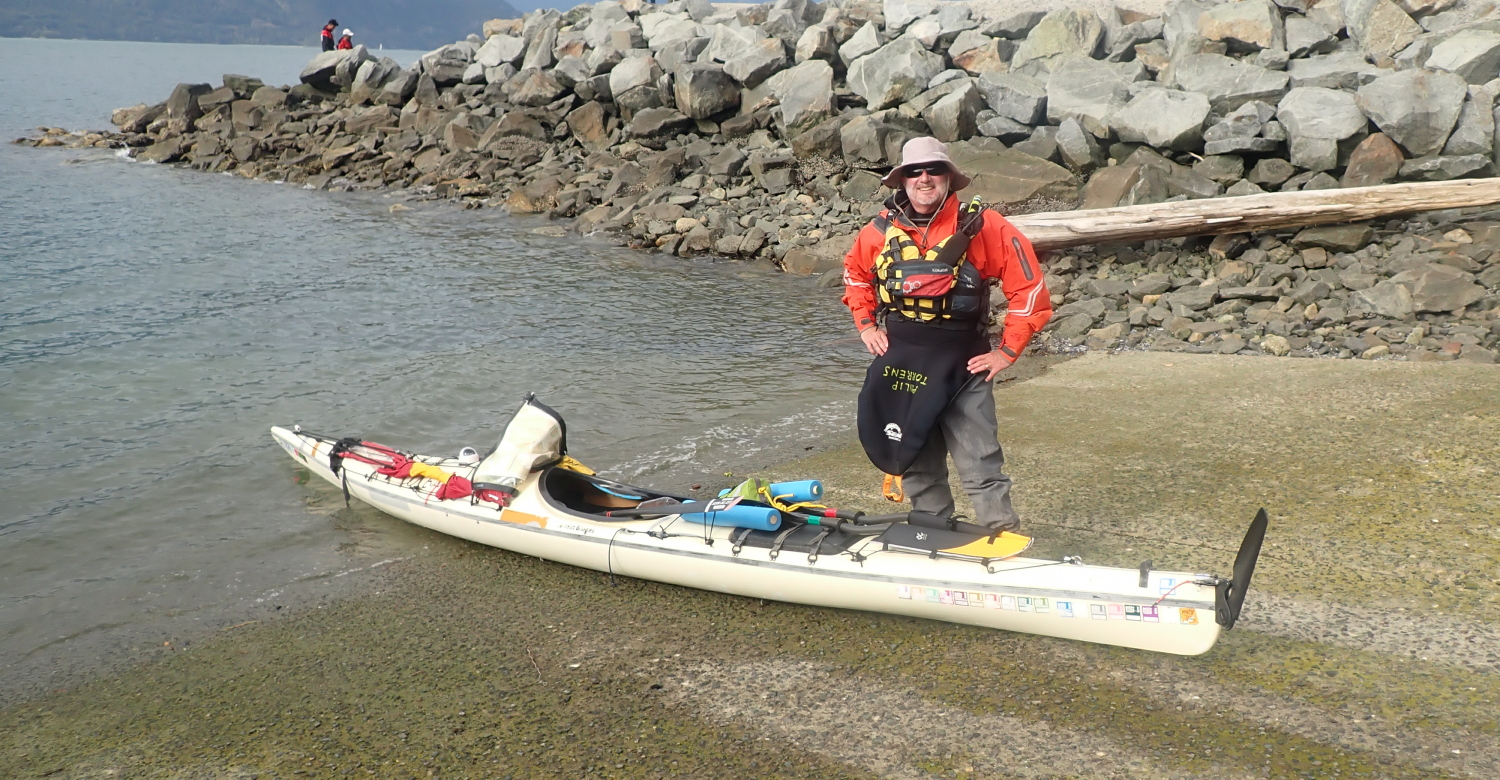
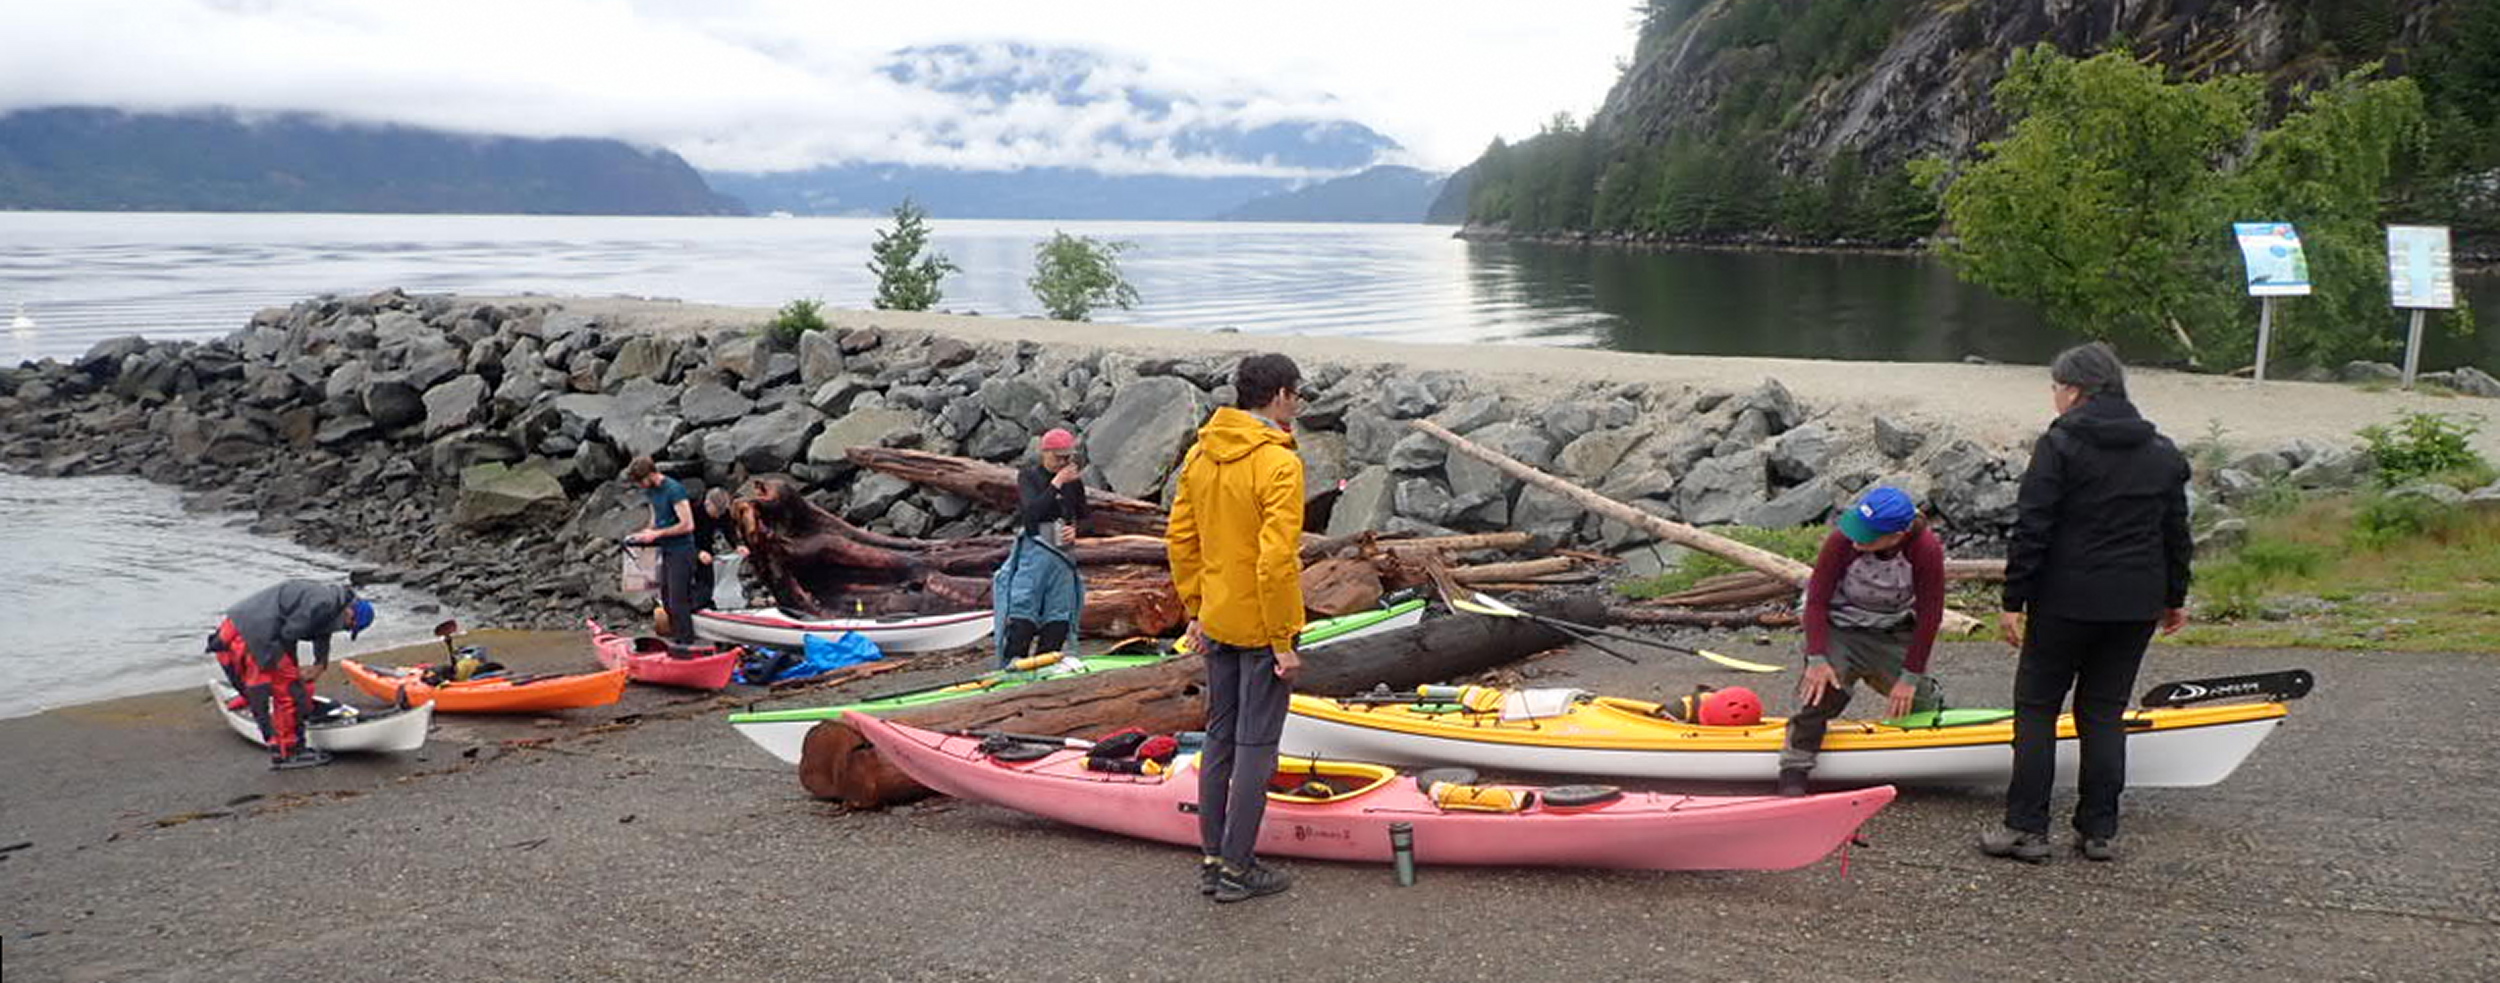
Mike and I rocked up to Xwawchayay (Porteau Cove) to find all the students already arrived and keen to launch. Before that however, we had a bit of learning and planning to do, and gathered round the nearest picnic table as an al fresco classroom. 

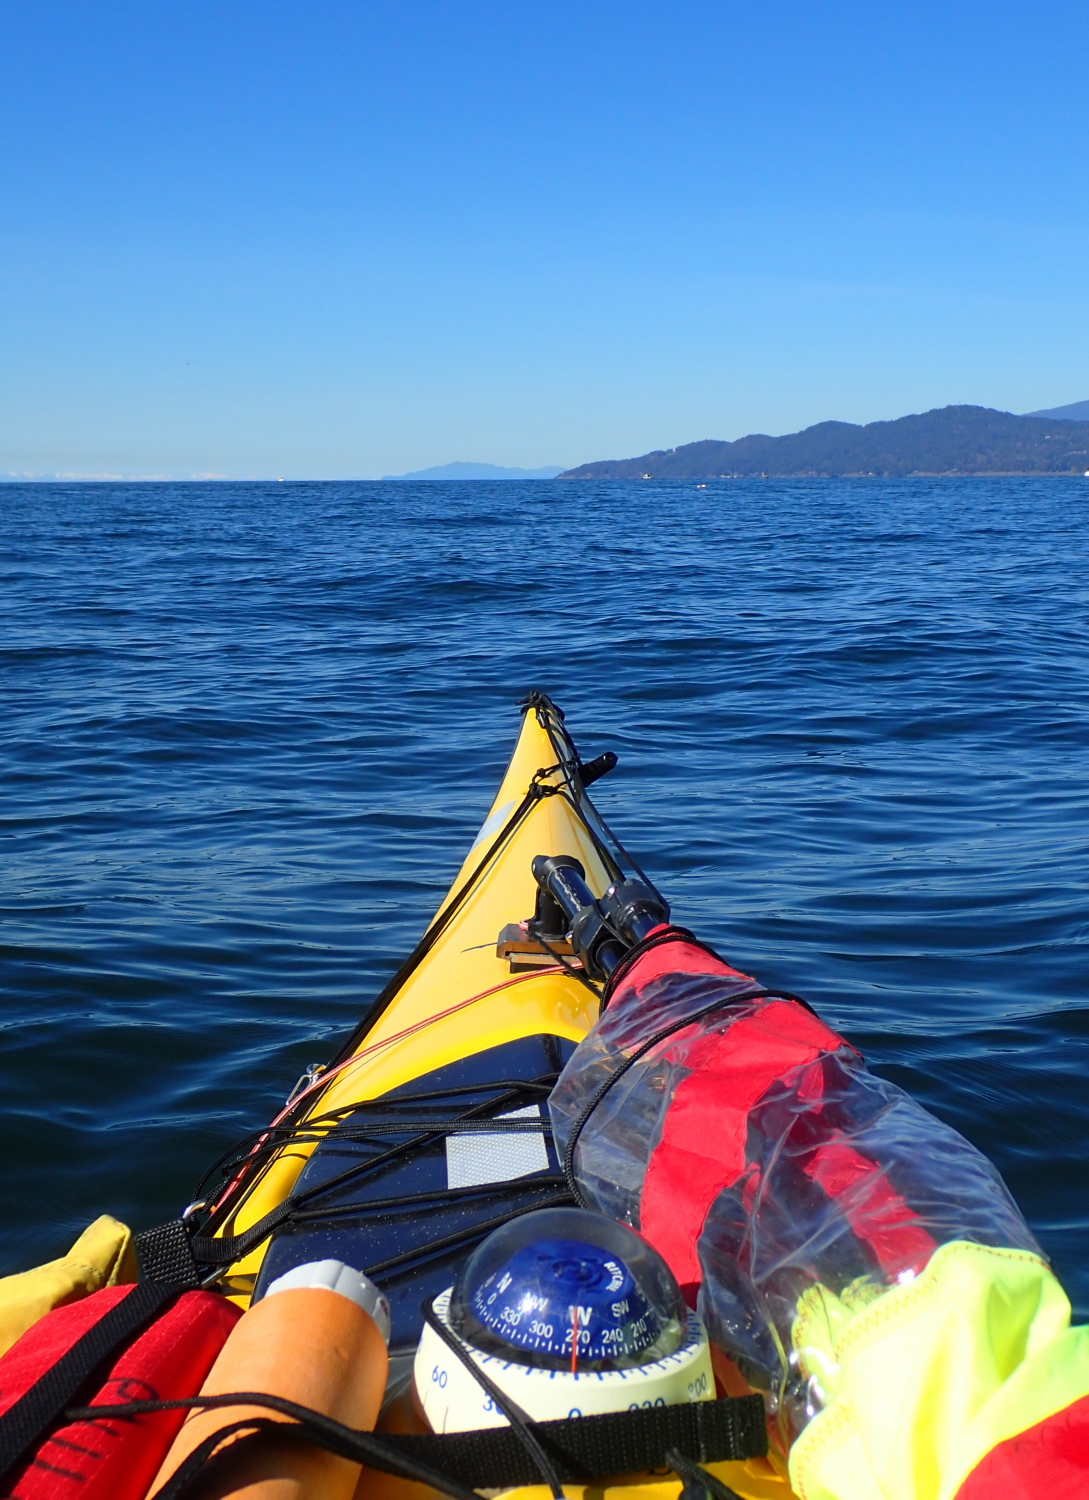
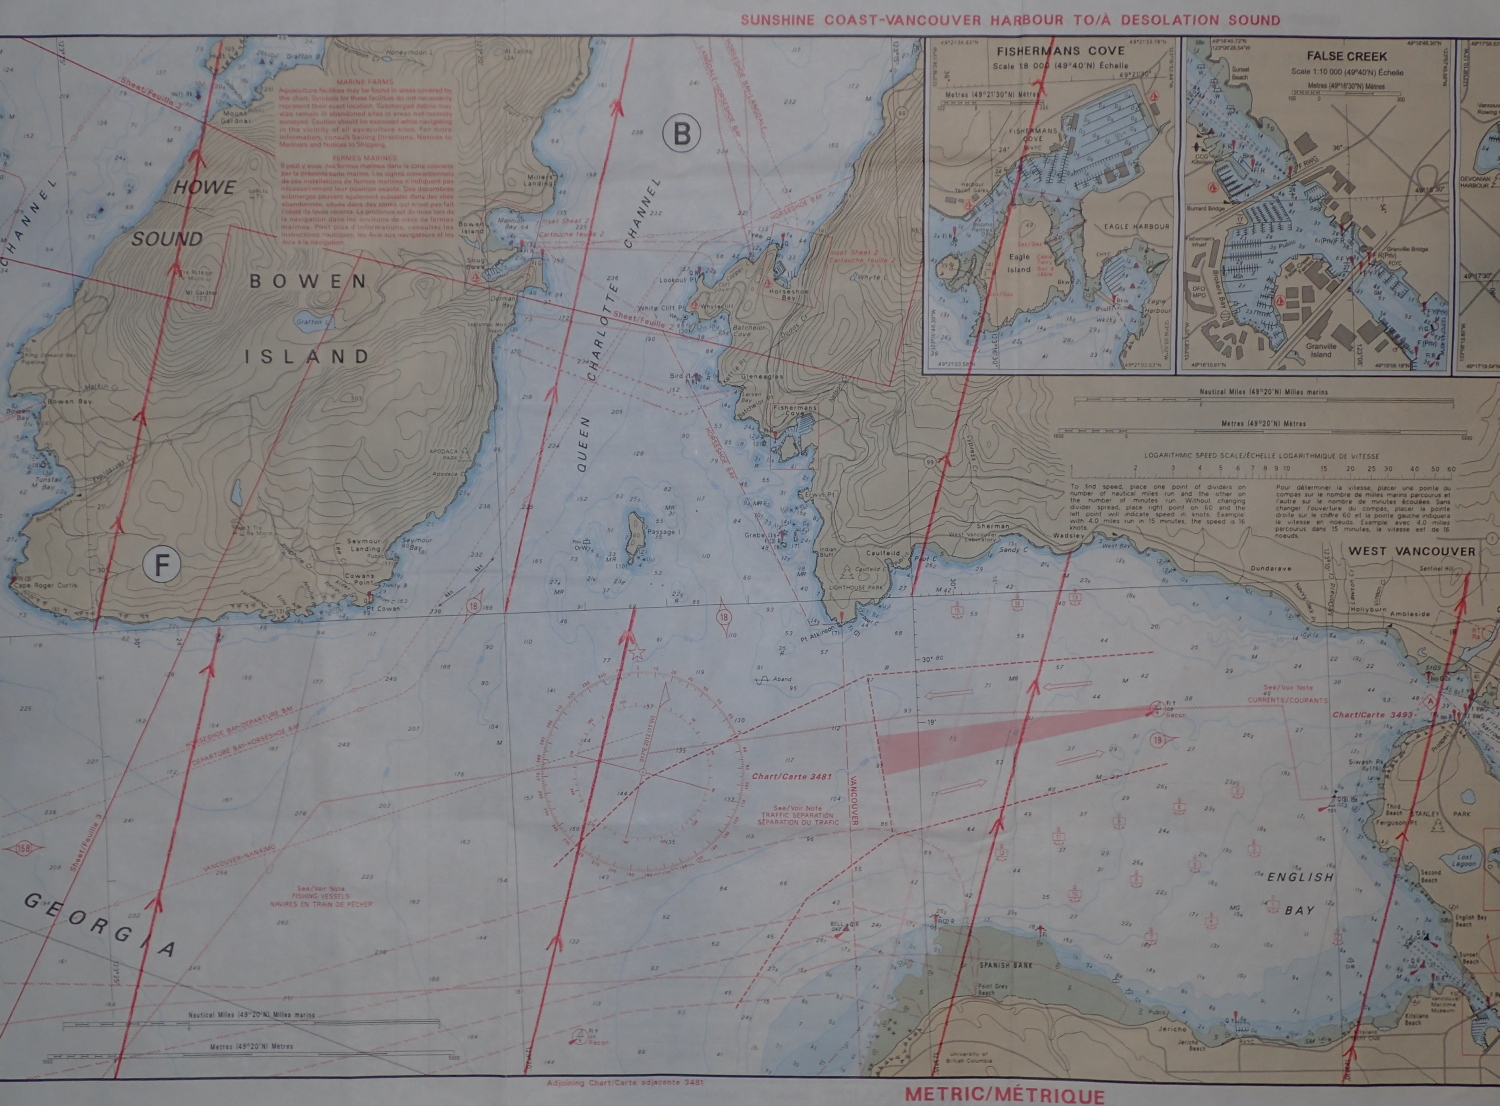
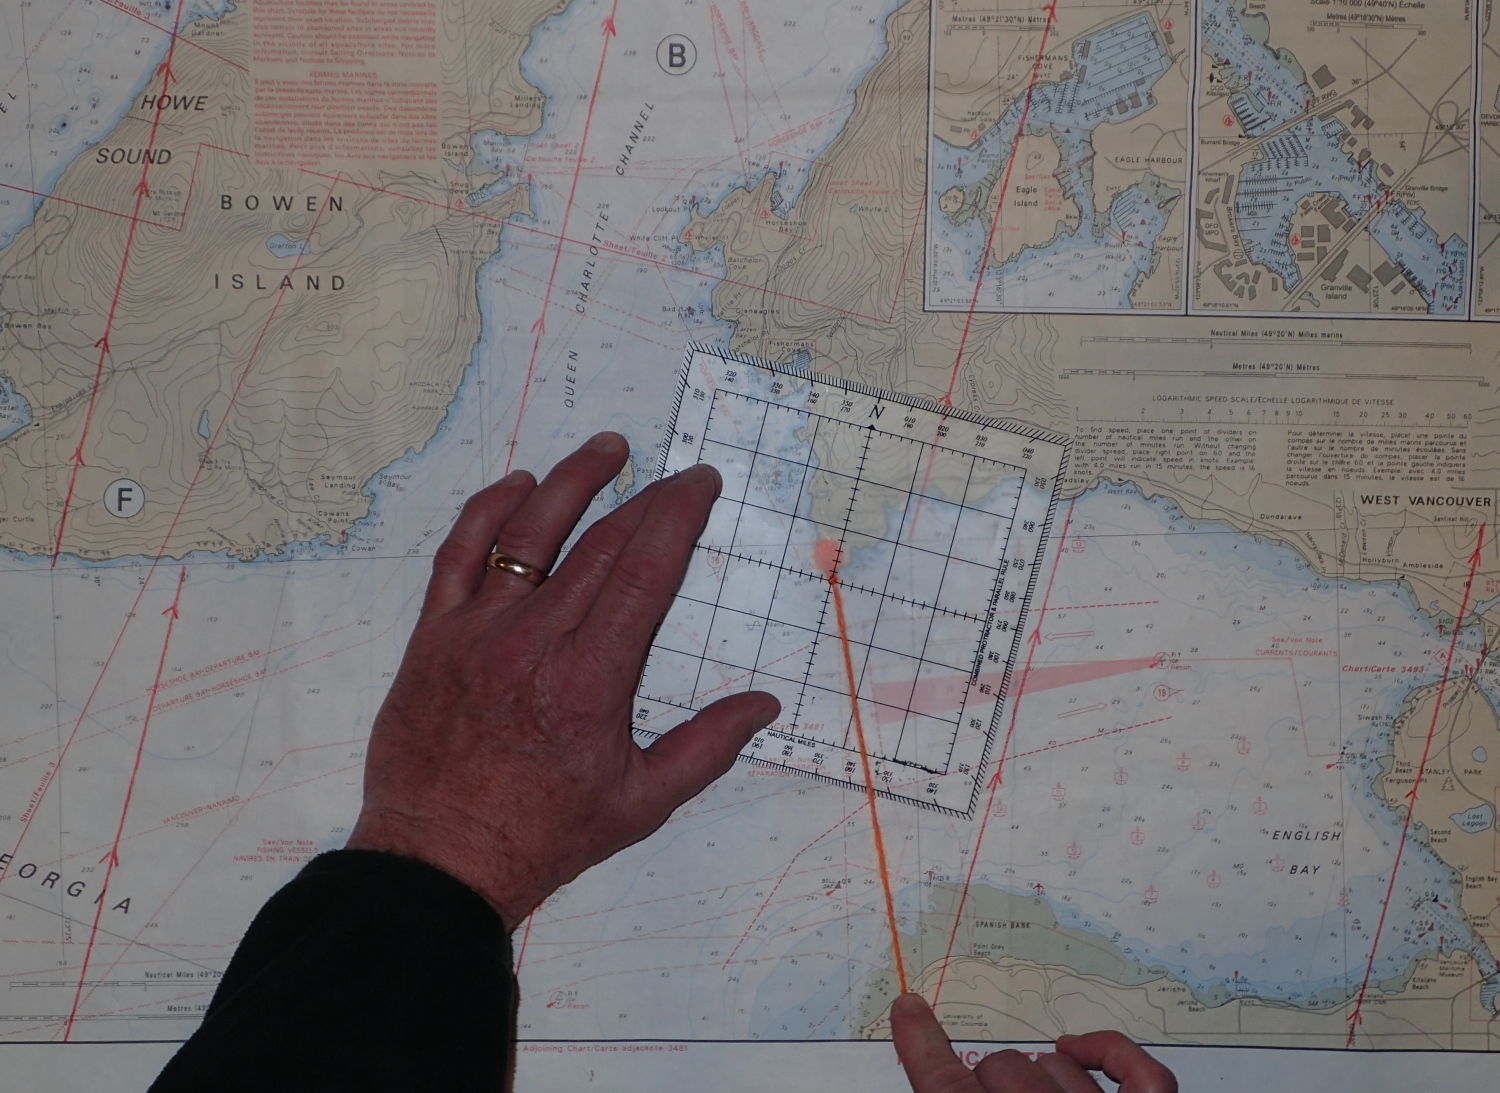
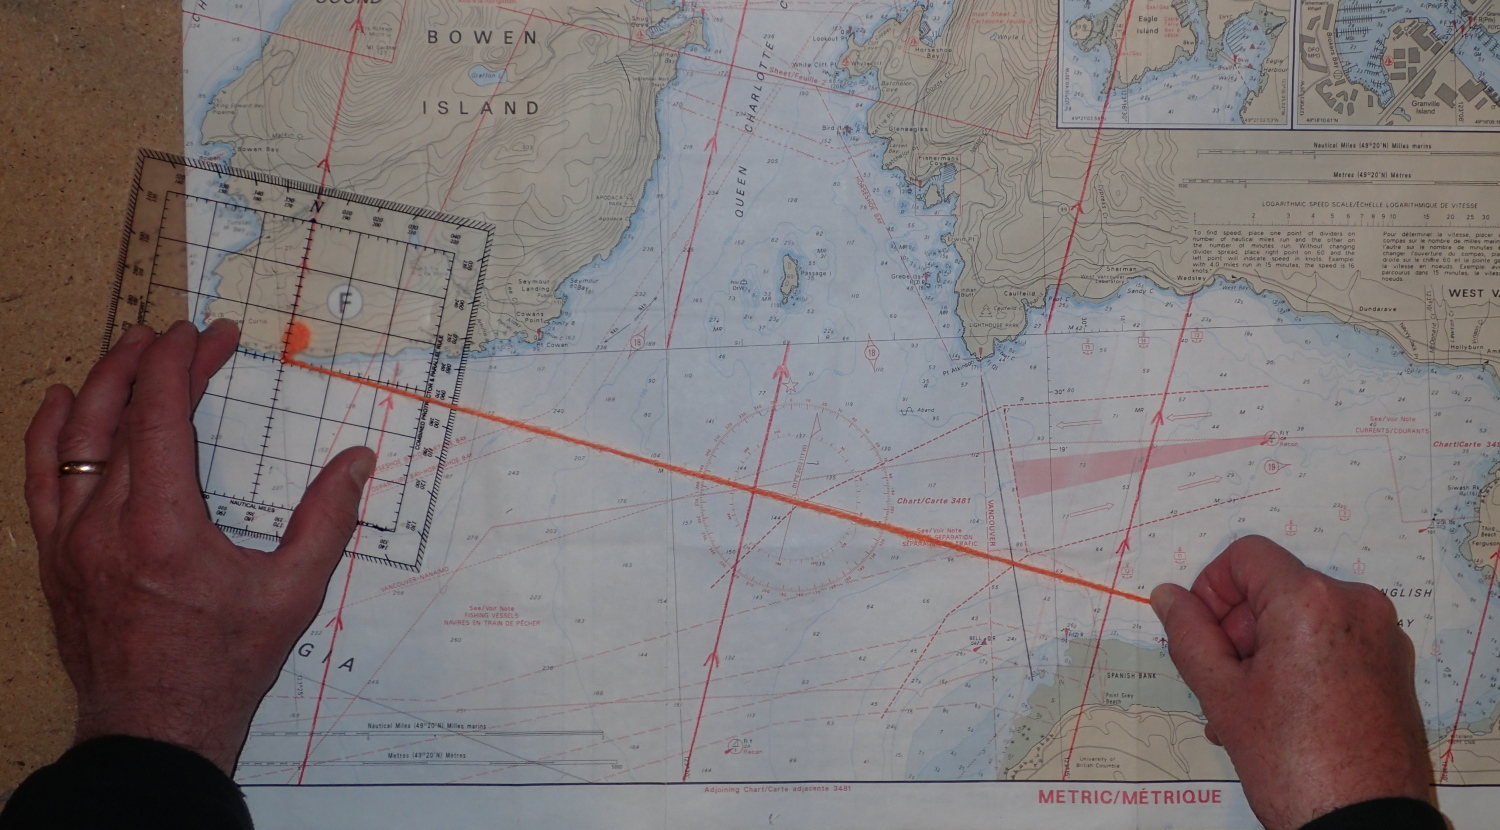
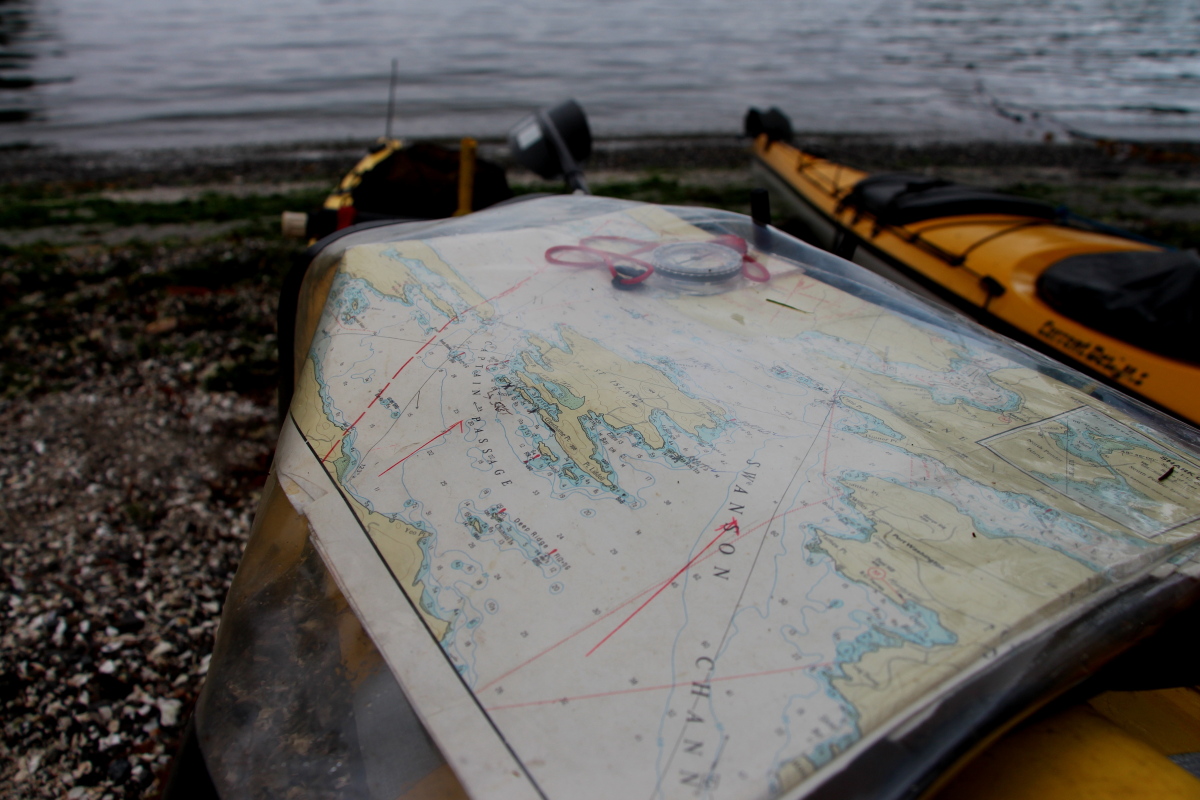
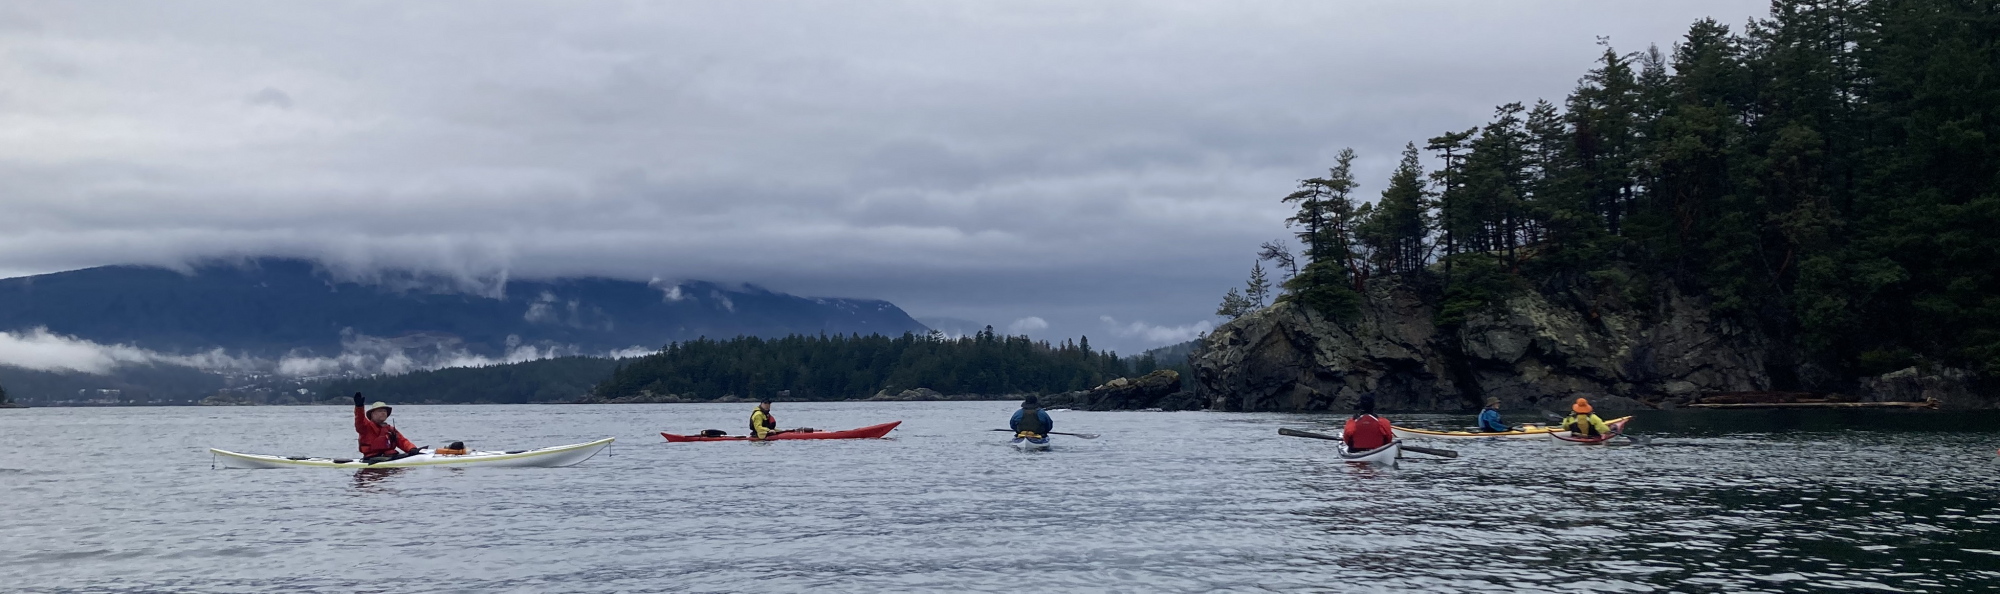
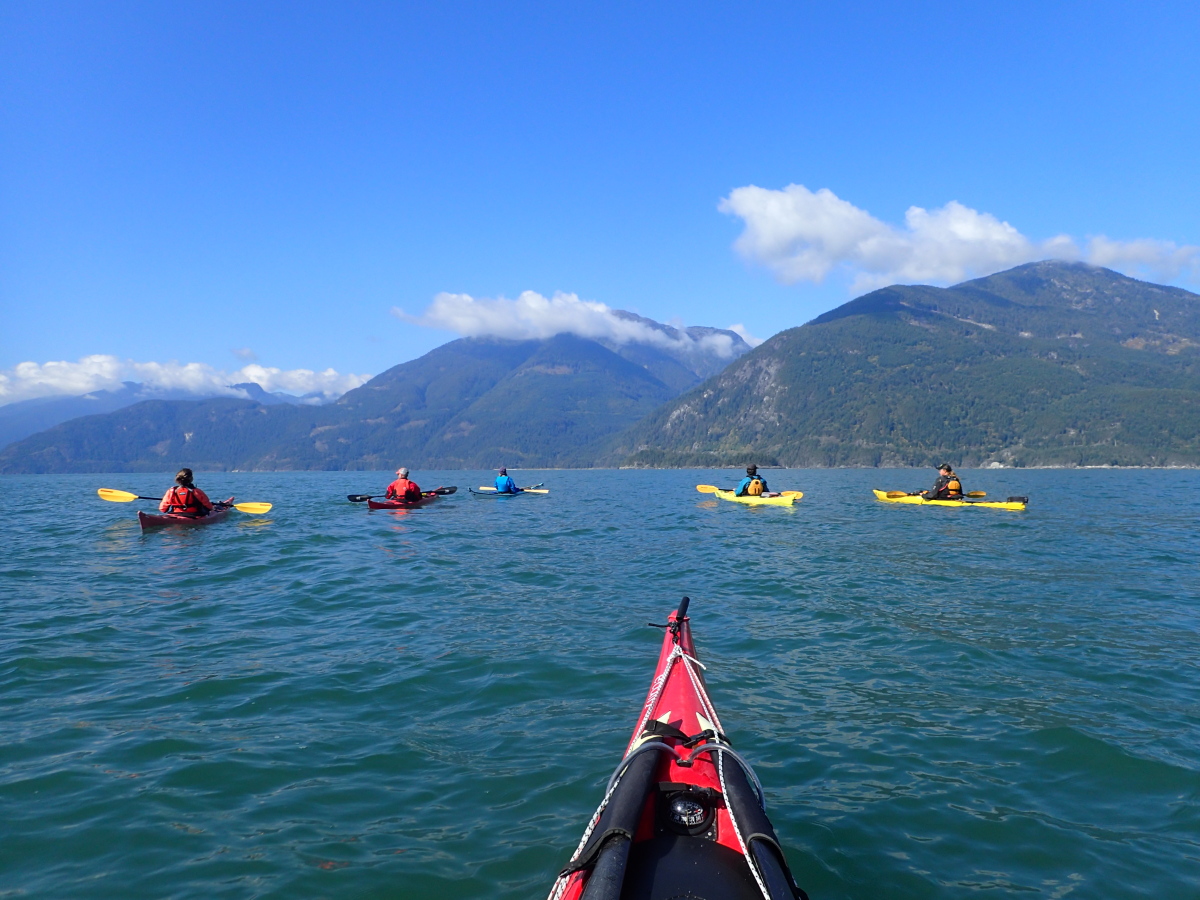
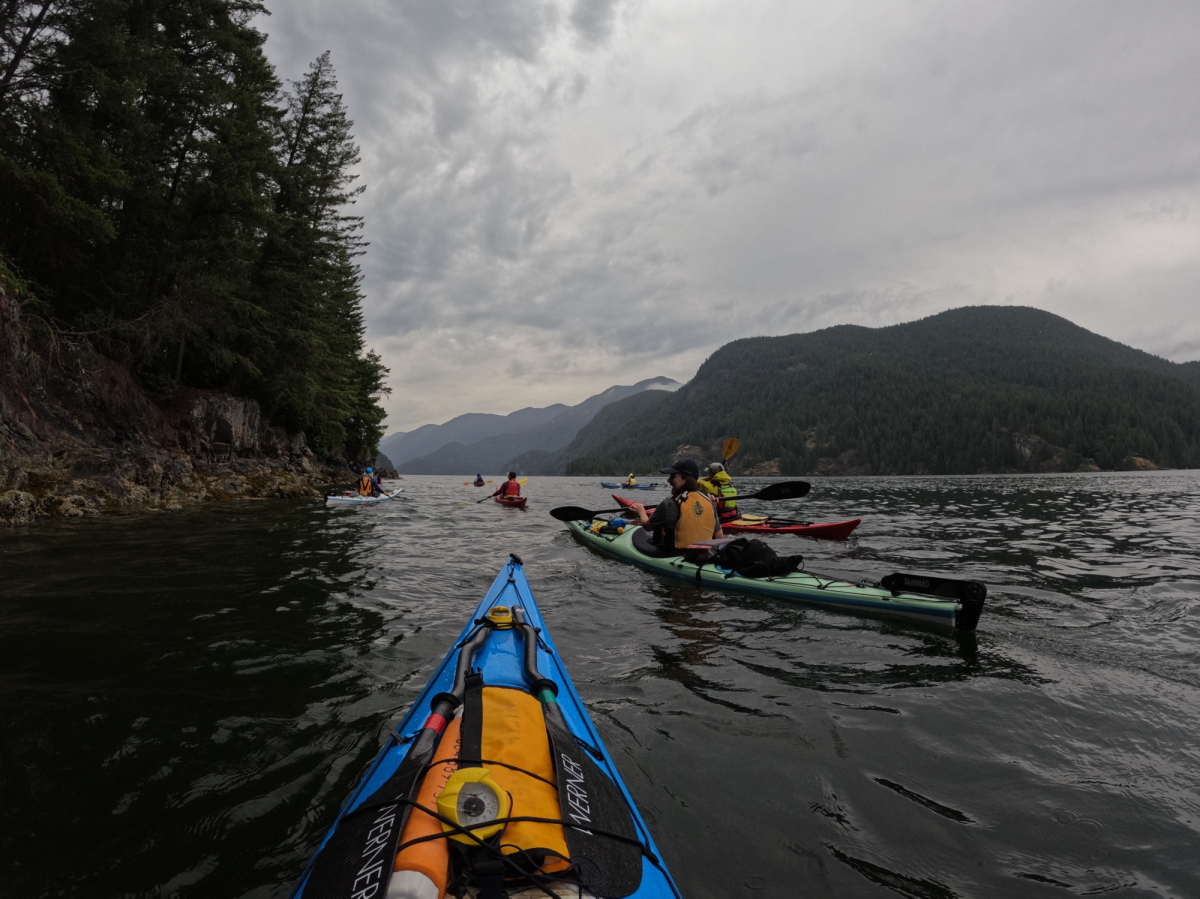
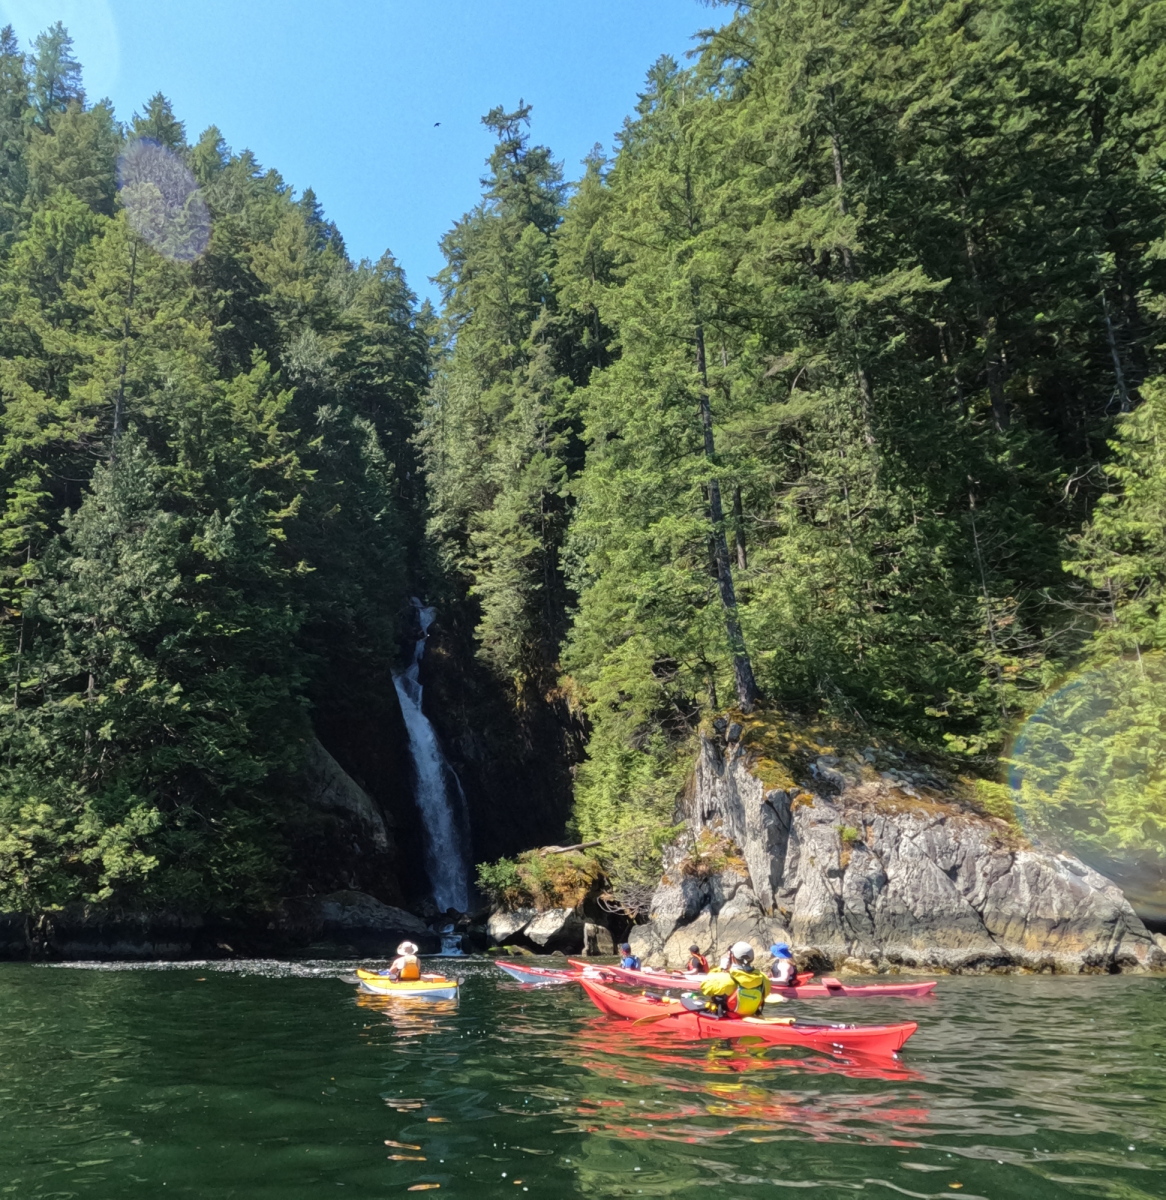
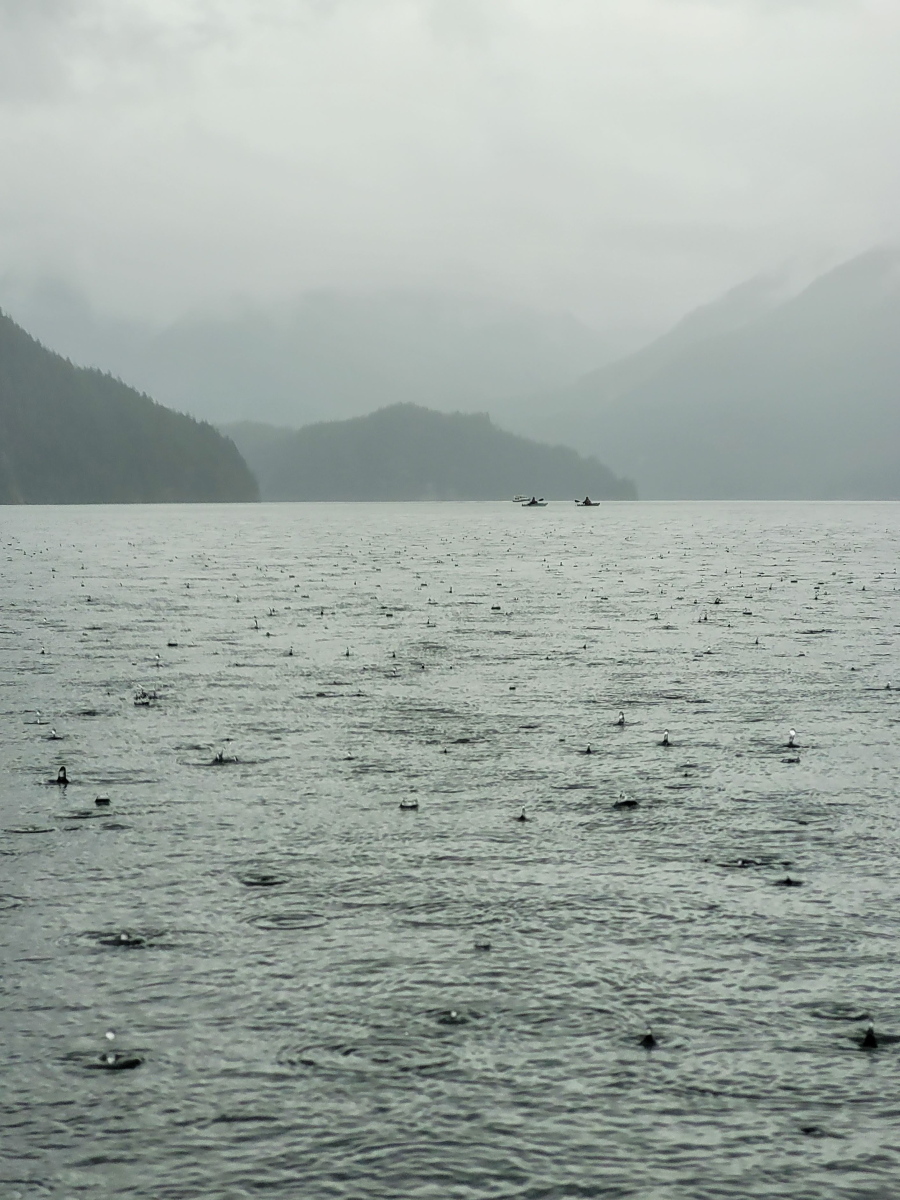
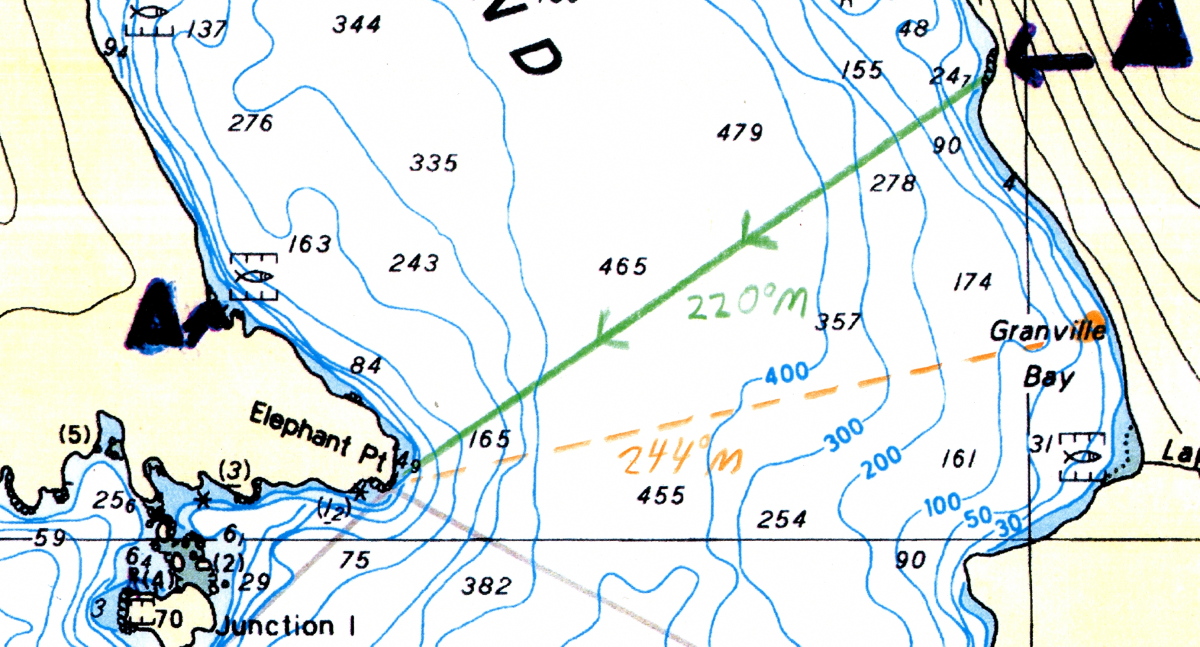
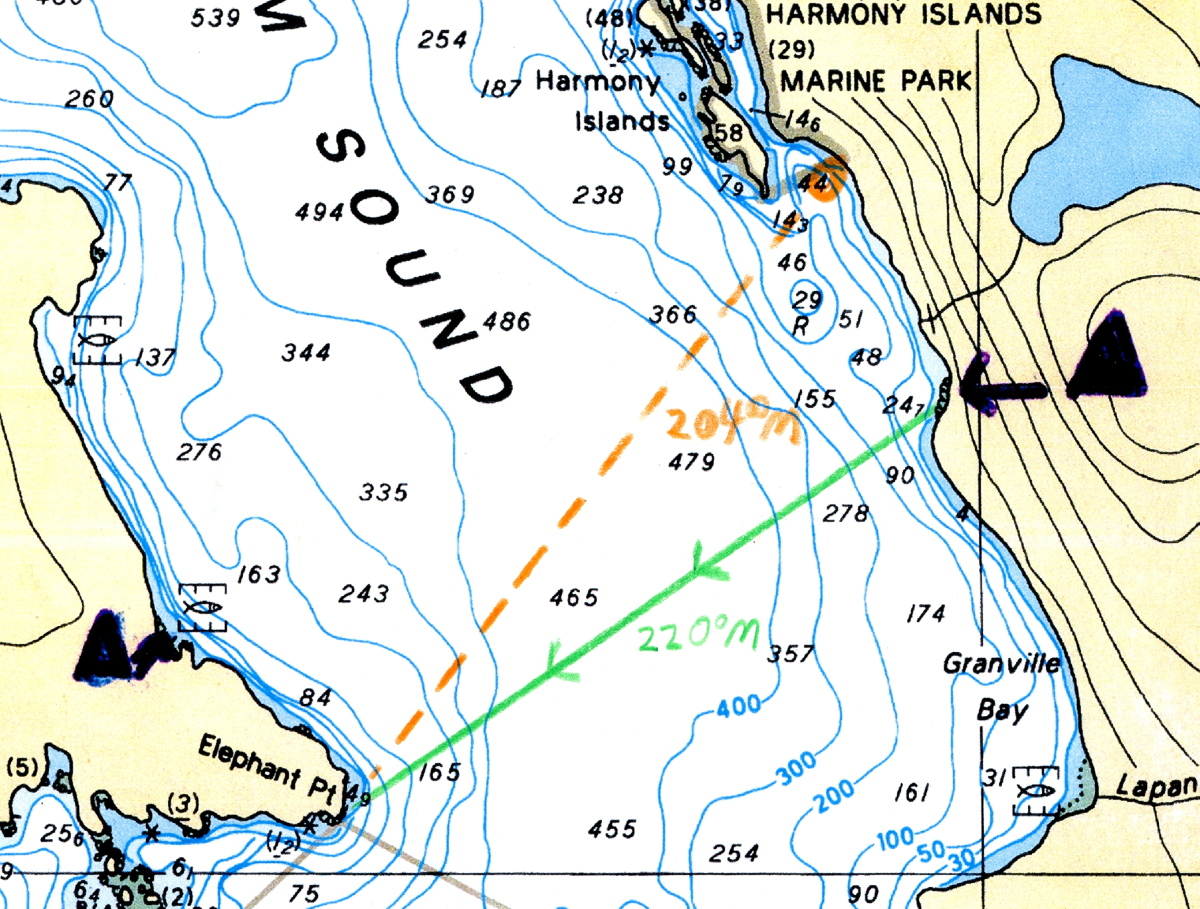
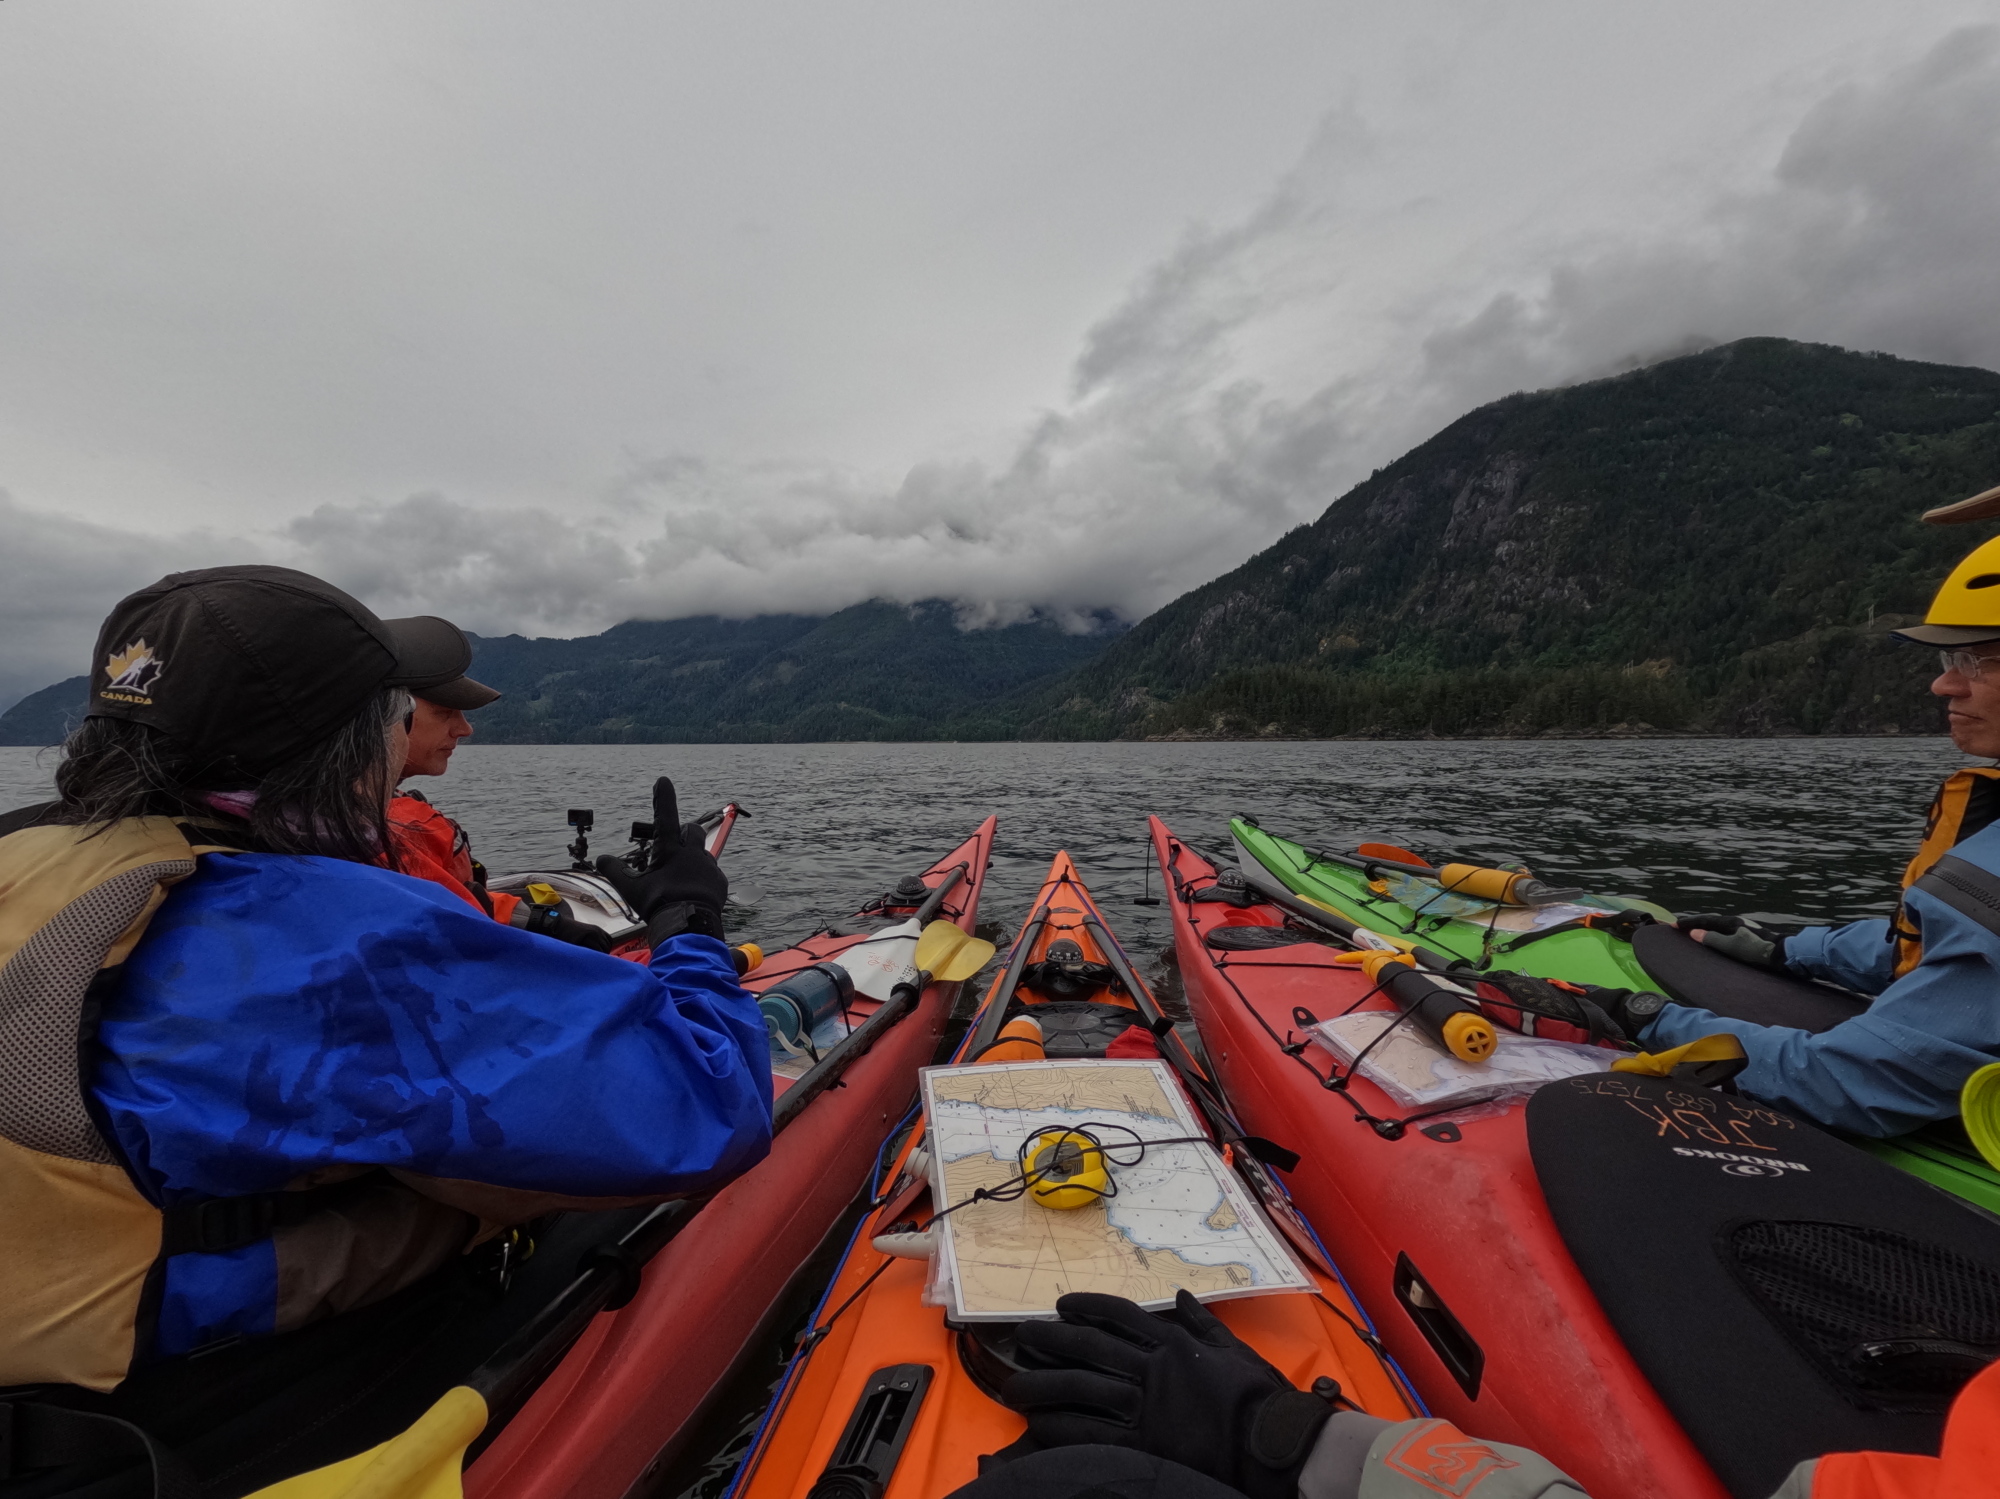
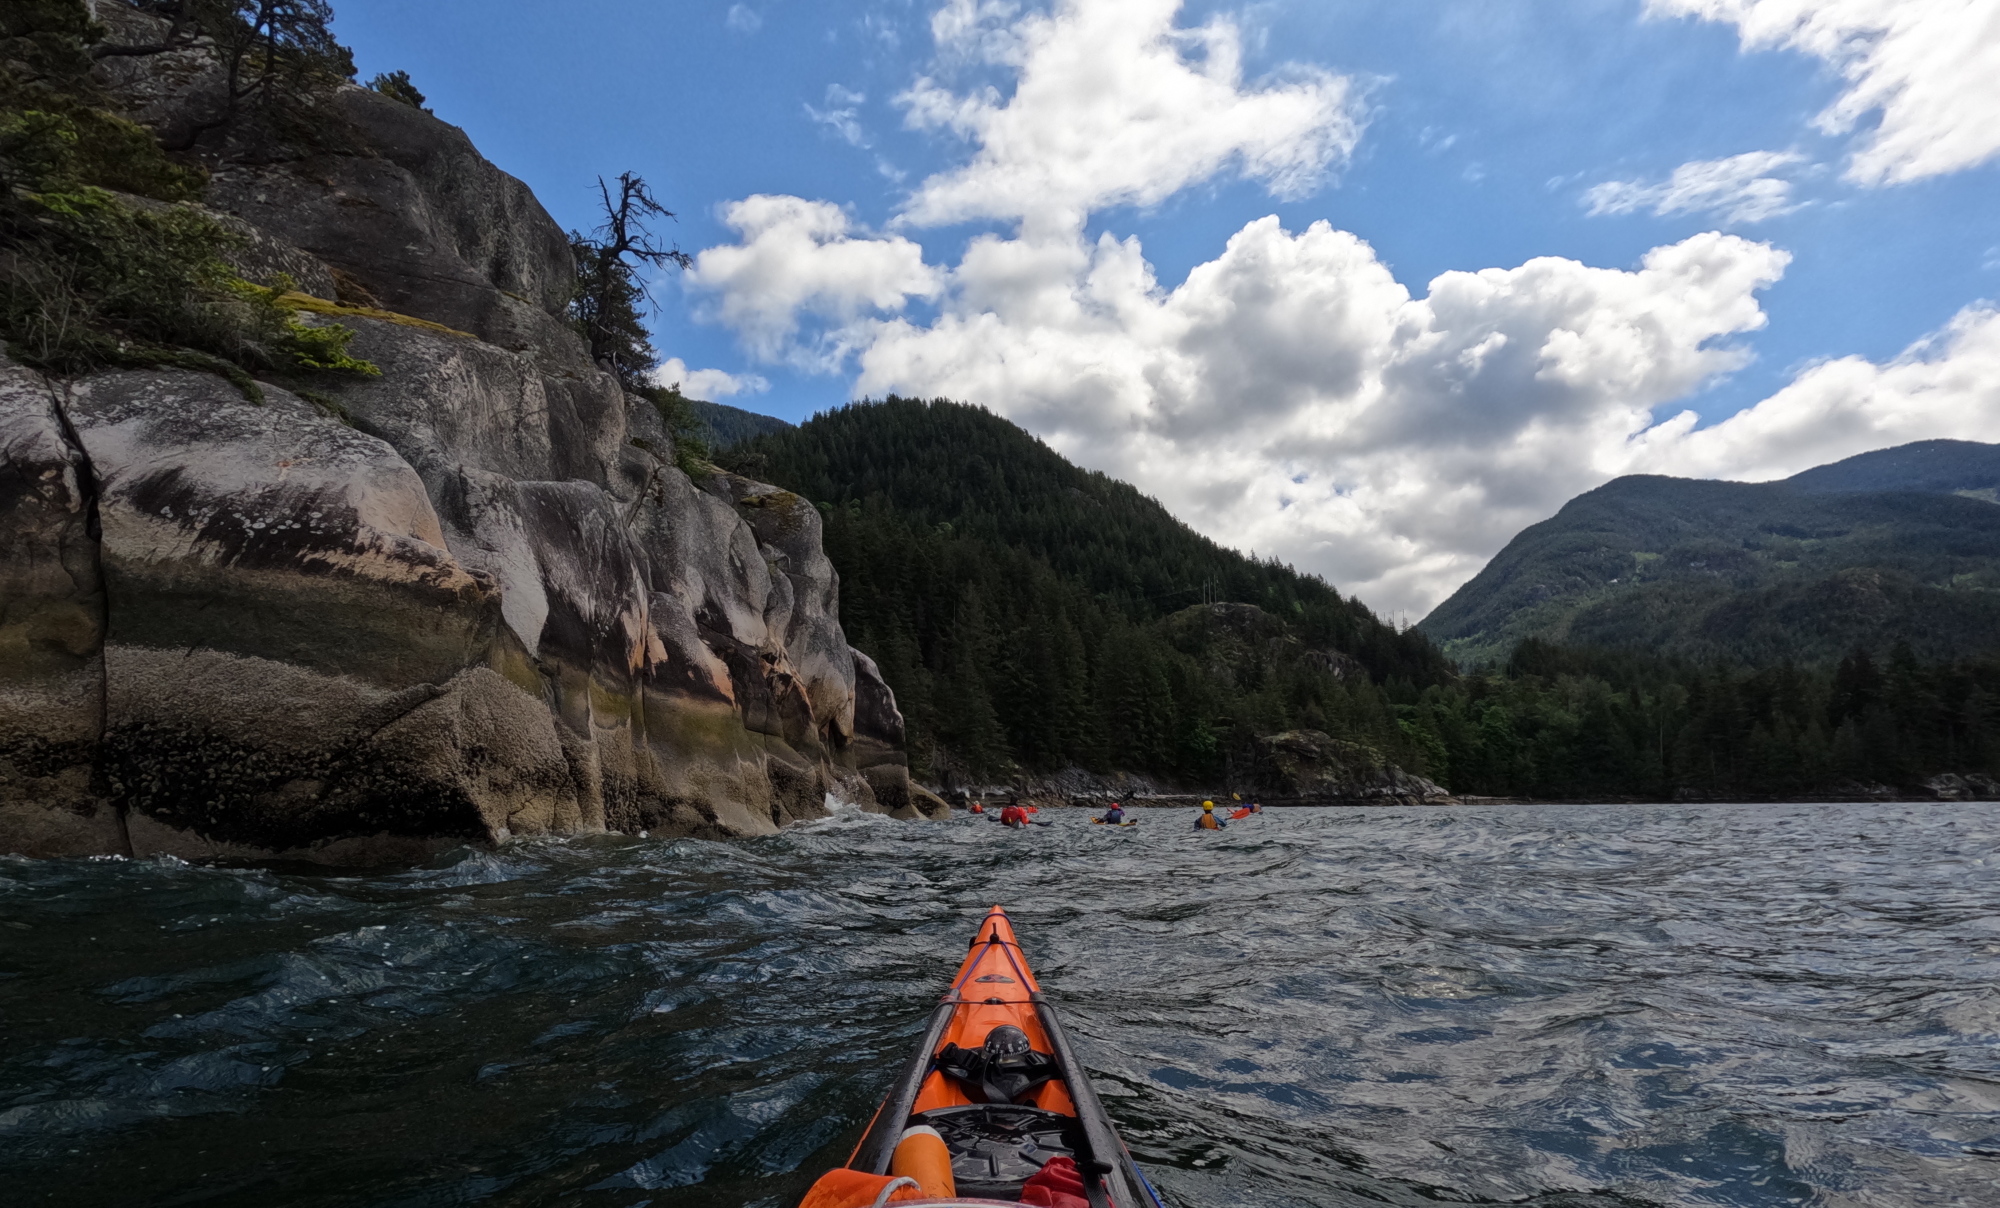
On the crossing, we practiced compass navigation, time-distance-speed calculations and the use of ranges. We made landfall just south of the Defence Islands, then turned north to handrail along the shore to Ts’itpsm (Zorro Bay).

Mid-channel course check-in

Enroute, we spotted a bear clambering up the cliffs from his seaside shellfish buffet. They were too far away for point-and-shoot cameras, but close enough that our Mark 1 eyeballs could marvel at their massively muscled shoulders. And the steep, rocky slope they were scaling proved their claws were easily the equal of human shinobi shuko and crampons.

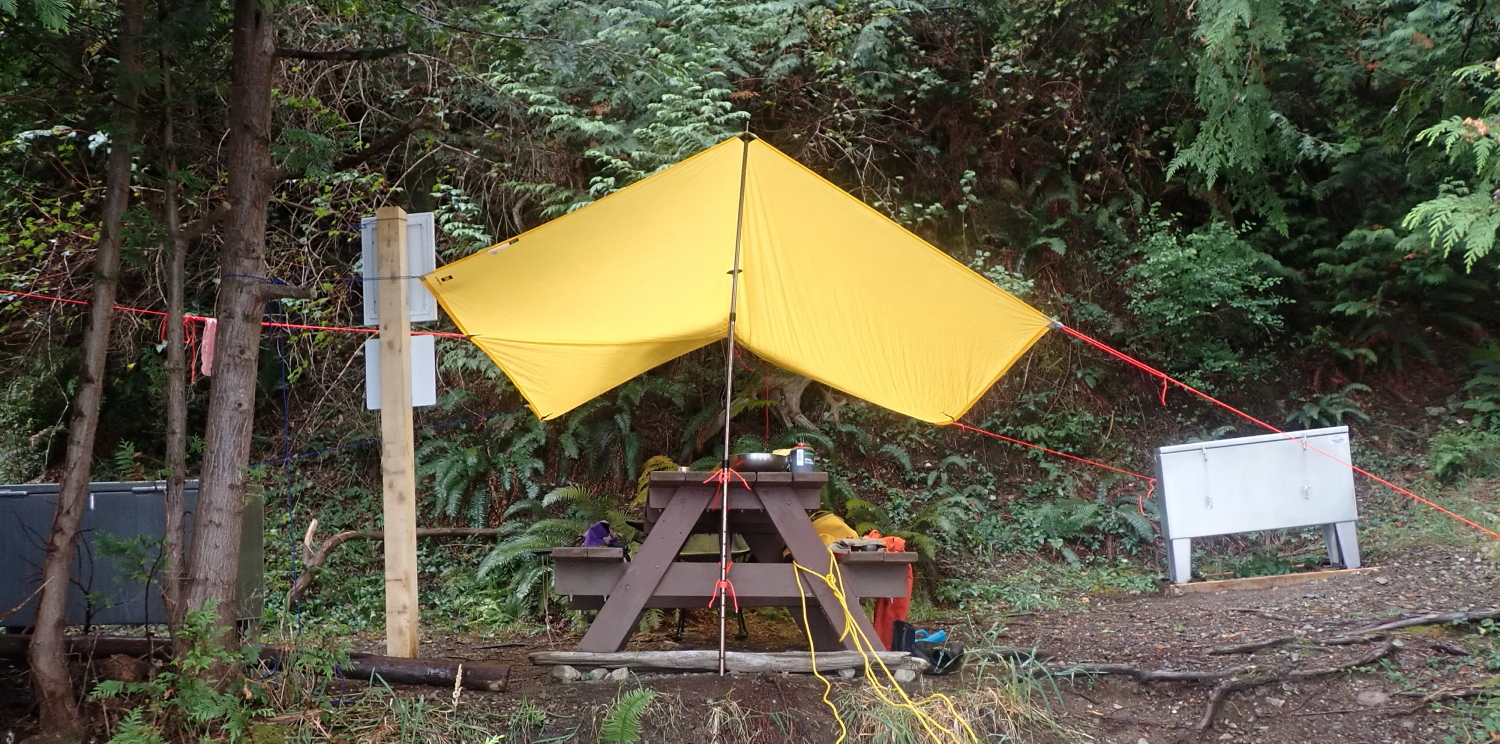
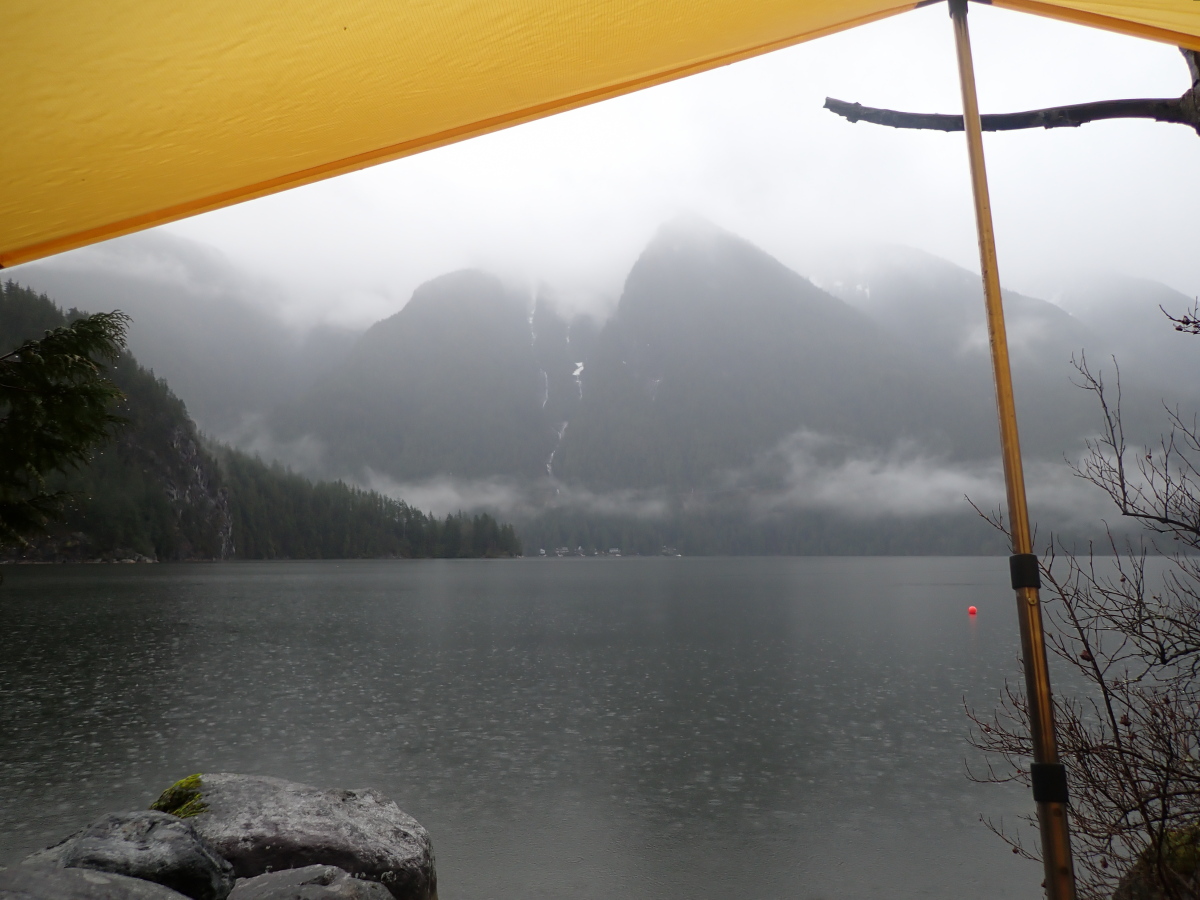
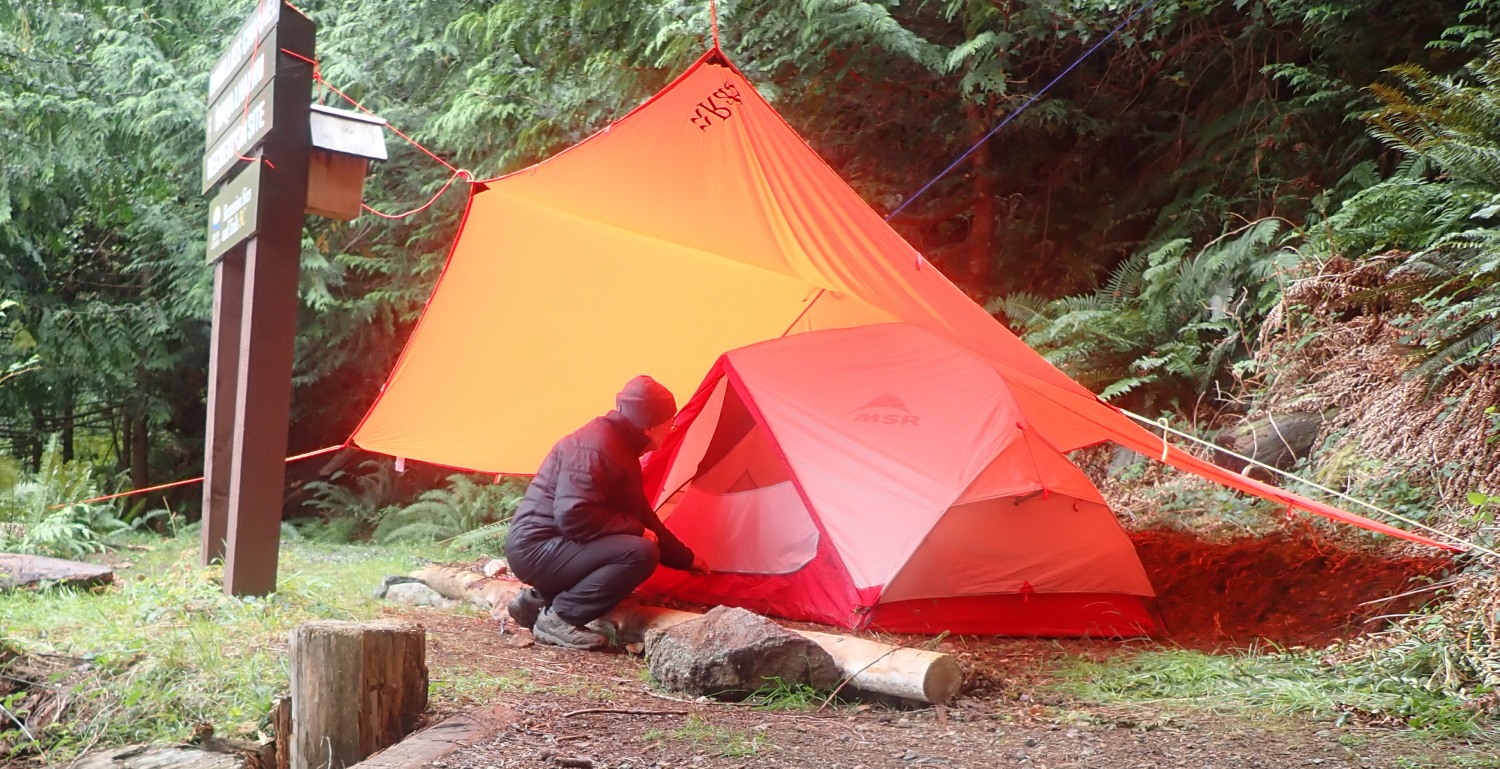
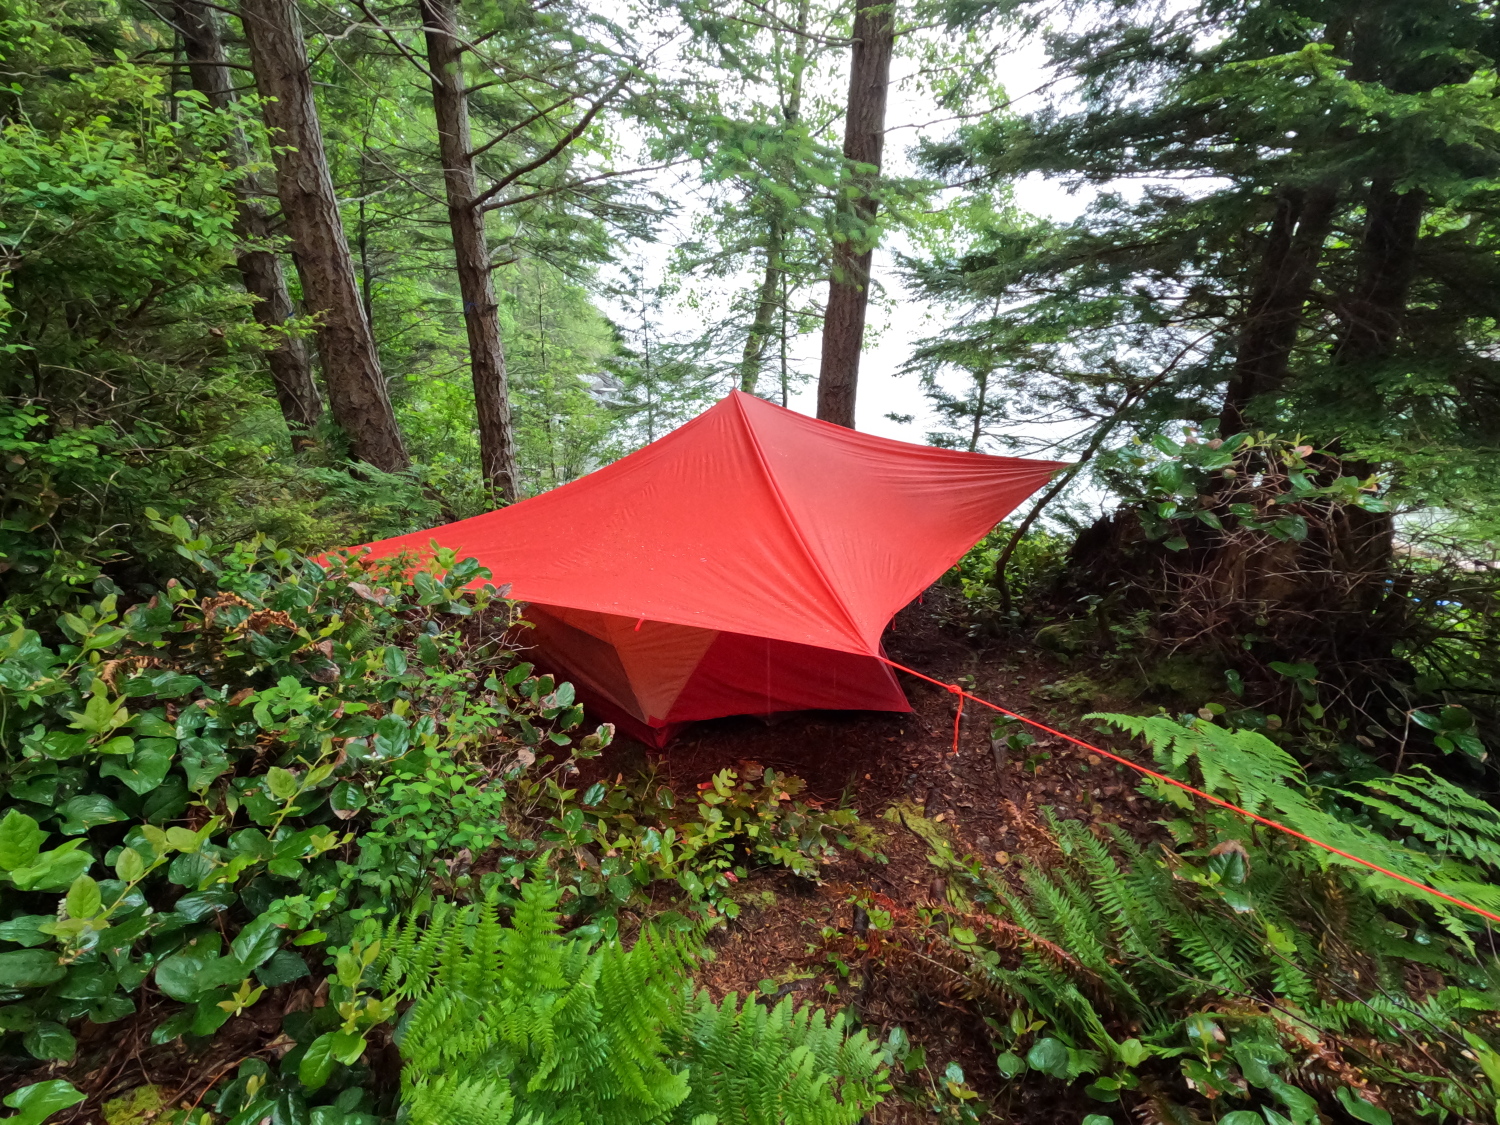
As we landed, showers were drifting in, so one of the first orders of business was to set up a dry central meeting area. I’ll plead guilty to being proud, verging on vain, of my tarpology skills, so I began rigging a roof over the most accessible picnic table. As we’d loaded our boats at Porteau Cove that morning, Mike had politely expressed that the tarp poles I was packing would probably be unnecessary, since he knew of a conveniently located tree at the site. As it turned out, the arborologist who regularly checks the site had decreed the removal of that particular tree since Mike’s last visit. So my precious poles were not a waste of space. I lashed one to a handy root ball to hold it firmly upright, and used it to suspend one end of the tarp ridgeline. 

Home, sweet home.

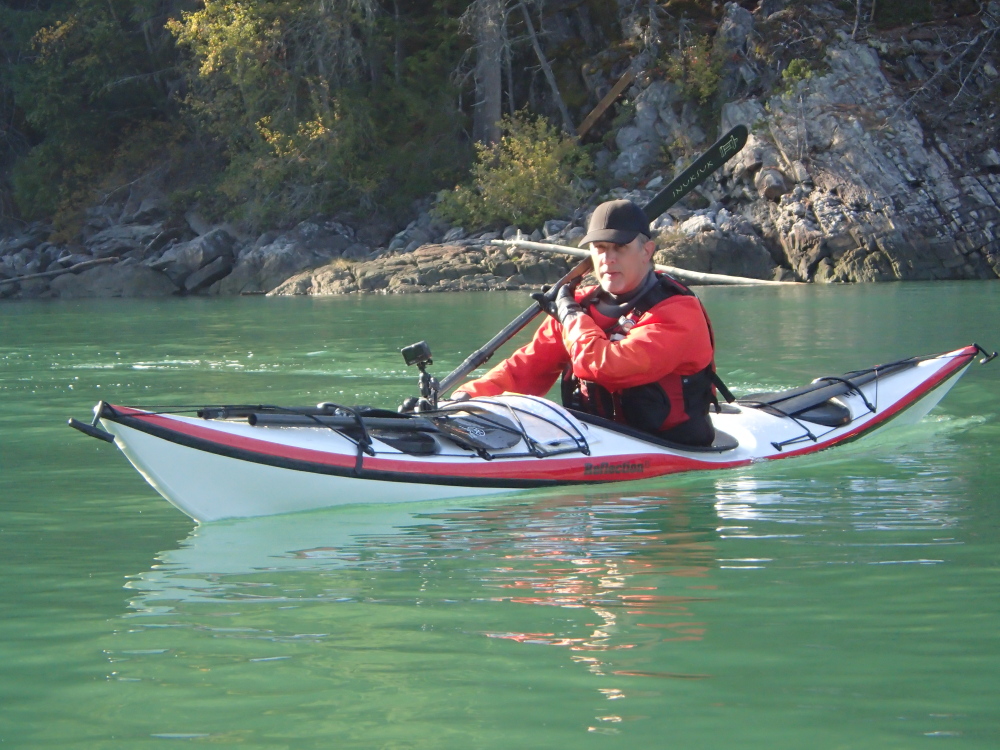
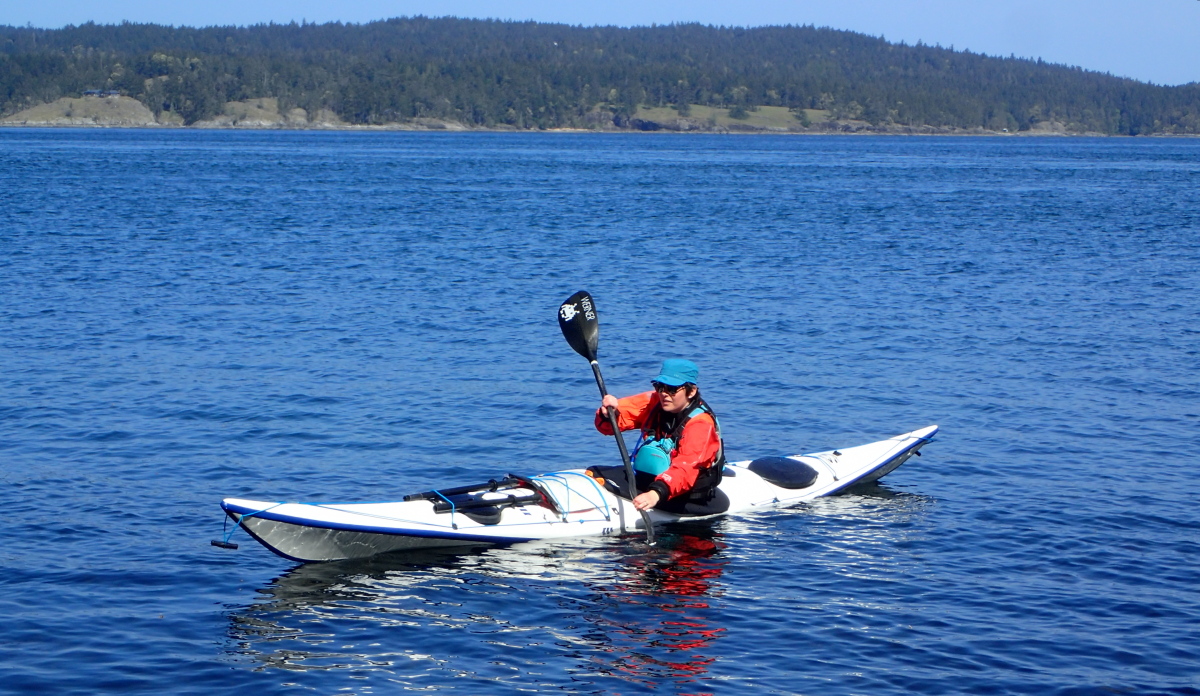
Once we had camp established, with everyone’s tents up, we reconvened at the water’s edge for a rolling clinic. This began on dry land, with Mike leading the students through the “load and drive” motions their legs and torsos should be following. Then it was on—and into—the water, with Mike kneeling next to each kayak in turn to serve as training wheels on the student’s first attempts.    

This is not martial arts training with a Greenland paddle (though Mike is arguably a Sensei): this is dryland rehearsal of the leg loads and drives that make for a successful kayak roll.
Setting up for the sweep, with Mike as “training wheels”.

As Mike was teaching, I waded out in what was supposed to be my drysuit to grab some video. An icy sensation flooding down my thighs reminded me I’d forgotten to close the relief zip after pumping my personal bilges on shore. With good reason, Mike laughed as I explained my error. But his turn would come (This is foreshadowing, or perhaps premoistening.)

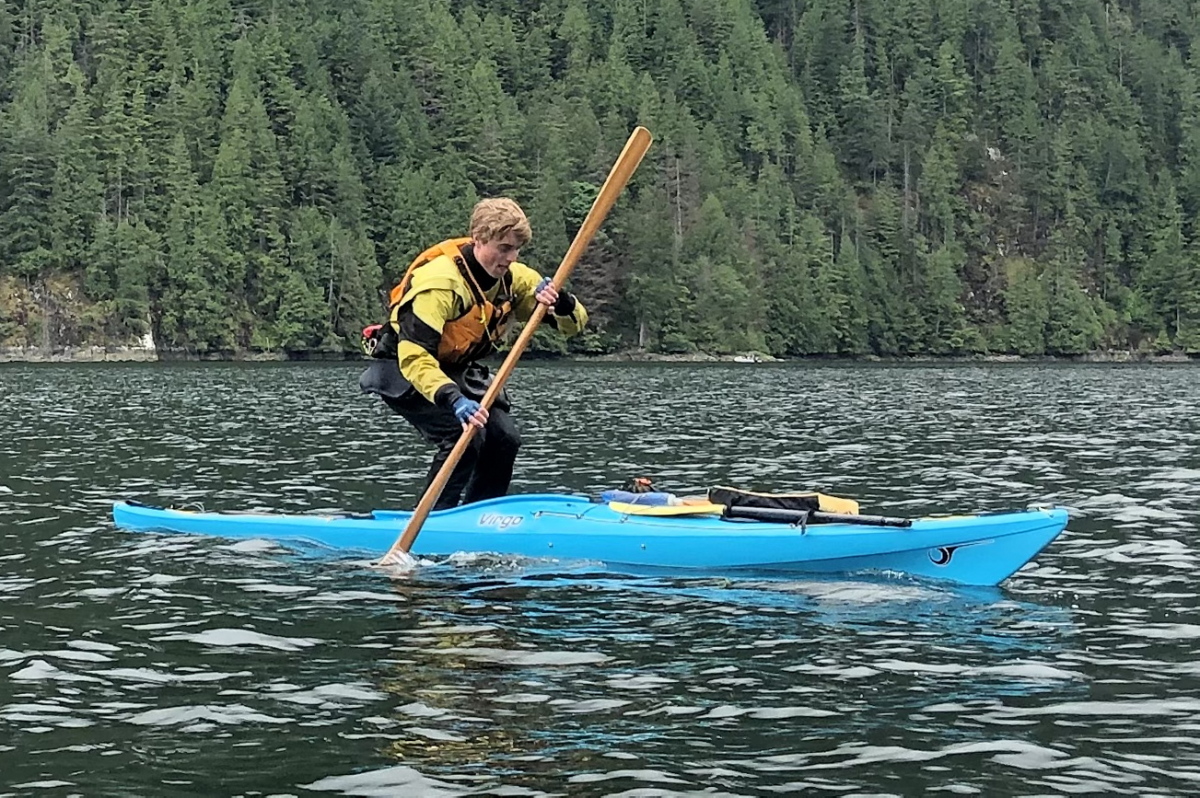
It’s not a requirement for Level 2 to actually perform a roll, but you do have to have a good grasp of the theory. Impressively, Tony and Gwyn not only pulled off some paddle rolls, but Gwyn also succeeded in hand rolling his boat a time or two. A real testament to their learning and Mike’s teaching.

Once ashore for the day, I hung my drysuit liner suit in my tent’s gear loft, above the candle lantern I always carry in the shoulder seasons, so it could dry. Or at least graduate from saturated to merely clammy.

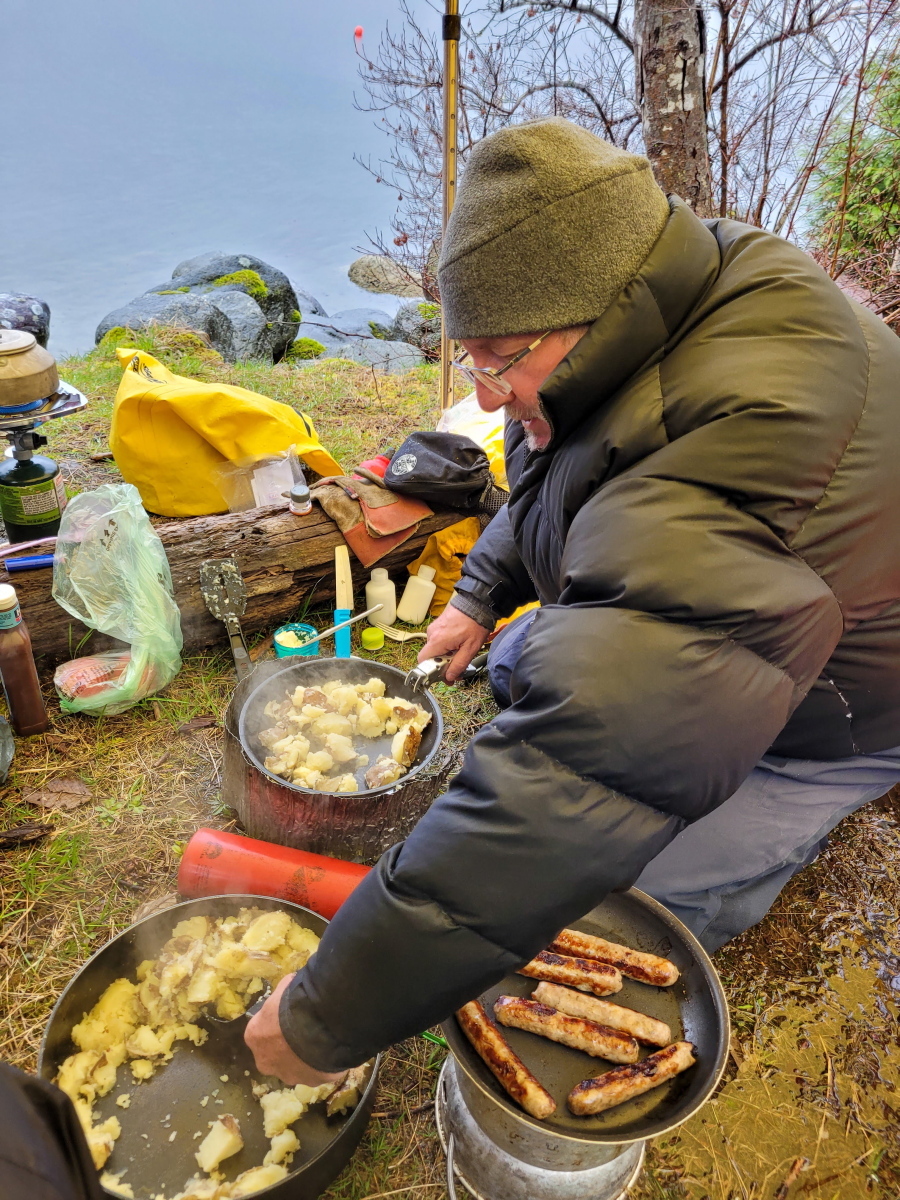
Ray and Dorothy had kindly offered to feed both Mike and I suppers on the nights we were out. And so we were treated to a delicious Thai curry, with lots of fresh veggies.

No scurvy on this sea voyage: fresh veggies ahoy!

Saturday, May 17, 2025

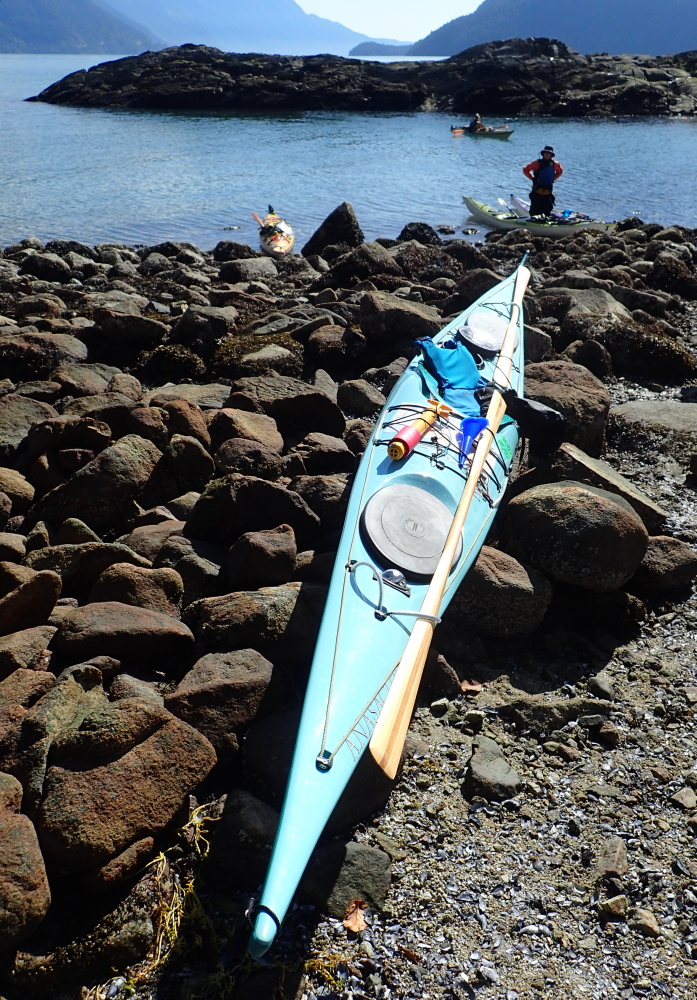
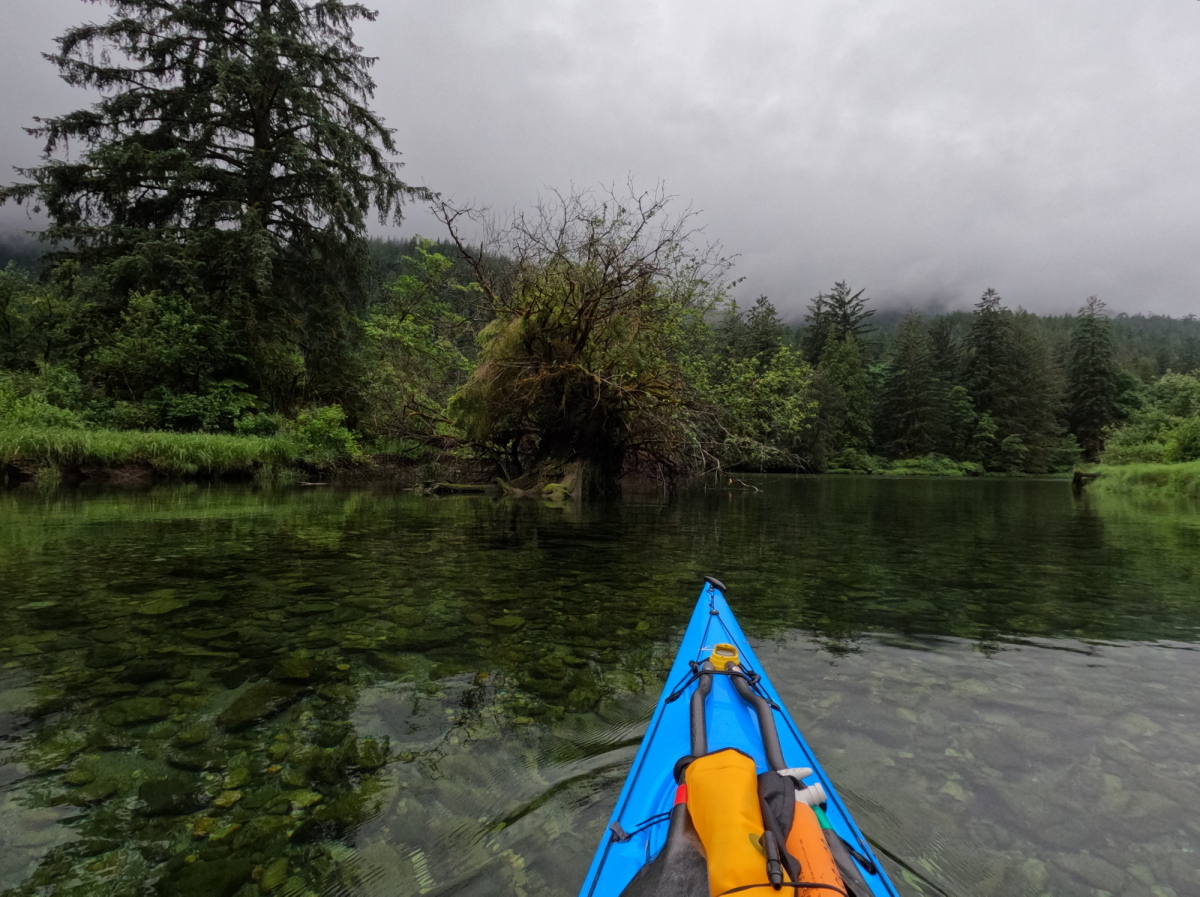
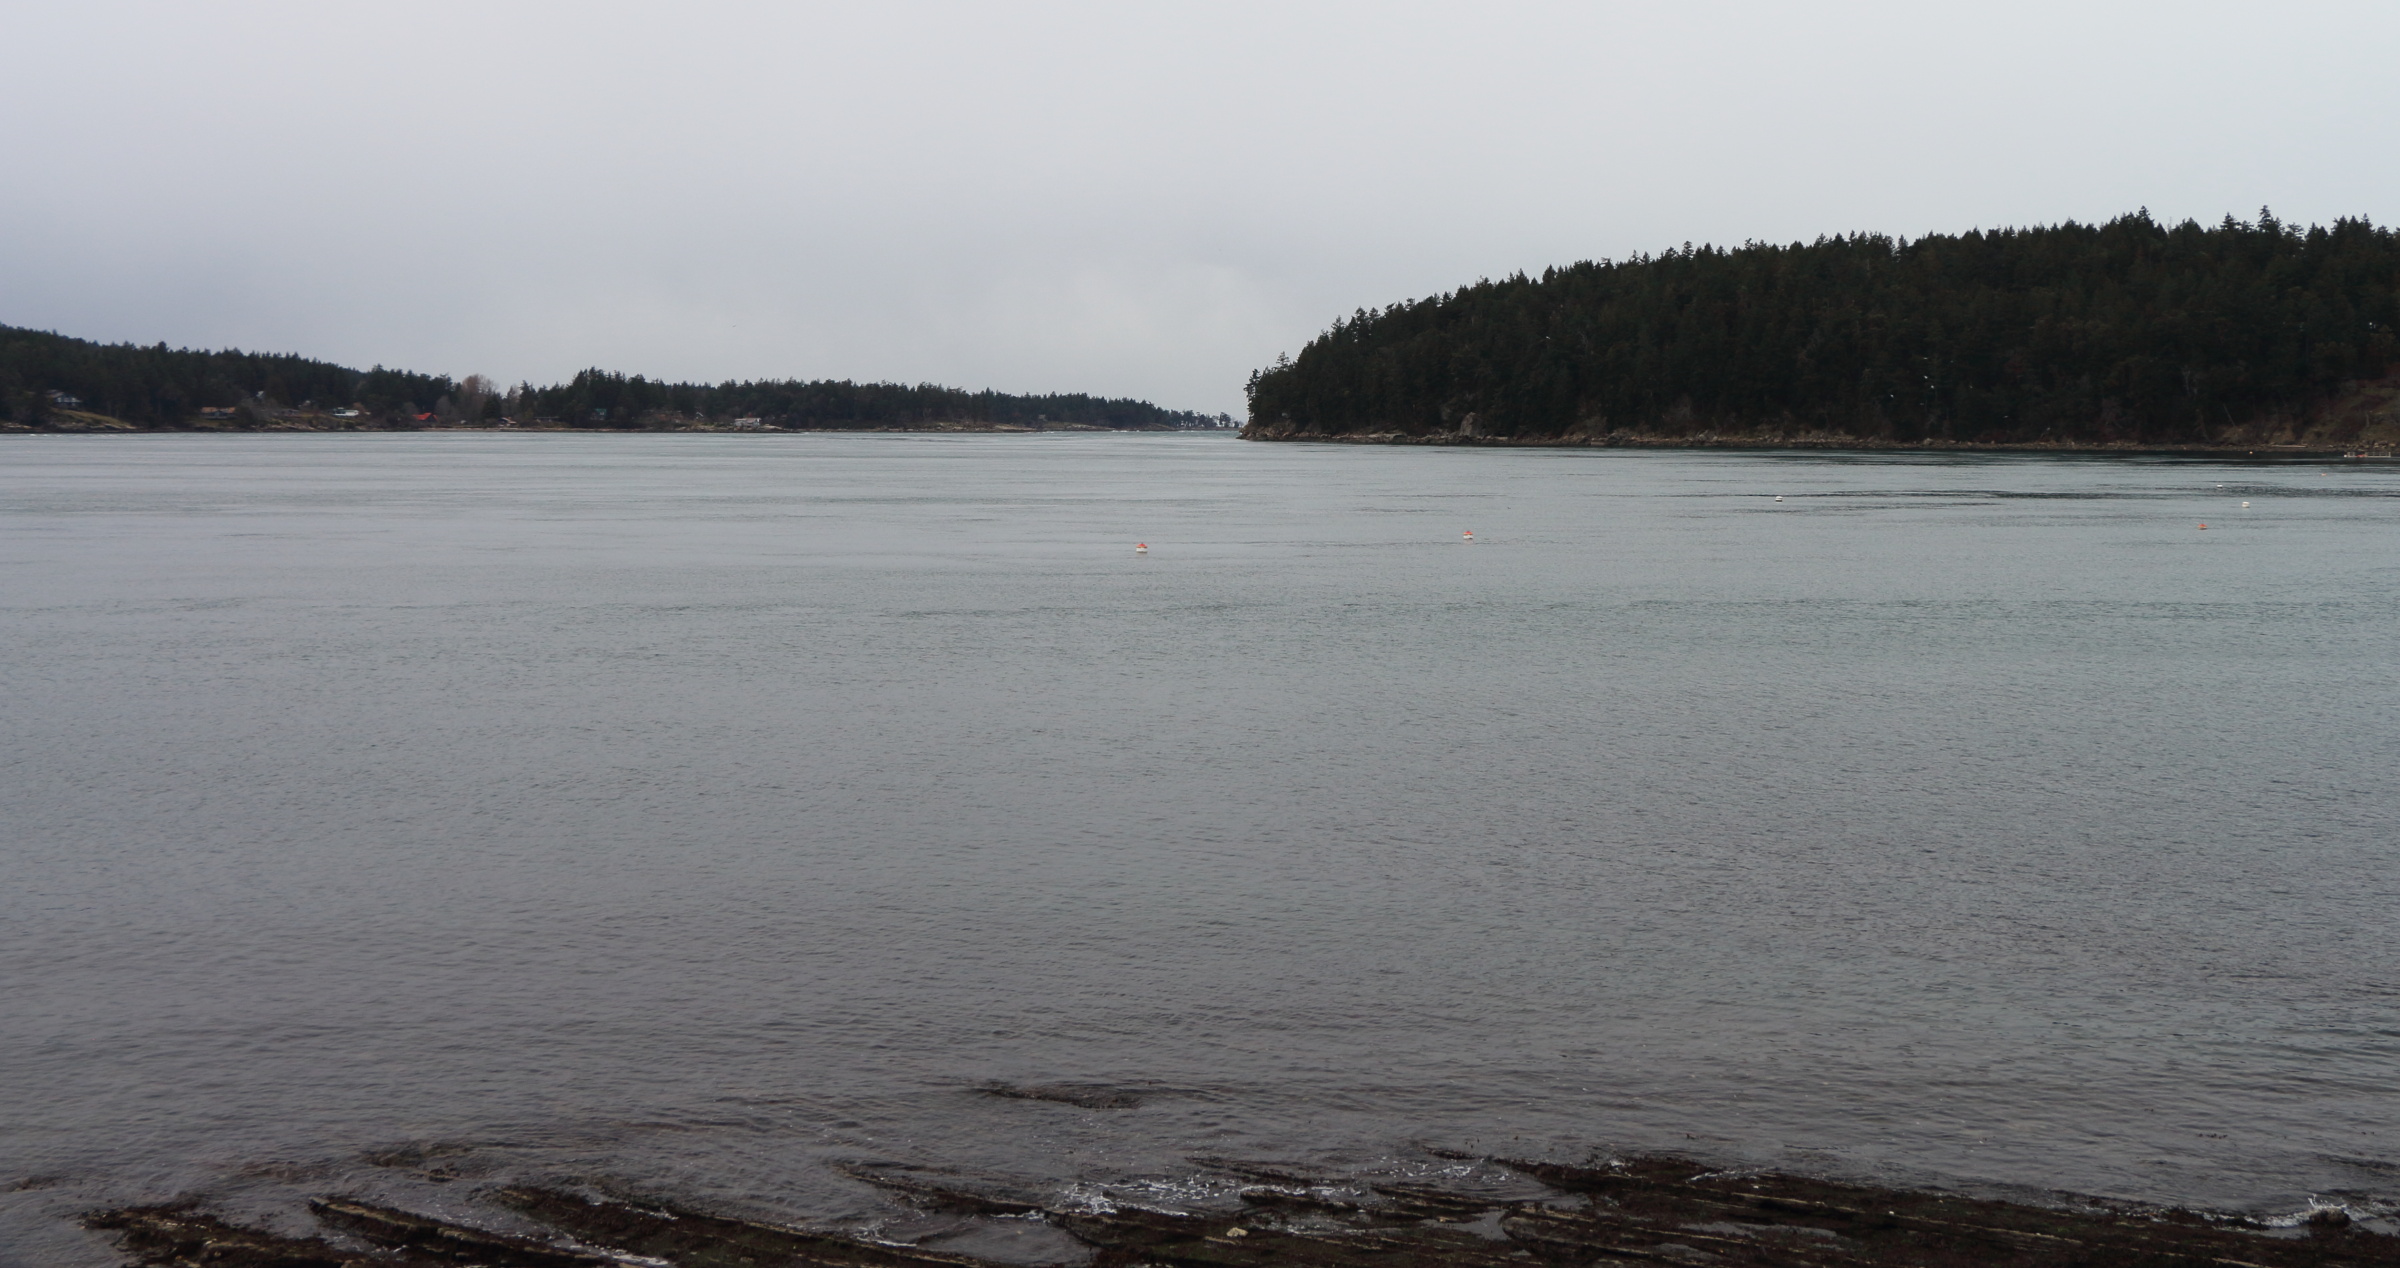
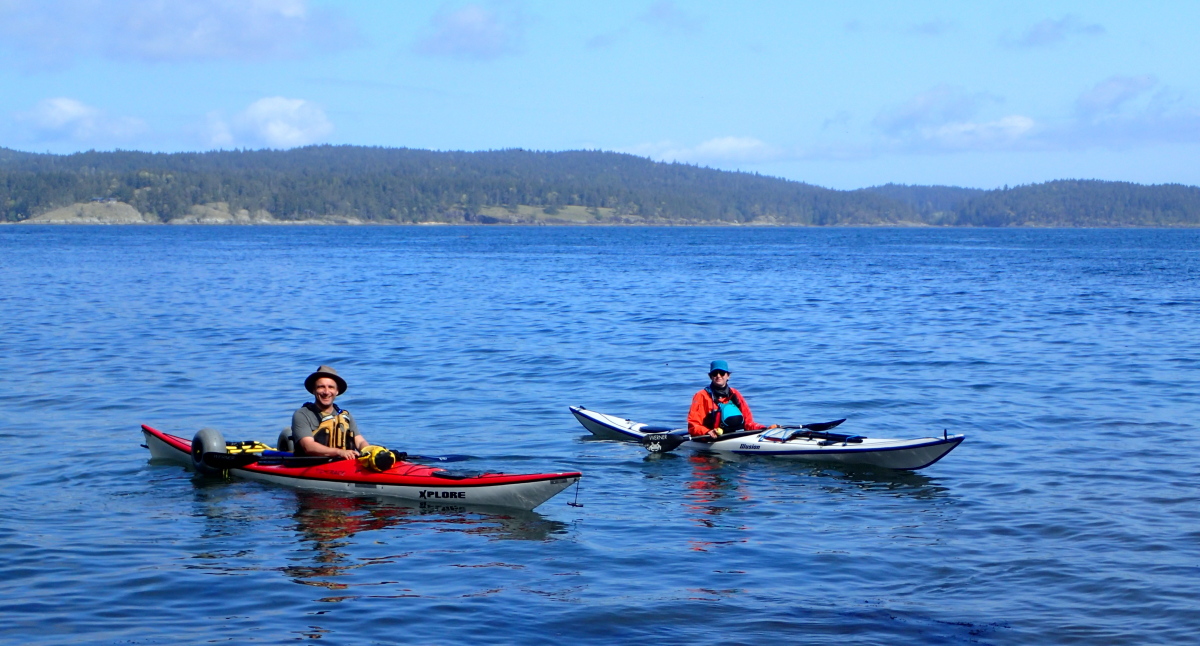
After practicing various strokes and techniques in the sheltered waters of Zorro Bay, we set off for our day trip to Islet View campsite. Enroute, we hugged the seaside cliffs as close as possible to use our manouvering strokes. 

Since the weather was cool with occasional showers, once we’d landed for lunch at Islet View, I fired up my MSR Windburner to provide hot water for soup and tea. Over years of shoulder season touring, I’ve found alternating bites of any lunch with swigs of hot soup makes even cold sandwiches feel like a hot meal. Appropriately enough, the lunchtime learning topics included managing hypo and hyperthermia.

During our lunch-and-learn, Mike dropped hints that the class might be hit with surprise scenarios on the way back to camp. This so affected one of the students that they felt a sudden urgent need to use the outhouse!   

Relaunching was a slow and careful process, as the tide had dropped enough to unsheath rocks with plenty of ankle-twisting and hull-cracking potential. 

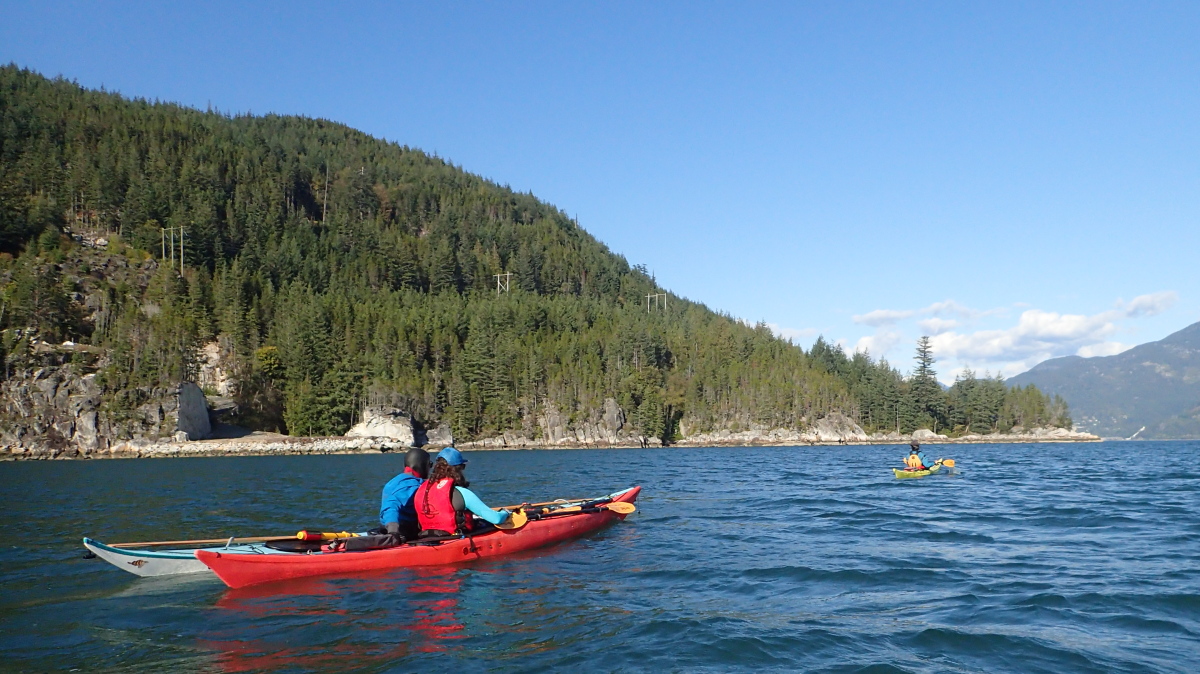
Enroute to the Defence Islands, we worked on scoop re-entries. A bit after we’d made our turn north, one of our students—Tony—”unexpectedly” capsized, surfaced with a “shoulder injury” and became “hypothermic”. After some initial confusion, the other students responded to this scenario, getting him back in his boat, rafting up another kayaker with him to keep him upright, and beginning a tow.

“Saving” Tony

It was at this point that an interesting wildcard came into play. Ray was towing and the steadily increasing southeasterly inflow was shoving him and his towee to the left, towards the small rocky cape just south of Zorro Bay. Quite correctly, he was doing aggressive sweep strokes on the left, attempting to turn his boat and the towee’s to the right. To his bafflement, no change of direction was happening. The problem, which of course was much easier to detect from the outside, was that his towline was draped over the left back of his boat, and was preventing it from pivoting to the left, as needed to make a right turn. Compounding the difficulty, Ray was paddling his personal Delta kayak, a boat with a rudder, so the line was not free to slide across the stern over to the starboard side. So I paddled alongside, hooked the towline with my paddle and flicked it over to the other side. Detecting and overcoming glitches like this is precisely why we practice scenarios!  

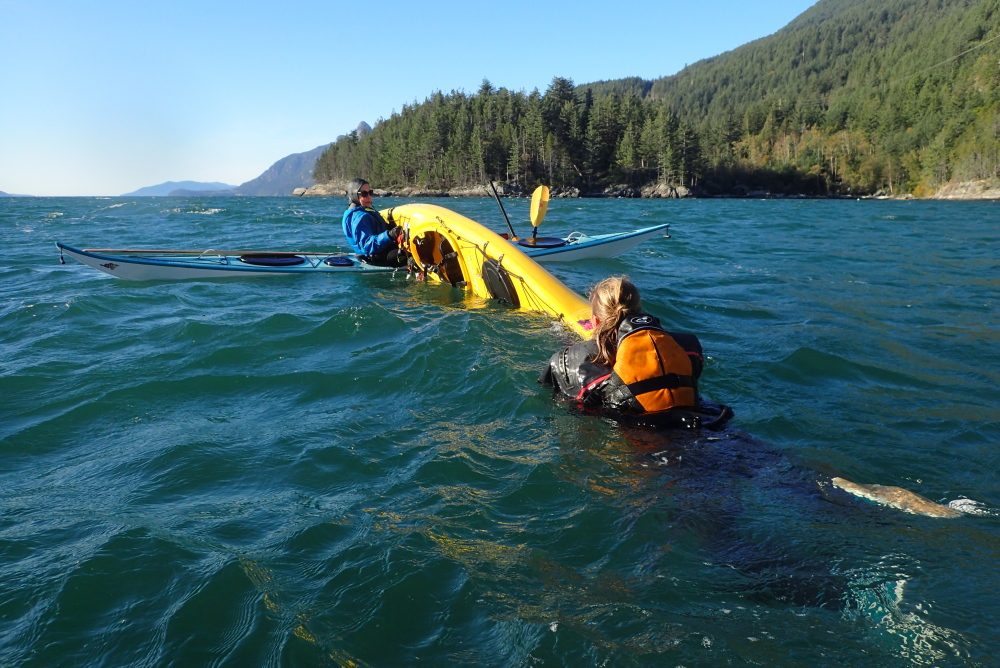
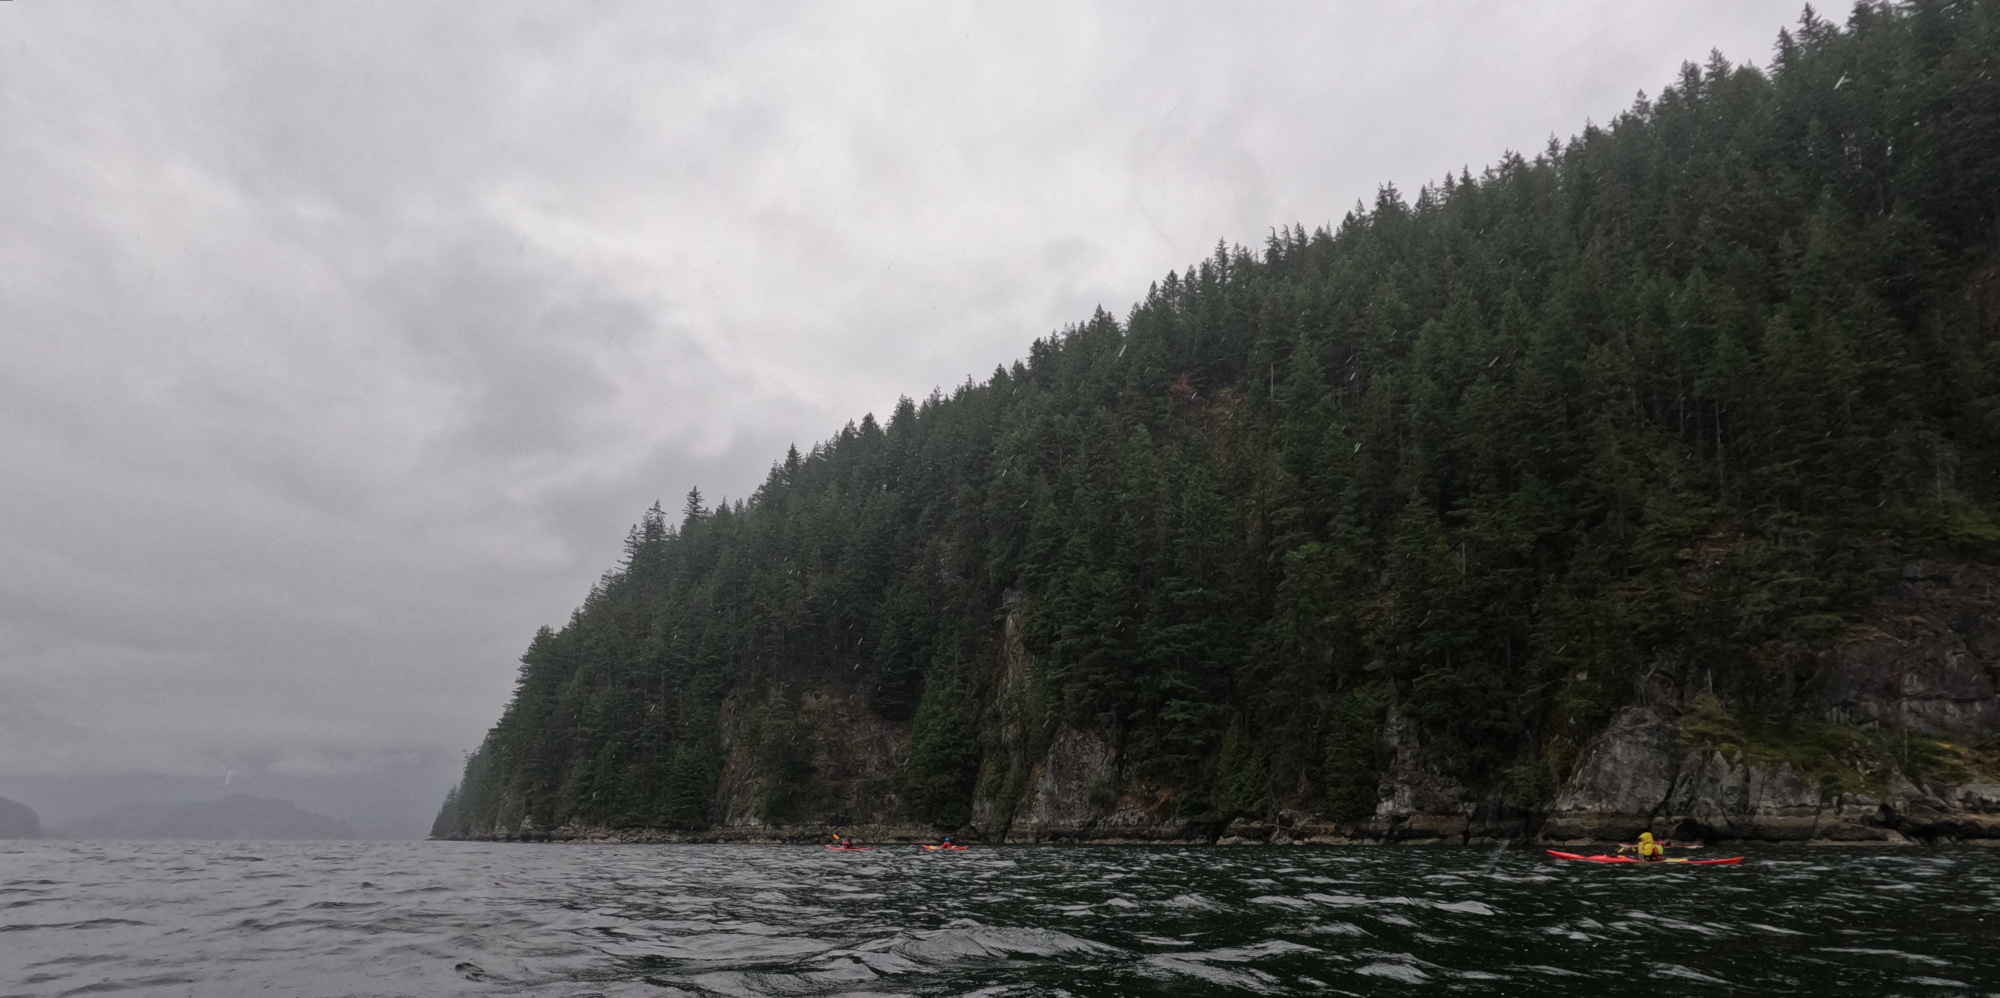
By this time, as Mike happily noted, we had full-on Level 2 conditions – strong winds and regular spilling whitecaps. So he gleefully declared the towing scenario concluded and directed all students into the water to practice their solo re-entries in just the kind of conditions in which they might be capsized for real. As the students had experienced on our pre-trip prep weekend, doing re-entries of any kind in sporty waves is a whole different kettle of kayaks than in the millpond calm or light chop of Beginner or Level 1 seas. 

By the time each student eventually succeeded in reboarding, they were pretty tired and cold. So at Mike’s direction, I ran a shuttle escort service, accompanying ones and twos into the shelter of Zorro Bay—which was by now south of us—and returning for the next refugees as Mike drifted further north with those students still in the water. On my last turn around, I had a briefly concerning moment. Mike had been calling me on the radio, but due to water damage on his VHF, the transmissions were as faint and garbled as if he were signalling from Mars. And when I turned to run north, he and his students were nowhere to be seen. Until, that is, I had the sense to scan more westwards, towards the shoreline, where they were all steadily and safely clawing their way south.    

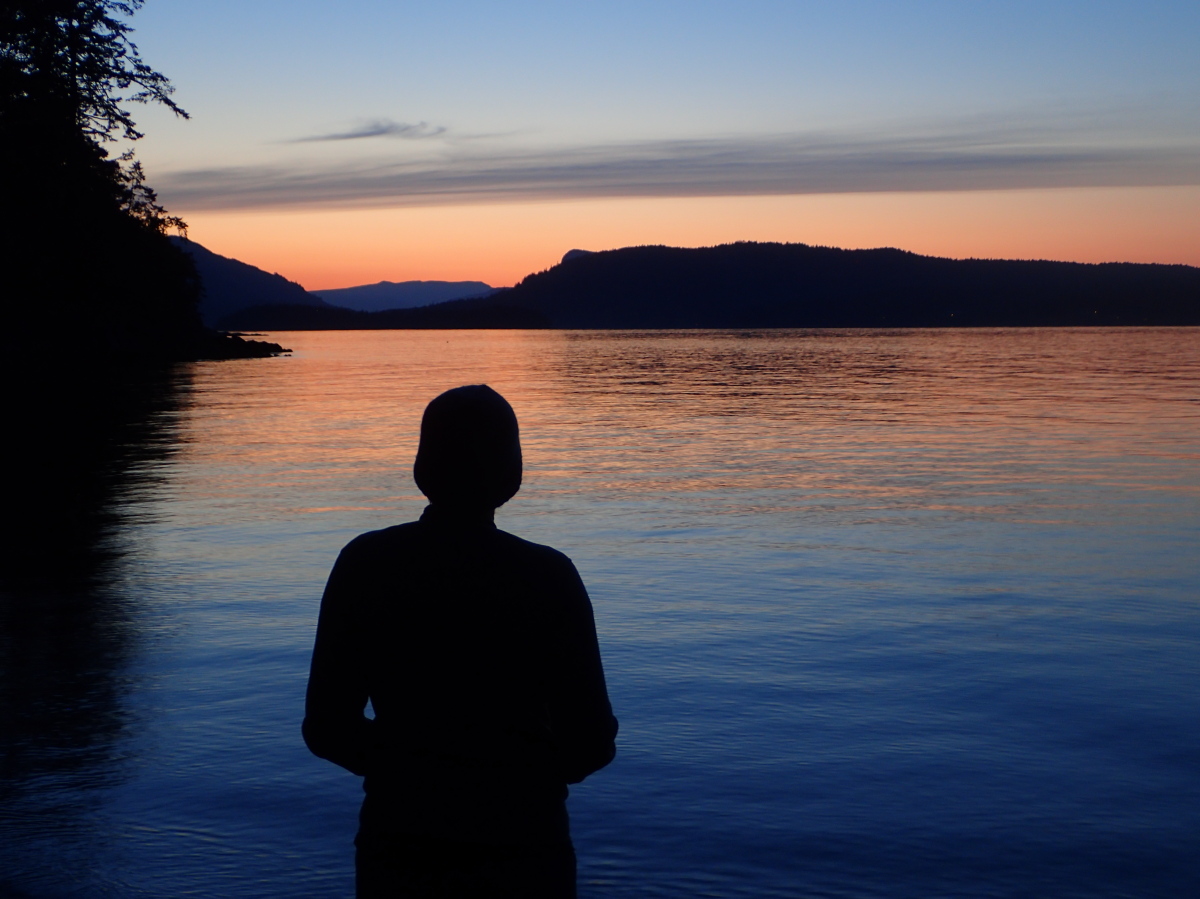
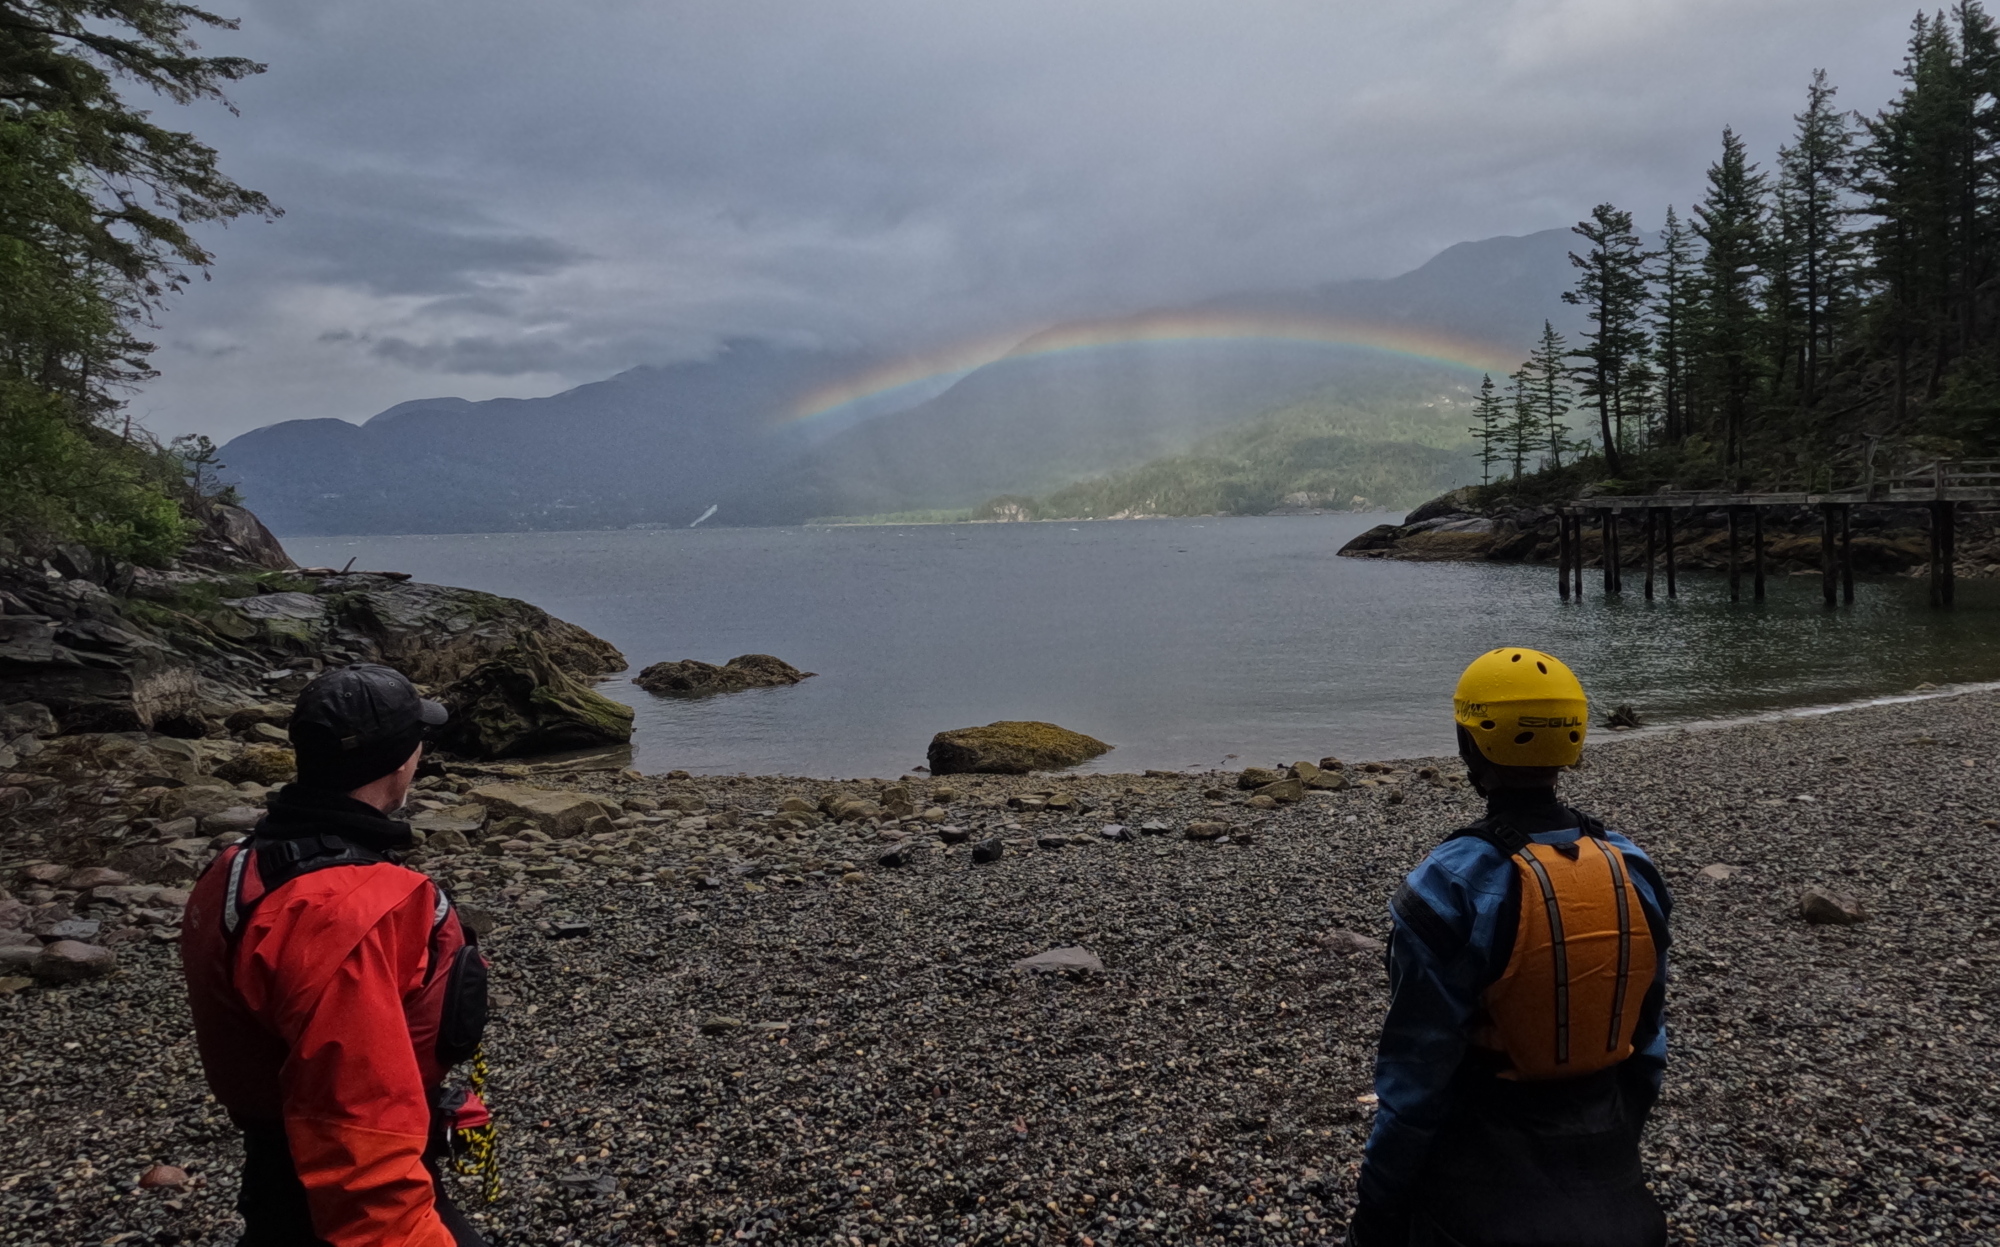
Just as the last of us landed, a spectacular rainbow lit up on the eastern shore of the sound. I’m not religious, but I’m pretty sure I remember reading that the rainbow is supposed to represent some deity’s promise that they are done with drowning people. So a good sign, then.

Sunday, May 18, 2025

We started the morning practicing hanging draws, followed by bow rescues. During one of his inversions, Mike discovered he’d made the same “leave the barn door open” oversight with his drysuit relief zipper as I had a couple of days before. So karmic balance was restored to the universe. It will be my turn again next time, I’m sure. 

Bow to your partner! A great way to prevent wet exits.

Our route, carefully planned prior to launch, took us east across Howe Sound to make landfall just north of Furry Creek, where we’d turn south to dogleg back to Porteau Cove. As the marine forecast had predicted, the southerly inflow was picking up nicely by the time we launched, so we had fine Level 2 conditions, or “Mike’s Delight” as I’m starting to call them: 1 to 2 foot seas with a high proportion of spilling whitecaps, all straight on our starboard sides, so we occasionally had to convert our forward strokes to slight sweep braces, or be ready to slap down a low brace.

I have a semi-unconscious response, developed during years of solo touring, to paddling in lively seas: I burst out into sea shanties. Fortunately for the rest of the group, the wind snatched away most of what we’ll call, for want of a better word, my singing. So they were not subjected to my offkey and misremembered version of “Jack was every inch a sailor.”   

As we handrailed south down the shoreline to Porteau Cove, we deliberately hugged the cliffs, enjoying the rollercoaster ride as the clapotis pinged off the walls to create sharp peaks and valleys in the water. 

Rocks and roll: Lumpy seas alongside the cliffs.

Just before landing at Porteau, Mike initiated the final exercise of the course: the “all in” where the entire class capsizes simultaneously, then helps one another reboard.

Happy landings!

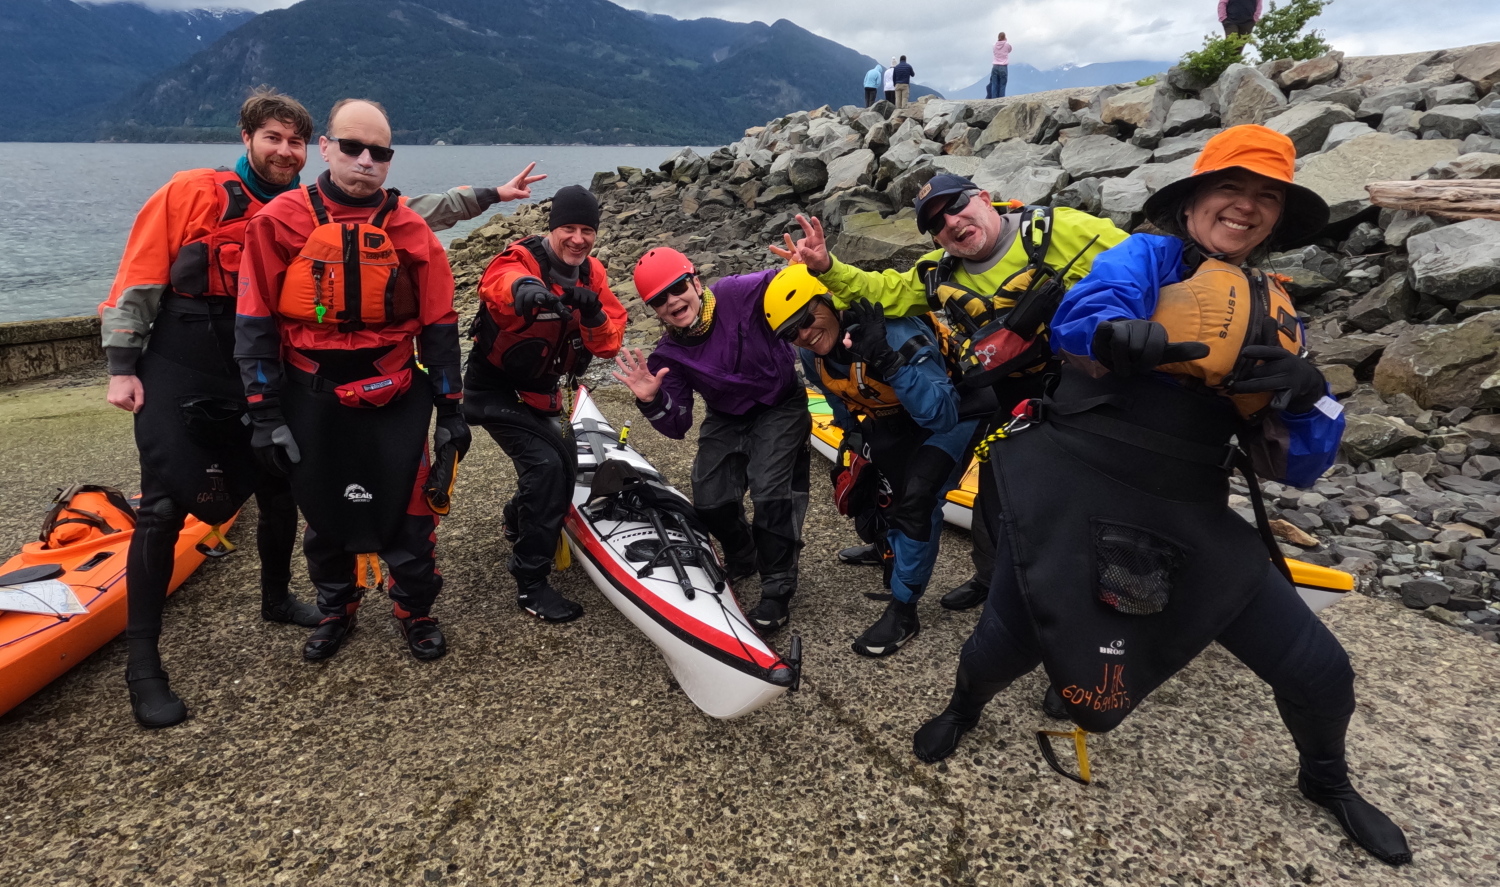
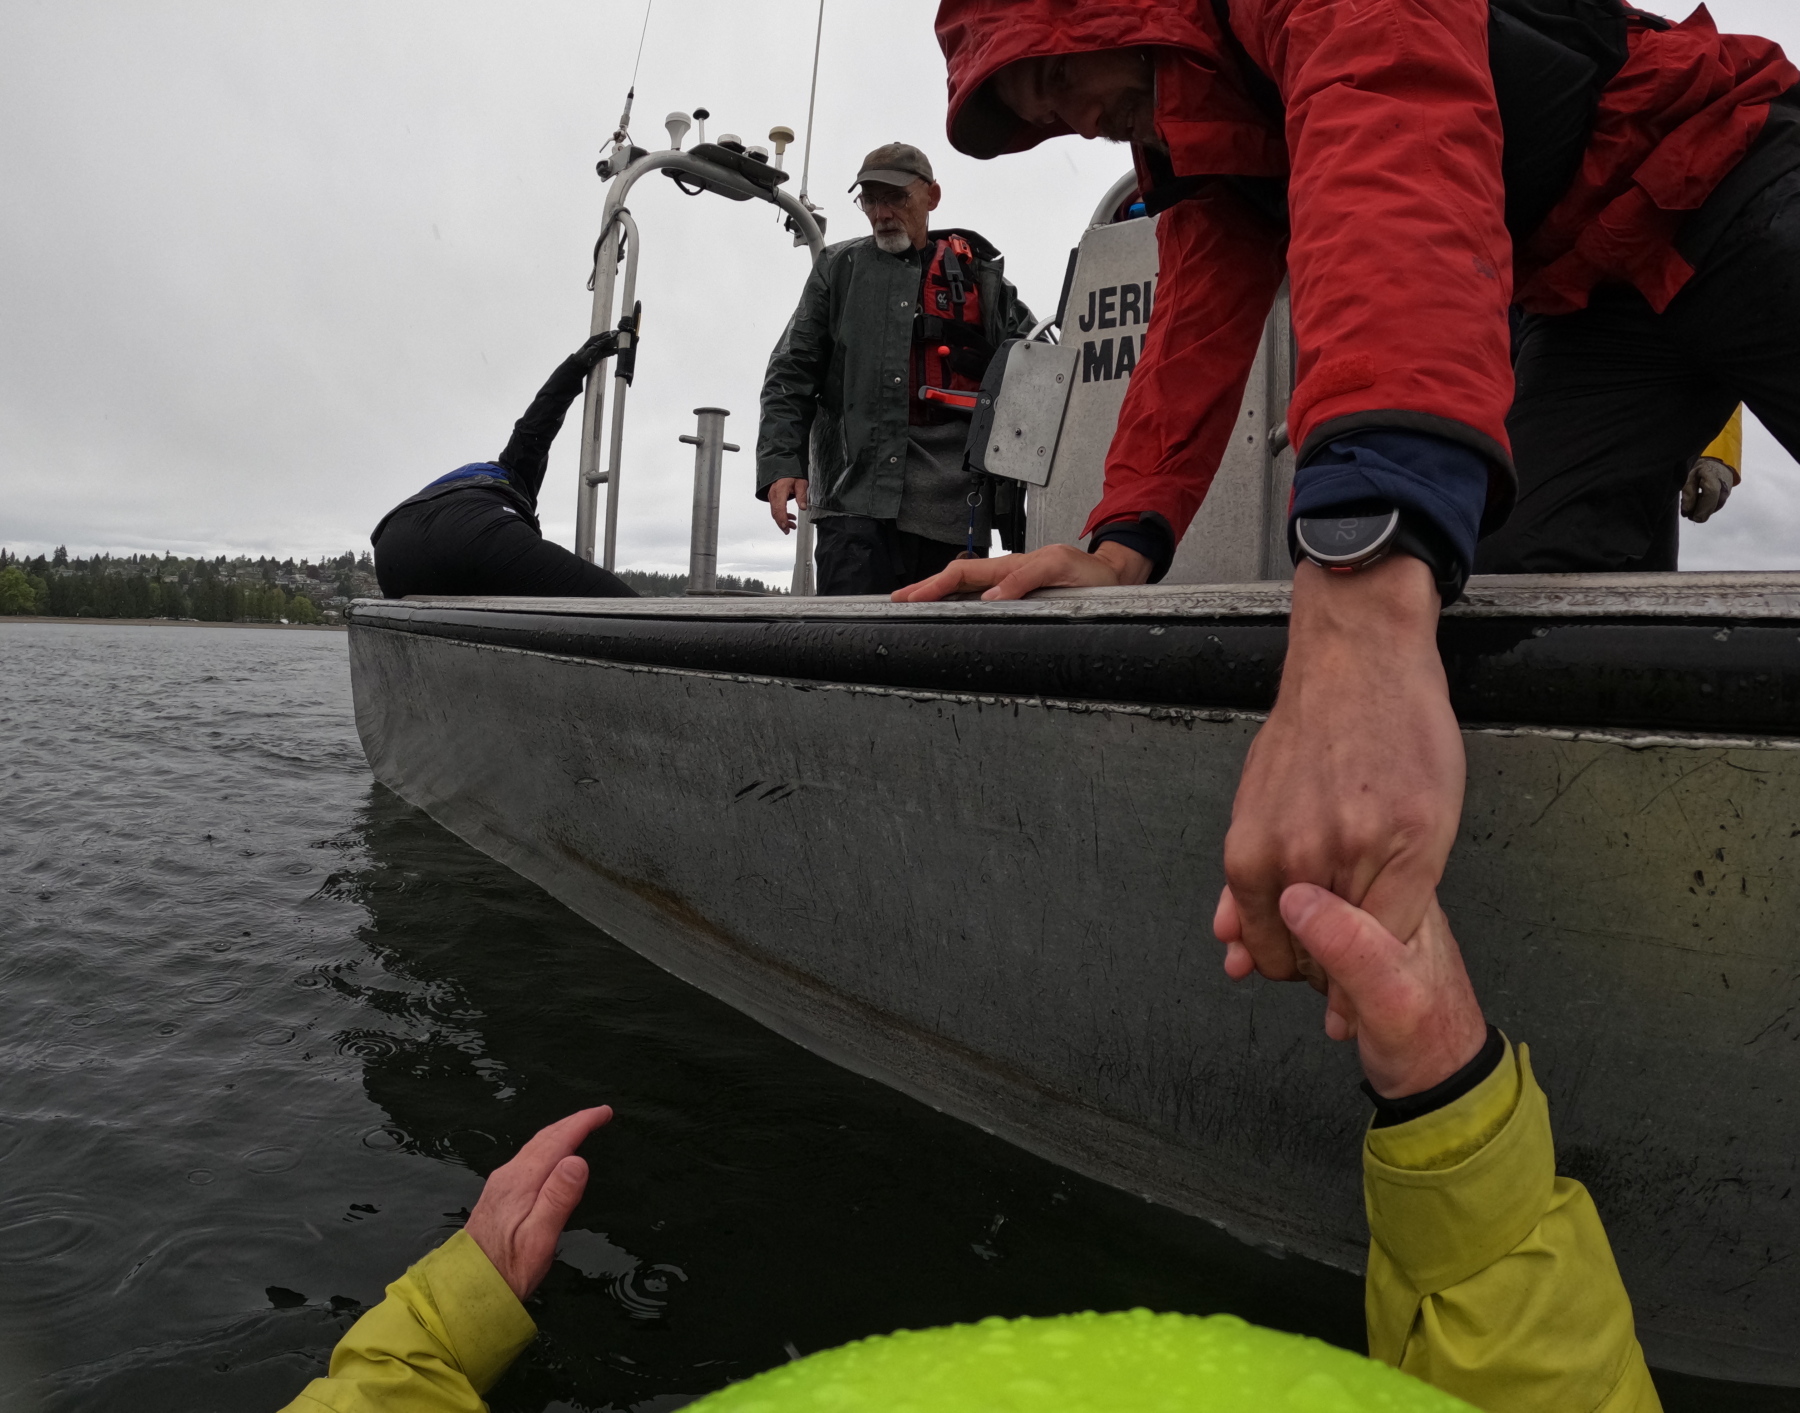
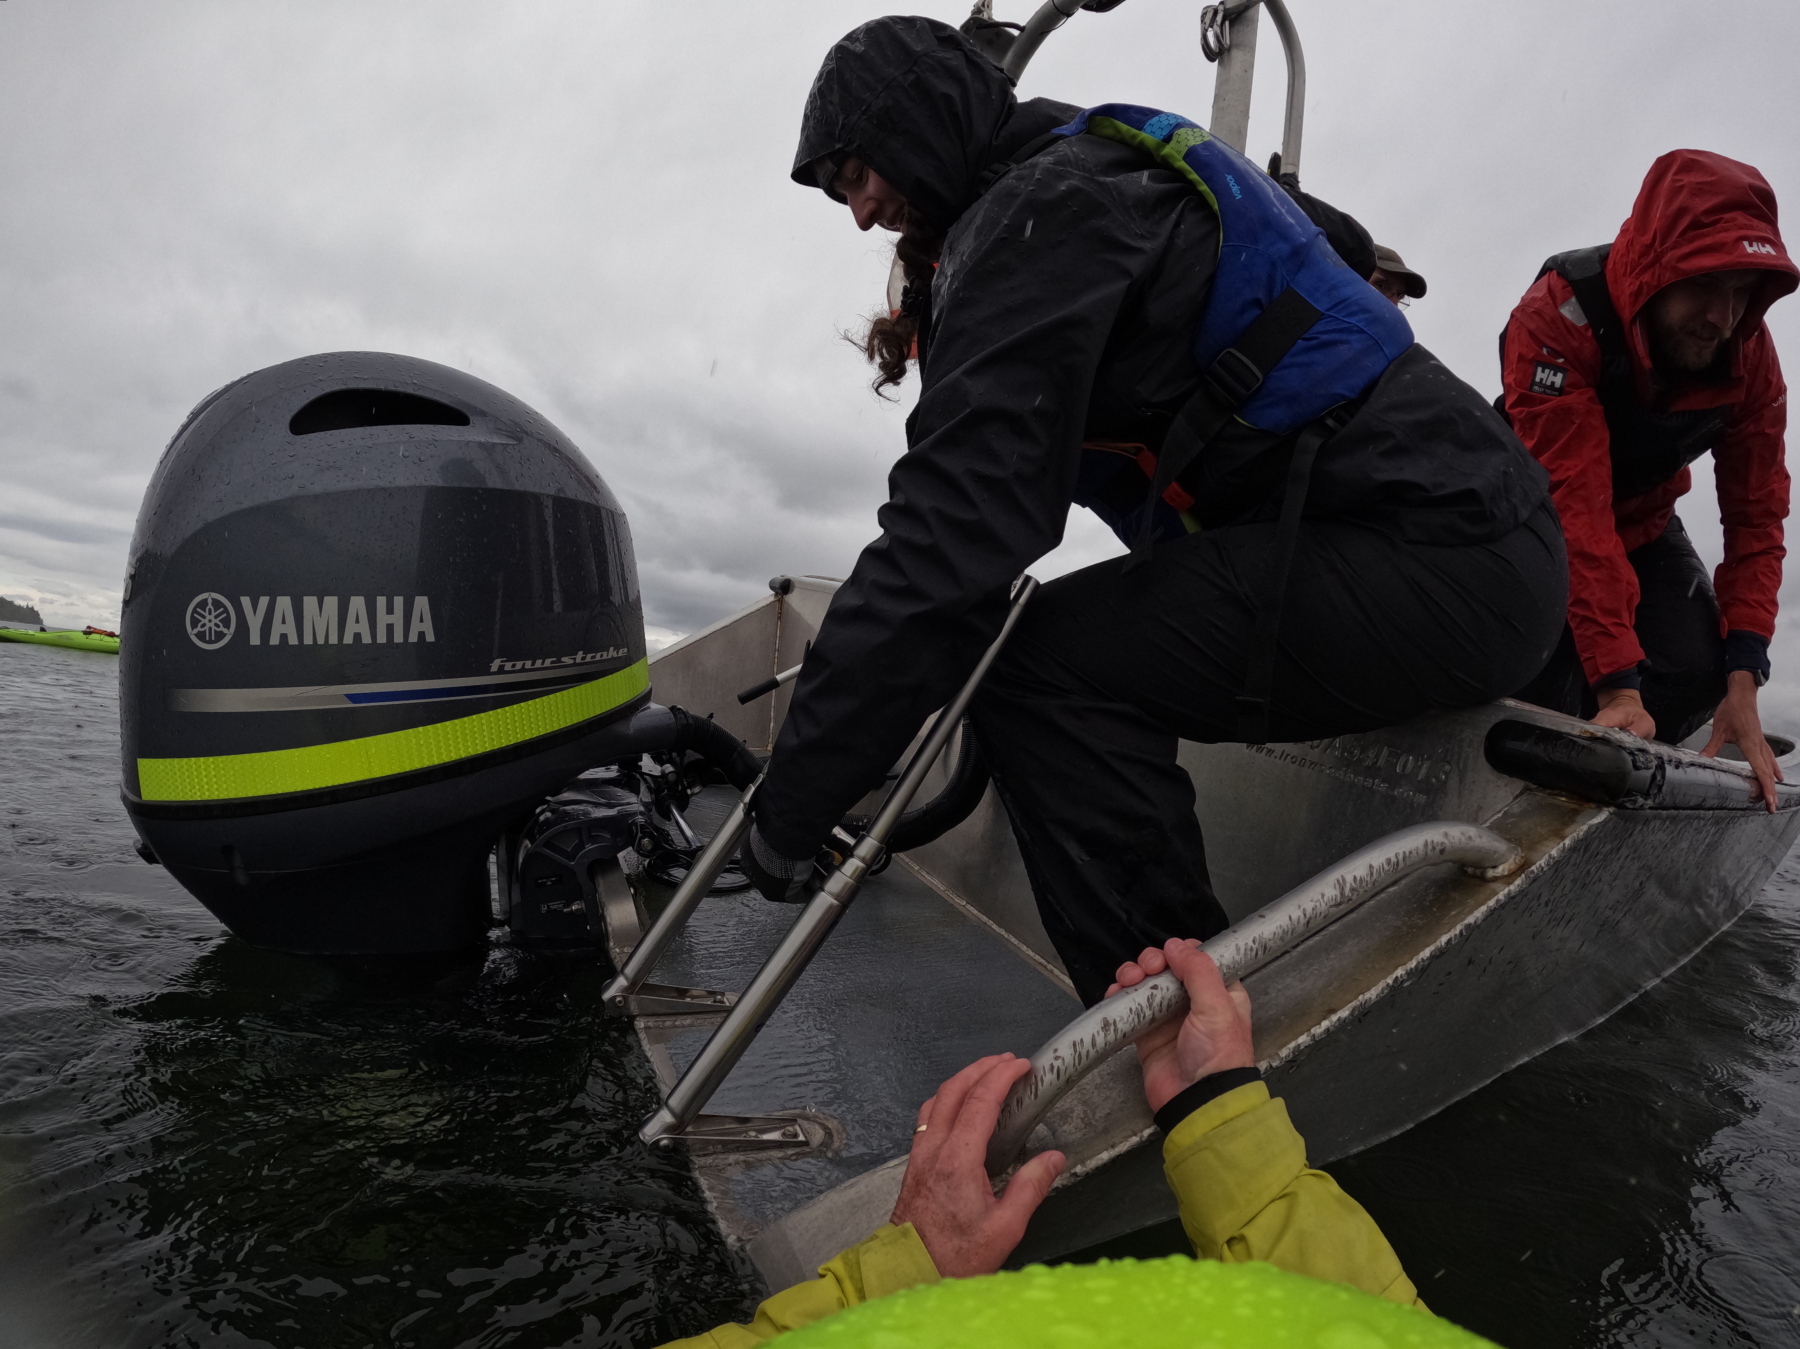
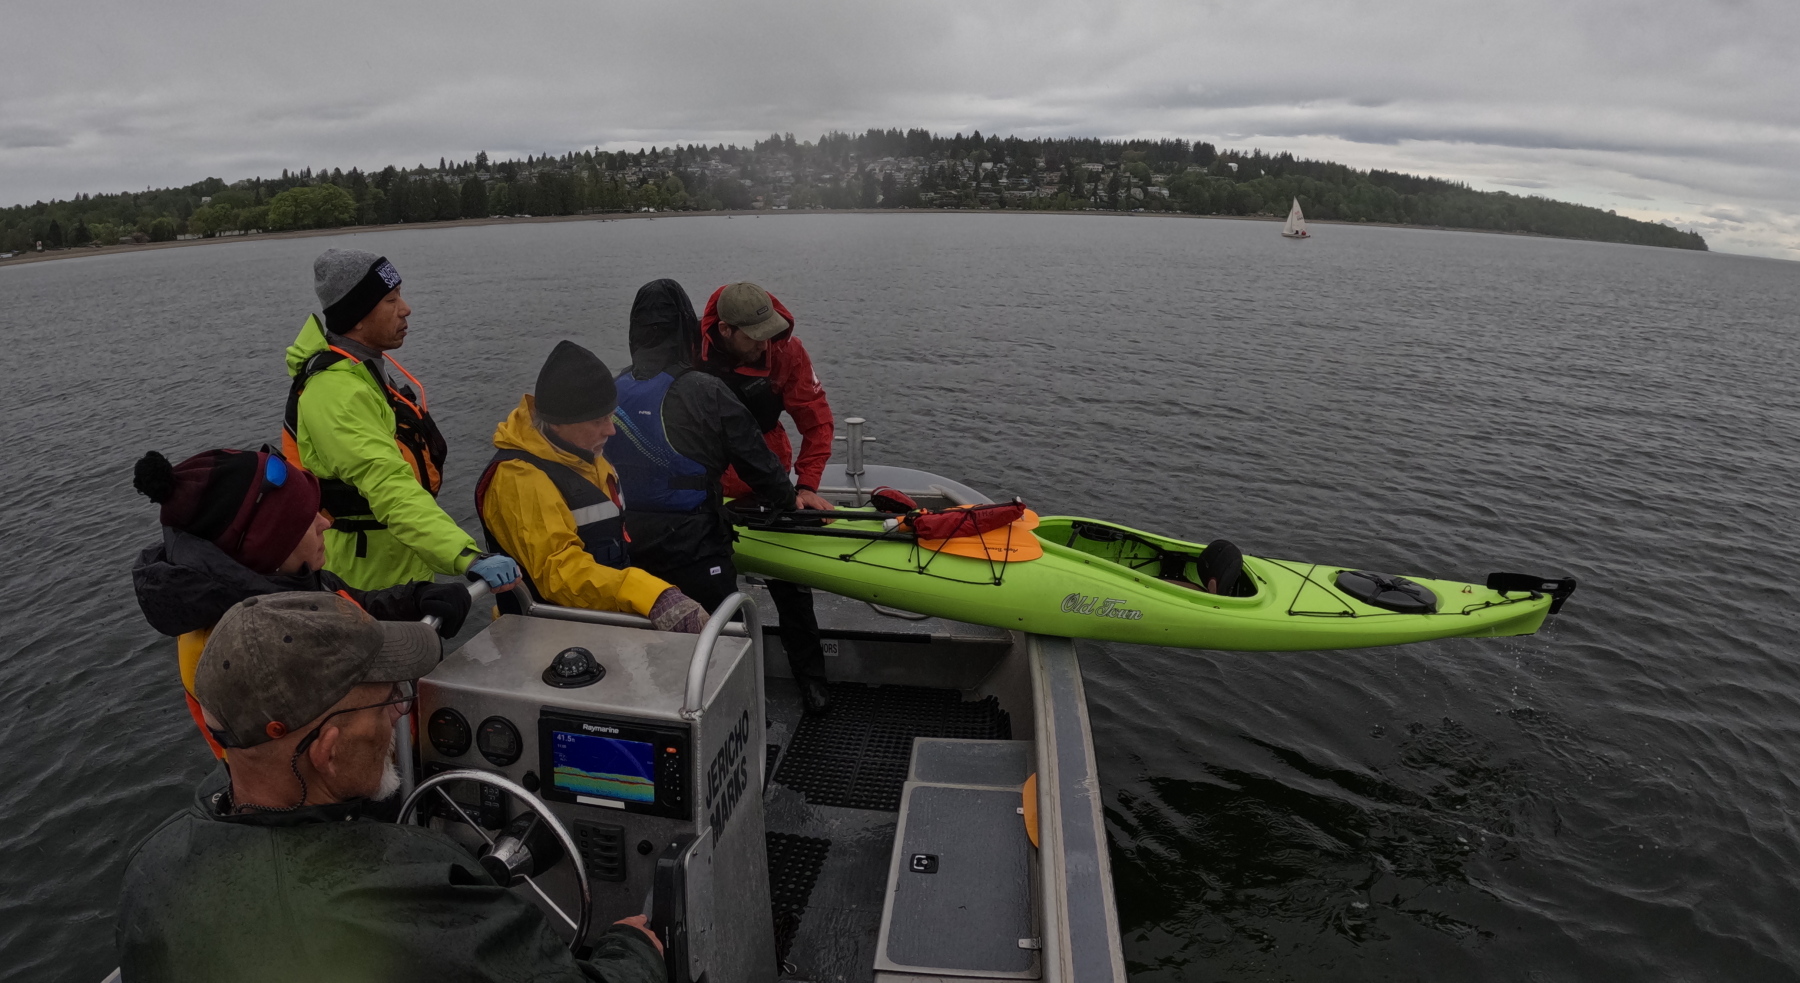
Not long after that, we were safely ashore. After debriefing with each student individually, Mike and I set off to return the kayaks and gear to Jericho Beach Kayak. It was a very long day by the time we were finished and home, but as always, we were energized by the students’ enthusiastic response to the course and its challenges.  

Mike has made another of his excellent videos, with footage of many of the events described in this post.

Rooms With A View: The Basics Of Tarpology

Featured

If you’re sea kayak touring in British Columbia, and out for any length of time, it’s not a matter of if it will rain, but when it will rain. They don’t call it “The Wet Coast” for nothing. In such Noahscape situations, being able to rig a secure kitchen-dining shelter is essential to ward off both cold and cabin fever.   

Showing a camp tarp rigged in an A-frame configuration
The classic A-frame bungalow roof tarp configuration, with an end pole improvised from driftwood.
Read more: Rooms With A View: The Basics Of Tarpology

Materials

If you only camp very occasionally, even the basic “plastic” tarps from your local Crappy Tire or Home Depot will suffice. They will be bulky and not terribly durable — though pinholes are easily fixed with duct tape. Please don’t let their semi-disposable price point tempt you to abandon them in the field at the end of your trip. Blue is the most commonly available colour, but if you can find orange, it provides a more cheery ceiling in the rain (this is true of all tarps: yellow and orange fabrics create a gloom-dispelling faux-sunlit vibe even on cloudy days.)

Polyester (PU) coated fabric tarps are more durable and compact, and, predictably, more expensive.

The most compact of all tarps are made with silicone-coated fabrics. (I fondly remember field-testing a prototype tarp for my erstwhile outdoor retailer employer decades back, before silicone fabrics were common. I wound up sharing a backcountry campsite with a friendly father and son. Their astonishment when I conjured an 8’ x 10’ tarp out of a soda-can sized stuffsack was as if I had produced not a rabbit, but an elephant, out of a hat.)
Silicone fabrics are also highly stuffable, saving a lot of time with folding and rolling.

Shapes

Several companies make cunningly-tailored wing tarps. I’ve owned a couple and really loved the catenary-cut, sag-defeating ridgeline and the assured-drainage scalloped edges. I was less enamored of the single set-up option. Particularly at improvised sites deep in the backcountry, vegetation often rudely insists on growing exactly where you need the edges of the wing to be. So these days, I carry rectangular or square tarps. They take a bit more rigor in rigging to prevent pooling water, but are more adaptable to cramped and oddly-shaped sites. 

Lines

When it comes to rope, the rule is: it’s hard to have too much. I typically carry at least a couple of hundred feet of paracord, in hanks of about 20 feet. The more line you have, the more options you have for set-up. By splicing one hank to another with a square knot, you can anchor lines to remote branches, trunks and roots. 

Showing a tarp rigged with very long lines, anchored to rock and trees up to a hundred feet away.
Playing the long (line) game. Having plenty of cord lets you float your tarp pretty much wherever you want it, even when natural anchor points are not nearby.

Brightly coloured lines will reduce stumbles and self-strangulation as you walk under and out from your roof. You can even buy reflective cord, which shows up beautifully in headlamps, and makes an excellent navigation beacon if you’ve wandered far into the bush to answer nature’s call at night.

Rigging Your Roof

If you’re setting up the classic A-frame bungalow roof configuration, you typically start by rigging the two high points that will form the ends of the tarp’s ridge, then adding the side and corner lines. 

Some folks like to do this by rigging a literal ridgeline —  a thicker rope running between two trees and/or poles. Next, they drape the tarp over this line, and use short lengths of cord wrapped in prusik knots (see below) around the ridgeline and secured to tabs or grommets on the tarp to stretch it along the ridgeline. This creates a very strong structure, but with the downside that the ridgeline rope chafing against the tarp may eventually wear the waterproof coating and/or the fabric itself to the point that it leaks. And dead centre of your roof ain’t a great place for leaks. 

Showing the A-frame configuration of a tarp without the use of poles
Look mah! No poles! The classic A-frame roof made by suspension only.

So for chafety reasons, I usually opt to simply stretch out the two attachment points at either end of the tarp’s centreline, letting the tensioned fabric itself create the ridge. Separate-ridgeline-rope enthusiasts will sneer that this stresses the fabric of the tarp more and is a weaker structure in wind. They are not wrong. But, tocca ferro, in decades of touring, I haven’t had a tarp tear yet. This might be because I retire my tarps (or demote them to “windbreaks only” duty) once the waterproofing has worn out, and this typically occurs long before the fabric itself is brittle. 

If you’re at a site that doesn’t accommodate retangular, symmetrical roof sides, think outside the box: make the diagonally opposite tarp corners the ends of your ridge, so the sloped sides become asymmetrical triangles that can poke between barricading trees and bushes.     

Showing a tarp rigged with an interior pole.
The high centre(ish) point setup. The tip of the pole is covered with a stuffsack to reduce chafe on the tarp.

Another classic tarp configuration is the high centre point, with the sides sloping down to form a shallow (and not necessarily symmetrical) pyramid. You can raise that centre point from the inside or the outside. From the inside, it’s via a pole of some kind, store-bought or improvised from driftwood. Either way, the tip where the pole makes contact with the tarp fabric should be condomized with a stuffsack to reduce chafe.

showing a kitchen tarp rigged with a centre pole made from a driftwood log
A driftwood log, upended and with the low end buried deep in the sand, makes a secure centre pole for this cozy camp kitchen.

Raising the centre point from the outside maximizes usable interior space. If there’s a cooperatively placed branch above the tarp site, just sling a line over it, tie it off to the topside tarp tab, then hoist the far end of the line and tie it off to a tree trunk or branch. (Your D.O.T. mandated “buoyant heaving line” works a treat for this.) 

a tarp suspended pyramid-style over the vestibules of two tents.
Centre-suspended pyramid configuration. Hanging from an overhead branch, this tarp forms a rain-free “mud room” for both tents.

If there’s no handy overhead branch, run a line from tree to tree above the tarp, then attach a prusik knot to this line and hence to the topside tab. This way, you’ll be able to slide the attachment point along the high line to fine-tune the tarp’s position. 

The blue line runs above this tarp from tree to tree. It’s connected to the topside tarp anchor point with a short, separate piece of cord wrapped into a prusik knot.

At breezy kitchen sites, you’ll want to rig the tarp as a combination windbreak and roof, with one edge at ground level. This will block wind-blown rain and keep gusts from wicking heat away from you and your camp stove. Some folks just rig their tarp as a simple lean-to, but these flat surfaces are prone to inverting into a sail when hit by strong wind. So I prefer to do a sort of pyramid tilted on one side. With the tip of the pyramid pointed into the wind and anchored securely, the tarp is much more aerodynamic and wind shedding.

Showing a tarp rigged as a leanto windbreak.
The “tilted pyramid” windbreak configuration. On the outside of the black patch above my head, a line runs to the tree branch beyond, preventing the tarp from inverting when wind hits the far side.

Though I do carry a few pegs for my tarp lines, I generally prefer to tie the lines off to tree branches, driftwood logs or roots. Natural anchors are usually more secure than pegs.

To minimize wrinkles and maximize drainage, try to run the lines from the side of your tarp as close as possible to 90 degrees away from the centre ridgeline, and corner lines out at roughly 45 degrees. Where lack of anchor points or the presence of obstacles prevents running a single line at the optimum angle, attach two lines to a single tab or grommet, run them out to whatever anchors are available, and tension them differentially to rid the tarp of ruckles.

As anyone who’s ever schlepped even a 5-litre waterbag knows, it doesn’t take a vast volume of water to be seriously heavy. So you want to ensure your tarp setup won’t trap large rainpools, lest there be rending of fabric and gnashing of teeth. Preventing pooling isn’t always a matter of going higher with your tarp lines or steeper with your tarp slopes. Sometimes it’s as simple as creating drainage valleys at the lower edges of your tarp. Do this by suspending a light weight, such as a water bottle, stuff sack with pebbles, or small piece of driftwood from one of the grommets or tabs.   

Knots

I have a pretty basic repertoire of knots that I mix-n-match as needed for rigging. The trucker’s hitch lets you apply a lot of tension to a line easily, so I tend to use it for the ends of the ridge attachment points, or for a tree-to-tree line that I’m going use a prusik hitch to suspend the topside attachment point from to form a high centre point pyramid. For the side or corner lines a tautline hitch usually provides enough tension. A simple square knot is great for splicing lines together to extend your anchor options. In the photo below, I used a pair of Japanese square lashings to secure the tarp pole vertically against the end of the picnic table. You can also use a square lashing to attach the ends of driftwood poles together to form an A-frame for one end of your tarp. 

Poles

If you can find one of suitable size on site, driftwood poles are an excellent option: they’re free, fully biodegradable, and take up no room in your boat. That said, I often carry at least one tarp pole for convenience and assurance I’ll have the right pole for my needs. I find the fully-telescoping type is easy to stow against the keel line of my kayak, but its minimum collapsed length is a few feet. If you have tighter hatches, you might need poles that fold tent pole style to fit through them.  

Tarps For Tents

Even if your tent’s fly is reliably waterproof, there are several reasons you might want an over tarp for it, especially on extended tours in persistent rain: 

Firstly, it’s wonderful to have a dry porch roof/mudroom where you can stand up to doff and don wetwear without getting the tent interior soggy. 

Secondly, in seriously heavy rain–the sort that hammers down in dollops rather than drops–bedtime in an unshielded tent can be like trying to sleep inside a drum at a heavy-metal concert. Intercepting the rain a foot or two above the fly dials down the din from crazy-making to practically cozy. 

Thirdly, like me, you may well be fond of breathing right through the night. Each of your hundreds of exhalations contains water vapour. The cooler and wetter your tent fly is on the outside, the more of that breath vapour will condense against its inside. Wet begets wet. In a really prolonged rain in cooler weather, so much breath moisture can condense against a fly’s interior that it looks–and feels–as though the fly is leaking. By keeping the outside of the fly dryer, an over tarp will vastly reduce this effect.  

Finally, by rigging the over tarp first and taking it down last, you can set up and pack up your tent out of the rain, and keep the interior canopy dry. Or at least dryish.        

Rescue me! Sea kayak saves with the Jericho Beach Rescue team

Featured

I’ve been kayaking out of the Jericho Sailing Centre for decades and guiding and instructing there for years. So when the good folks at the Jericho Rescue Team asked for a “splash test dummy” to help train their latest batch of volunteers on how to rescue capsized kayakers, I was all in! 

A sea kayaker's point of view of a capsize, with the rescue boat visible in the distance.
Over I go!

The Sailing Centre is home to many clubs and businesses that put hundreds of small craft out to sea every year. Inevitably, some of those mariners are going to get into difficulties. Each season, the Rescue Team helps with some full-on emergencies and intervenes early to keep dozens of situations from escalating into emergencies.

A view from the rescue boat, showing a capsized sea kayak next to their upside down kayak.
I think he’s supposed to be inside that boat, not beside it!

Actually fishing a kayaker and a kayak out of the water was a good learning opportunity for the volunteers, who deal with many different types of small craft, each with its own quirks. (Pro tip: a kayak drains better if you lift it out of the water bow first rather than stern first!) In addition, each trainee got the opportunity to steer the boat to the swimmer, and to kill the engine before pulling the victim to the stern and the reboarding ladder. (Thankfully for me, no-one forgot that last step!)

a capsized kayaker's view of the approaching rescue boat
Help approaches.

The late April Sunday was cloudy and the water surprisingly cold. But I had my trusty drysuit. Or not. As I discovered during my first capsize, I hadn’t quite sealed the zipper tab all the way, so the icy sea found its way in at about crotch level. Oh well, this added a bit of verisimilitude to the rescue scenarios! Plus I got to entertain the folks on the rescue boat with my down-on-all-fours, leg-cocked-up-like-a-dog-at-a-fire-hydrant pose as I drained water out of the drysuit zipper.

Almost there.
A helping hand.
Deploying the reentry ladder.

Despite draining and resealing my suit, my insulation layers were pretty moist. So I was chilled to the point of shivering by the time we’d finished the morning’s swims. I took advantage of the lunch break to rewarm in the showers at JSA, and to borrow a wetsuit from my employers at JBK, which I layered under my still-damp drysuit in a kind of “belt-and-suspenders” redundancy.

Bringing my boat on board.
Back in the water!
Poling me in!
Happily back aboard.
You could be forgiven for thinking the guy in the red suit is saying, “Check out that dork with the propeller helmet!” But in fact, it’s a trick of perspective with my paddle. And Red Suit is following the correct man overboard procedure, keeping one arm pointed toward the swimmer, so that the person at the helm of the boat is free to concentrate on safely steering to the rescue.
Swimming yet again!
a swimming sea kayaker reaches with his paddle to the rescue boat
Pulling in with the paddle

Once I was done with the afternoon plunges, the team deposited me on shore, where I lost no time taking a more prolonged warming shower, followed by a great meal at The Galley, courtesy of the Team. It was great to have helped them learn, while getting a better understanding of how they work.

Sea Kayak Navigation: LOPS at sea

Featured

In a previous post, we talked about how to use the shoreline and compass bearings taken on recognizable landmarks as Lines Of Position to determine our location. At the end of that post, I mentioned that when you’re away from the shoreline, you can use compass bearings alone to determine your position. Here’s a real-life worked example:

Recently, I was paddling in Ayyulshun’/English Bay and headed a bit out past Point Grey into the eastern edge of the Strait Of Georgia. Just for fun, and because the landmarks were nicely down sun for photos, I “shot” my position using my bow compass.

First, I aimed the bow of my kayak at the Point Atkinson Lighthouse. It’s the white upright object visible at the shoreline in the photo below. Looking at the red lubber line visible in the dome of my bow compass, we can see that the magnetic bearing to the lighthouse is 335° (or close enough to that for practical purposes). That gives us one Line Of Position.

A photograph showing the bow compass of a sea kayak pointed at a landmark (a lighthouse). The lubber line on the compass read about 325 degrees.
Shooting a compass bearing using the bow compass of a sea kayak: With the bow of the kayak pointed at Point Atkinson Lighthouse, visible on the shoreline, the red lubber line gives us a reading of roughly 335° on the blue dome of the compass.

Next, I swung my boat to point at the southern end of Bowen Island. As you can see in the photo, the bearing to that point was about 272° magnetic. 

Shooting a second line of position with the bow compass. With the bow of the kayak aimed at the southern tip of Bowen Island, we get a reading of roughly 272°

(From sheer force of habit, I automatically chose two landmarks that were—very, very roughly—90° apart from my point of view. As I’ve mentioned in previous postings, this is good practice, since it means that when you plot the corresponding LOPs on your chart, they’ll meet at a more-or-less right angle, which makes for a much clearer intersection point than an acute or obtuse angle.) 

My chart of Ayyulshun’/English Bay. The thick red lines with arrows point to magnetic North. For why I’ve drawn them on my chart—and why you should do the same with your charts—check out this post.

While on board the kayak, pinning down my modified Davis protractor and pulling out the protractor string while simultaneously holding my camera above the chart case would have required more hands than I happen to be equipped with. So instead of plotting my position in real time while at sea, I opted to do so back at home, with a flat, unbagged chart and a camera tripod. (But since you—probably—wouldn’t be flailing around with a camera at the same time as you’re navigating, you can work your plot at sea.)

To plot my first Line Of Position, I laid my Davis protractor on the chart with its centre over the Point Atkinson Lighthouse. I pivoted the protractor until its North-South lines lined up with the magnetic North lines I have drawn (in red) on the chart. Then I drew the protractor string across the 335° indicator on the protractor’s outside edge. I lightly penciled in this LOP on the chart.

Plotting my first LOP. With the centre of my Davis protractor over the landmark I shot (the lighthouse), I pivot the protractor until its North-South lines are parallel to the red magnetic North lines on the chart. I then draw the orange protractor string out along the 335° mark on the outside edge of the protractor.

I repeated the process for the second LOP plotted on the southern tip of Bowen Island, this time pulling the string across the 272° on the protractor’s edge. Where the orange protractor string overlaps the pencil line of my first LOP is (or was) my position.*

*Strictly speaking, finding your whereabouts by this process is called resection. But it’s more commonly, if erroneously, referred to as triangulation. So if you talk about “triangulating”, you’re more likely to be understood by your less pedantic fellow paddlers. But if you’re the sort who delights in correcting your campmates with “Well ackchyually, unless it’s from the Champagne district of France…” in your primest Thurston Howell The Third accent, why not baffle them all with resection?

A photo showing the use of a Davis protractor.
Plotting my second LOP. With the centre point of the protractor on the south shore of Bowen Island, I pivot the protractor until its North-South lines are parallel to the red magnetic North lines on the chart. I then draw the orange protractor string out along the 272° mark on the outside edge of the protractor. Where the string intersects the penciled line from my first LOP was my position when I took both shots with my compass.

With the bow compass swinging in the swell and the limits of reading it, there will be some error in my plotted position. So if I’d needed higher accuracy—if for example I were hoping to avoid some nearby reef lurking in ambush just beneath the surface—I could have shot a third landmark and plotted a third LOP.

As noted, I waited until I was home to plot the LOPs I’d shot on my chart. How would I have done it out on the water? Rather than take my chart out of its waterproof bag, I’d have used the protractor outside the chart bag, and marked the first LOP directly on the chart bag with a chinagraph pencil (which are also excellent for jotting notes directly on the deck of your kayak—such as the changing compass bearings to your landfall, so you can detect the direction you’re being drifted).

Since I was already on the water, I took advantage of the chance to photograph another example of using two objects as a range for an LOP.

With the nearer landmark object (the red buoy) apparently to the left of the further landmark object (the lighthouse), we know we are slightly to the right (or in this case, to the east) of the LOP they will form when they are aligned.
When the two landmarks are in line (the lighthouse is visible through the framework of the buoy), we know we are somewhere along the Line Of Position they form, as shown in bright green on the chart section below.
A chart with a bright green line on it running through two landmarks to creat a Line Of Position.
When the buoy and the lighthouse line up from our point of view, as shown in the photo above, we know we are somewhere along the bright green line, to the south of (below) the buoy.
When the nearer landmark (the buoy) appears to have moved to the right of the further landmark (the lighthouse), we know we are now to the left (or west) of the LOP they form when lined up.

Even when far from shore, you can mix-and-match different kinds of LOPS—compass bearings and/or ranges—to determine your position. So it’s perfectly possible to be “all at sea” in the literal sense without being so in the metaphorical sense of being lost.  

Sea Kayak Navigation: thoughts on GPSs and smartphone navigation apps

Featured

The first module of the online sea kayak Trip Planning Course I teach is all about navigating by chart and compass. And one of the questions I inevitably get asked during that lesson is “What about GPSs or smartphone/tablet navigation apps?”

Read more: Sea Kayak Navigation: thoughts on GPSs and smartphone navigation apps

My answer is “I love’m—in their place.” And that place is alongside, not instead of charts, compasses, and hardcopy tide and current tables. Nor am I saying that as some cranky luddite: I was a very early adopter of portable GPSs. I owned one of the first internal battery powered versions in the early 1990s, a Magellan NAV 5000D.

The flower of 1990s technology

This bigger-than-a-brick unit had no built-in scrolling charts: You had to determine the coordinates of your desired destination from a paper chart and manually key them in. Likewise, you needed to transpose the real-time position, shown as raw latitude and longitude numbers on a monochrome LCD, onto your paper chart. That was great for confirming where you were once you’d landed and weren’t moving. But when you were getting surfed along off a lee shore, trying frantically to determine how close you were to sandbars lurking beneath the muddy waters of a shallow Arctic sea? Rather too much latency (as in “The late Philip Torrens was found not far from the reef that had capsized the kayak…”). So by today’s standards, that GPS was risibly clunky (It’s literally a museum piece now.) But by the standards of the time, it was revolutionary. It was an incredible help in finding our way through the often featureless Canadian Arctic.  

Navigating like it’s 1993! On the lower left, just above the folded blue chart case, sits a Magellan NAV 5000D, complete with its vertical external antenna in a pivoting white housing of its own. Today, GPSs are much slimmer, lighter and faster. The kayaker-wader on the upper right? Rather the opposite on all counts, really.

Since then I’ve almost always owned and carried a GPS of some type while kayaking anywhere other than in my backyard waters of English Bay in Vancouver, BC. As with all consumer electronics, features have expanded as cost and size shrink. Today’s units can hold integrated scrolling charts that show your position relative to the land and seascape in real time, just as the maps app on your smartphone shows a rolling roadmap when you’re driving.   

A screen shot of the "map" page from an early GPS, showing that it has no topographic or hydrographic details.
A screenshot of the “map” page from a last-millennium GPS. No topographical or hydrographical details. A big help, huh?

One of the functions I like best and use most with GPSs is their ability to automagically offset for drift from wind and current in real time and guide you along a fairly straight line to your destination, as opposed to a much longer arc. 

There are formulas for predicting the upstream angle you should ferry given a particular current speed, crossing distance and paddling speed—see David Burch’s excellent Fundamentals Of Kayak Navigation. But both current speed and paddling speed can vary over the course of a long crossing. Throw in the wildcard of wind, and holding a straight course gets pretty problematic. Likewise, there are techniques for using ranges and/or changing compass bearings to detect and offset drift. But they rather rely on being able to clearly see specific real world features, which won’t always be possible, especially when your landfall is on or over the horizon. So the longer the crossing, the better I like my GPS.

GPS’s real-time drift detect-and-correct is handy even over shorter distances when I’m kayak sailing. Because kayaks aren’t keel boats, they’re subject to a lot of drift with a sail up, especially when on any point of sail other than running before the wind. With more complicated rigs such as the Falcon Sail I’ve got on my rudder kayak, the crew is often fully occupied trimming the sails properly and has little spare bandwidth for monitoring drift. The GPS helps me point my kayak just far enough off or across the wind to get where I want to go, without stalling by pointing unnecessarily high upwind. 

Another very cool feature on many GPSs and apps are the built-in tide and current tables. Often these are not mere numerical columns with times of lowest and highest waters and minimum-maximum current speeds, but also graphs that let you easily determine precise water depths and current speeds at any interim between the highs and lows. That’s really handy for finding tent sites on the beach that won’t feature ensuite swimming pools at midnight, or for deciding just how long after slack water it’s still safe to run Suckemdowne Narrows.

Although it’s great to let the GPS magic box do all that math for you, you should retain a working knowledge of formulas such as the rule of twelfths, the rule of thirds, and the 50/90 rule, plus hard copies of the tide and current tables for the areas you’re paddling. This will both improve your intuitive understanding of what the magic box is telling you, and ensure you’re not left helpless if the magic ever dies due to exhausted batteries or saltwater leakage. 

Damn! We missed our slack water window!

I personally have a strong preference for freestanding GPS units over phone or tablet apps. Part of that is probably just intellectual inertia: I’ve been using GPS-specific devices for decades and am very familiar and comfortable with them. But there are practical reasons as well: I prefer actually owning the unit and the data in it to renting an app on a subscription basis. I’ve heard too many horror stories of companies nickel-and-diming their subscribers with fee increases, reducing or bricking functionalities when pushing out upgrades you can’t opt out of, or orphaning apps when they go out of business. I also prefer not having all my electronic eggs in one basket: if I lose my navigation functions for whatever reason, I don’t want to have also lost my phone functions, or vice-versa. Last, but far from least, it’s much easier to operate real buttons than a touchscreen through the plastic window of a waterproof soft case.*

 *You absolutely do want cases for your GPSs and phones, notwithstanding any manufacturer’s claims about their integral waterproofness. The one time I insufficiently sealed my soft case, then knocked it into the sea while docking, the supposedly waterproof GPS inside drowned itself in a fit of pique.   

Despite my personal preferences for stand-alone GPSs, I can see the case, so to speak, for navigational apps such as Navionics or savvy navvy. They make for one less physical gadget to buy and carry (and for reduced end-of-life e-waste). Plus, to a generation accustomed to downloading apps for everything from ordering dinner to help with stargazing, I’m sure that instantly adding one more functionality to your phone just feels simpler and more intuitive.

That said, I just recently upgraded my ancient (but still operating) Garmin GPSmap 76Cx to Garmin’s GPSmap 276Cx. The new unit is a bit bigger than the old one, which sounds like a retrograde step. But that’s actually a feature, not a bug: the significantly larger screen makes chart details much easier for my elderly eyeballs to read. 

Showing the Garmin GPSmap 76Cx GPS and the Garmin GPSmap 276Cx side-by-side to allow comparison of the screen sizes
Size matters: the relative screen sizes of the Garmin GPSmap 76Cx GPS and the Garmin GPSmap 276Cx. Pocket knife for scale.

Which leads us to an important way GPSs work best alongside hardcopy charts rather than in lieu of them: even the larger screen on my new GPS is only about 2.5” x 4.25”, while the “screen size” of my smallest chart bag is about 9” x 12” (and I have larger ones). Meaning the paper chart covers more area in more detail than the map page of even the largest tablet you’d care to mount on your foredeck. And all at-a-glance, fully sunlight-readable, no zooming or panning-and-scanning required. So when you’ve blundered into the thick of Shipwreck Rocks to find larger-than-forecast swells running, you can use your GPS’s chart page to determine your precise position in relation to immediate local hazards, and the big picture from your paper chart to ensure that the escape route you’re improvising doesn’t turn out to be a literal deadend.

Showing a chart in a chart bag on the deck of a sea kayak, for comparison to the "map" page of a portable GPS.
The “map page” of a chart bag. More coverage, more quickly than with any GPS or tablet.

Less urgently, but still usefully: during pre-trip planning at home, you can use the big screen of your computer to scroll electronic charts, and point-and-click waypoints and routes to download to your GPS. But you won’t have that computer with you in camp as you plan the next day’s voyage, often switching things up from your original ideas based on field experience of the area. Rather than just squinting through the letterbox slot of your GPS screen, use your paper charts for big picture planning, then scroll to add any additional required waypoints on the GPS.

Similarly, I prefer to use my GPS in conjunction with, not in replacement for, my old school magnetic compass. Why? Imagine yourself paddling a long crossing directed solely by your GPS. See how pretty is the pixel picture it paints of the virtual world on its chart page! See how it counts down the distance and ETA to your destination in such encouragingly bite-sized increments! See how precisely its compass arrow points the way! See the spiked deadhead log you’ve just punctured the bow of your boat against! Oh, wait – why didn’t you see that? Because your eyes were magpied by those shiny moving screens, distracted in the same way that drivers become intexticated by their phones. 

Less lethally, but still tragically, there’s much else you might miss when bowing to the electronic idol on your spraydeck shrine: the bright flash of a passing puffin, or the soft roil of migrating humpbacks, or a baby sea otter bobbing expectantly as it waits for mom to surface with breakfast, or any of the million-and-one things you are presumably out there paddling in order to experience.

How to avoid missing all that? Set your GPS to display the compass bearing to your target waypoint (use the settings menu to ensure it’s displaying a magnetic bearing rather than a true North bearing, and that it is autocorrected for local magnetic variation). Check this reading periodically as you paddle, but actually steer by the bow compass on your kayak. Result: with your head up and your eyes focused for distance, you’ll have much expanded situational awareness (and much reduced susceptibility to seasickness). And if the GPS should decide to shit its pants (sorry about that technical mumbo-jumbo) mid-crossing, reverting to the deck compass for navigation is smooth and panic-free, since you’re already using it to steer to the last known bearing to your waypoint. (Based on how that bearing was changing up to the point of GPS failure, you’ll know whether you were being drifted to the left or to the right, and hence which way to turn to find camp once you hit the shoreline.) 

In choppy water, a bow compass is a far less (sea) sickening sight than a GPS on your spraydeck.

BTY, Class D/Class H handheld marine VHF radios have integrated GPSs, and therefore offer navigation pages with a compass pointing to your selected waypoint. But none that I know of offer full marine chart pages (yet – the market is always evolving!) So the navigation experience they offer looks and feels like that of stand-alone GPSs from two decades ago. Also, I like to have my VHF in a holster on my PFD, rather than on the deck, in case of separation from my kayak (When it comes to emergency equipment: If you don’t have it on you—you don’t have it!) So for those reasons, I’d never rely on my radio as my primary electronic navigation tool. That said, if I found myself in swirling fog and currents, uncertain of my position and with my primary GPS inoperable, I would absolutely use the VHF GPS for my Hail Mary play.

Aside from the sheer satisfaction of using the traditional skills and technology of charts and compass, and the sense of connection that gives me with all the generations of seafarers who have come before me, there is that practical benefit of redundancy in the event of equipment failure. (I felt a smug sense of vindication when I learned that the US Navy, after having skipped celestial navigation training for an entire generation of officers on the grounds that GPS had rendered it obsolete, brought back sextant schooling several years ago.)

So think of compasses and charts and hardcopy tide and current tables not as low tech but as highly robust tech. If none of them had previously existed and someone introduced them today as a navigation suite that doesn’t depend on satellites or subscriptions, never needs batteries, is pretty much impervious to salt water damage, and is immune to spoofing*, that would sound pretty damn amazing. As it is!

*With the exception of the “self spoofing” you can accomplish by packing your steel hatchet in the bow compartment just under your deck compass. Or by letting the magnetic clasps on your waterproof phone case swing too close to the hiker’s compass in your chart bag. You deviants

Midwinter Paddling: to the Pasley Islands in Howe Sound, BC

Featured

January 21, 2024

The relentless icy rain this Sunday morning was pretty uninspiring. But we thirteen Jericho Beach Kayak guides had committed to a group daytrip weeks before. So we had a certain professional pride (plus a gender-neutral machismo) that dissuaded any of us from chickening out in front of our peers.

We waded through a small ice-water lake in front of the Jericho Beach Kayak hut to schlep the boats out to the roof racks waiting on our vehicles (the prudent—or at least the so-equipped—of us had heeded EJ’s suggestion to bring boots for this portage.)

Our little car convoy made fine time to the Horsebay Ferry Terminal, and caught the 10AM something boat across to Nex̱wlélex̱wm/Bowen Island. Enroute, we had a quick huddle in the passenger lounge to confirm launching, the paddle plan and radio channels.

final pre-paddle briefing on the ferry

As if to reward us for our perseverance, the rain stopped just as we launched from Tunstall Bay at noon. On the cliffy south side of the bay, a frozen waterfall testified to the unseasonably cold weather of the previous week.

Ice, ice, baby! A frozen waterfall on the south side of Tunstall Bay
Enroute to Worlcombe Island

As we approached Worlcombe Island, we could see vast flocks of large birds gyring above the treetops. They proved not to be vultures lurking for under-prepared kayakers, but eagles young and old. (They’re clearly visible at this point in my buddy Mike’s video of our outing.)

Along the north side of Worlcombe Island

We alit a little after 1PM in a small bay at the southwest tip of Pasley Island. In summer, I wouldn’t bother firing up a stove for lunch, but in winter, it’s nice to stoke the inner fires with pre-warmed fuel. So my trusty WindBurner stove came into play. It was not only mucho fast but also provided much amusement for my tripmates, as the vast clouds of steam made it look like I was either improvising a sauna or preparing to do a magician’s disappearing act.

It being the offseason, the homes on the upland above our picnic spot were not occupied. This was fortunate, since it meant that those of us who lined up facing the southern rockwall to take the necessary pre-launch precautions to ensure our drysuits would remain dry for the next leg of the voyage were not accosted by irate cottagers. 

On an offshore rock near the northwest tip of Pasley, we spotted a bleached white skeleton. This was not a kayaker who’d been marooned by an insufficiently secured boat, but a brilliant bit of sculpture installed by an unknown artist for the delight of passing boaters. It even included an appropriately wind-tattered pirate flag.

Somewhere between our boney friend’s reef and Mickey Island, the rain began to fall intermittently. But it had held off for our lunch stop and was pretty tolerable while we were buttoned up in our boats and pumping out body heat with every stroke.

As we bobbed in the lee of Mickey Island, confirming our course home and who was leading the next leg of the trip (me, as it happened), swooping and diving seagulls just off the point on Pasley Island south of us showed something was afoot (or perhaps, afin). And as we got nearer, swirls and splashes from beneath the sea, like reversed raindrops, confirmed that fish were being herded up from below. Sure enough, enormous thick brown necks suddenly broke the surface, accompanied by huffs and snorts. (As an aside: I’ve been within paddle-poking distance of Orca more than once over the years, but I continue to be more wary of sealions than killer whales. Still, I comforted myself with the idea that if they decided they were tired of seafood and wanted a little red meat, the odds were only one in thirteen I’d be dinner!) The sealions are best visible at this mark in Mike’s video.

Switching leaders once more at the western tip of Worlcombe, we handrailed along its south shore, encountering more sealions on route. They proved pretty camera-shy, appearing only in the distance anytime I had my Go-Pro in hand.

along the south shore of Worlcombe Island

We landed back in Tunstall Bay a bit after 4PM, with a rain falling so steadily I opted not to change out of my drysuit, but to drive to the ferry terminal still wearing it.

The last of us rolled onto the five-something ferry just moments before it sailed, as if it were our own personal, private transportation. Upstairs in the passenger lounge, we ambushed one of our number, whose birthday it happened to be, with donuts and singing.

After offloading the boats back at Jericho Beach Kayak, we supped at the Wolf And Hound. It’s amazing how many of our adventures end there. It’s almost become our off-season office!

The fabulous thirteen!
a chart of Bowen Island and the Pasley Islands in Howe Sound, British Columbia, showing the route of our kayak daytrip
the route of our daytrip

Thanks to all my colleagues for the pleasure of their company, and to Mika, Chris, Natalie, Tomo, Warren, and EJ for sharing pictures for this post.

Electric Bilge Pumps For Sea Kayaks: The Saga Continues

Featured

So let me start by acknowledging that over the years I’ve spent a ridiculous amount of time and money on the various incarnations of my electric bilge pumps. At this point, it’s as much about the intellectual challenge and the fun of problem solving as getting water out of my boat. But as far as obsessions for old men go, it’s pretty harmless. Plus, if you can save some cash and avoid heading down dead ends by learning from my experiences, I’m happy for you.

Showing where the wires run in the system for the sea kayak electric bilge pump.
Nothing like a little soldery to brighten up a cold and cloudy day. Here I’m attaching the wires from the battery box, which will live in the day hatch compartment, to the wires that pass from there through the rear bulkhead and into the cockpit. The wires connected to the pump, though not the pump itself, are visible in the cockpit running over the seat.

This latest upgrade wound up becoming The Pump of Theseus: a new battery, a new battery box, and a new switch system. I also replaced both the base and backrest of my existing seatback. Still, a couple of feet of the positive and negative wires where they pass through the bulkhead into the dayhatch compartment were retained. So it’s kinda, sorta the same system, right?

Let’s walk through the components I replaced and why:

THE BATTERY

On previous systems, I’d used battery holders to stack AA batteries in series to add up to the voltage needed for a 12-volt bilge pump. I had a couple of reasons to do so at the time: I was doing longer (multi-week) trips and wanted the option to recharge the batteries in the field with my solar system and/or to swap out the rechargeable AAs with alkaline batteries from my other gear if needed. These days, I’m mostly doing shorter (long weekend) trips. In any case, I wouldn’t be doing longer trips in my skeg boat: I’d use my more capacious rudder kayak. Most significantly, over time, the thin wires from the 9 volt connector clips I’d used had sometimes corroded through – not from getting submerged, but simply from the salt air that entered the battery box when I opened it at the seashore.

At the suggestion of my friend and kayak addict co-enabler, Michael Verkerk, I switched over to a pre-fab 12 volt battery pack from Bioenno. This unit does require a wall charger, but as noted, I’m doing shorter trips these days, so the charge should last through any 2-3 day paddle I do with this boat.

THE SWITCH

In the last couple of systems I built, I‘d used magnetic relay switches, “potted” with marine sealant in a length of PVC plumbing pipe to make them watertight. And Michael had kindly made me a present of a new relay switch. But when I set up the system for a dry run on shore, I found the switch kept freezing in the closed (turned on) position after a pass with a magnet. Once the completed system was installed in the boat, I’d have had no other way to turn the pump off, short of opening the battery box and disconnecting the battery – something that would range from awkward to impossible at sea. And that would pretty much make the pump system a one-shot gadget, not reusable until I’d landed and replaced or recharged the depleted battery. 
So I went back to the future on the switch, using an air button and air switch designed for use around hot tubs and pools, as I’d done on an earlier pump system

The air button is on the left. My home-brew ring for the switch cover is visible just above it.

I knew from my previous experience with air buttons that they will rapidly jam with sand around the beach, so I used keyhole saws to cut a plastic ring from one of my favourite forms of raw material stock: a dollar store kitchen cutting board! This ring was sized to hold a protective neoprene cover over the air button. 

Showing the air button switch for my electric bilge pump mounted on the rear deck of my sea kayak.
The air button in place on the rear deck. It’s mounted directly into the dayhatch compartment.
Showing the air button protected by a neoprene sand cover.
The ring in place over the air button, holding a sand cover cut from thin neoprene.

THE BATTERY BOX

The new, larger battery and the air switch required a larger box, a Pelican 1120 Protector Case.

the waterproof box containing the battery and air switch for an electric bilge pump for my sea kayak
The Pelican 1120 Protector Case. The battery is the square blue object on the left. The two silver-tipped objects on the upper right are spare fuses. Poking out from the box on the lower right, just to the right of the black pressure valve button, is the hose-attachment nipple of the air switch.
Showing the waterproof pass-throughs for the wires on the side of the battery box.
The waterproof pass-throughs for the wires are cable clams. These particular ones are made by Blue Sea Systems.
Showing the battery box for an electric bilge pump for a sea kayak, connected and ready to run.
The battery box sitting on the back deck of the kayak, ready to slide into the day compartment. The air hose is now connected to the nipple on the air switch.

Some dryland experiments with one-way valve, backflow preventers I’d previously used in the pump discharge hose confirmed two things:

  1. They didn’t really prevent water that entered at the mushroom head from flowing backwards through the pump and into the kayak cockpit when the pump was turned off. Clearly this is because the valve is intended to be installed where the hose and mushroom head are ideally running downhill–or at least horizontally–away from the valve. The tight quarters and low freeboard of my kayak leaves the hose curving uphill to a vertically-mounted mushroom head. As a result, the one-way valve is sitting at the bottom of a water column if the hose is down-flooded by waves.
  2. The one-way valve also seriously reduced the water output from the pump.

So I abandoned the one-way beak valves and reverted to another hack I’d used in previous systems: a custom-whittled foam “cork” at the mushroom head. It’s sized to be snug enough to prevent waves down-flooding into the boat, but loose enough for water pressure to blow the cork out of the mushroom head pop-gun style when the pump is activated. It’s on a tether to prevent loss. 

Showing a home made foam cork sealing the top of a mushroom head to prevent flooding into the boat.
A close up of of the mini-cell foam “cork” in the mushroom head, wrapped with electrical tape. It actually pushes far enough down to sit flush into the head: I’ve just pulled it partially out for clarity.

Since I was rebuilding anyhow, I also rebuilt my minicell foam seat back. I’d been happy with the support of the old one, but the actual back brace had tended to get sheared off over time as I dropped into the cockpit. I’d needed to reglue it a few times. So in the new version, the back brace is a single piece of foam that extends all the way back to the bulkhead, and rests on the lower foam piece (which also houses the pump). I’d expected to need to glue these two new components together, but found to my pleasant surprise that they press-fit solidly into place under the rear coaming. This will make accessing the pump for cleaning and maintenance much easier. 

The foam base of the seat back in place. The pump is housed in a recess carved into the back of the block. I’ve used a marker to outline the areas where the seat bottom contacts the foam in preparation for carving out clearance scoops to allow the seat to slide fully back in the cockpit.
Showing a home-made foam seat backbrace for my sea kayak.
Look ma! No glue! The backbrace portion of the foam seatback press-fitted into place.

So how did it all work out? Here’s the video of the first dryland test. Stay tuned: I’m already scheming on further upgrades for the air button cover and the cork!

UPDATE: DECEMBER 17, 2023

So when wandering through a kitchen specialty shop a few days ago, I stumbled across these red flexible silicone thingy-ma-bobs. The manufacturer was foolishly marketing them as stick-on drink lids for glasses and mugs, to keep your bevies hot or cold, as the case might be. But any preceptive paddler could easily discern they were actually cut-to-size covers for the air switch of your electric bilge pump system and splash lids for the mushroom head cork on the pump outlet. So I replaced the previous neoprene cover with the new silicone – it should be more watertight. Plus it accessorizes better with the colour of my kayak. And, as any of my friends will tell you, I’m nothing if not fashion forward.

Silicone drink cover, top
Silicone drink cover underside
Showing a silicone cover for the air button of an electric bilge pump in a sea kayak
silicone cover for air button
close up of a home-made splash cap for the cork protecting the mushroom head . Part of an electric bilge pump system in my sea kayak.
silicone splash cap for the mushroom head cork

Leveling Up: assisting on a Paddle Canada Sea Kayaking Level 2 course

Featured

I hugely enjoy my work as a sea kayak instructor, but since I’m only certified to teach up to Paddle Canada’s Sea Kayaking Level 1 on my own, I usually just get to paddle locally in the Iy̓ál̓mexw/Ayyulshun (Jericho Beach/English Bay) area with my students. So when the opportunity arose to assistant-instruct on a Paddle Canada Level 2 Sea Kayaking course, with three days and two nights away in Átl’ka7tsem/Txwnéwu7ts (Howe Sound), I was in faster than you can say “re-entry roll”!

Sweetening the pot was the fact that my friend and colleague, Mike McHolm, would be the lead instructor on the course. I’ve known Mike since he was a customer at the late, lamented Ecomarine. Mike absolutely caught fire as a kayaker, and recently earned his Paddle Canada Sea Kayaking Level 4 (for those not in the know, that’s about one step below being able to calm the seas and walk on the water.)

Mike and I have co-instructed on Paddle Canada Beginner Sea Kayaking and Intermediate (Level 1) courses before, and found we have nicely complementary skill sets: he’s the master of advanced strokes, braces, scrambles and rolls; I’ve got a solid background of practical experience with extended touring and navigation.

The prep for the trip portion of the course included two intense days of on-water and on-shore instruction at Jericho Beach over the September 16-17 weekend. As it happened, three of the six students in this Level 2 course were graduates of a Paddle Canada Level 1 course I’d taught the weekend before.    

September 29, 2023

A bit after 8AM, Mike and I rolled into Xwawchayay (Porteau Cove) in the Yakmobile (a Yukon truck with a custom-made roof rack that can accommodate up to ten kayaks). As we offloaded the boats, our students joined us. The usual knocked-over-anthill scurrying about ensued, as we all packed our kayaks for the first time on this trip. Next, we had a pre-launch meeting, where we went over “Me, We, and The Sea”, reviewed some compass navigation and dead reckoning techniques, confirmed our planned route, and designated lead and sweep paddlers.

sea kayak students at a prelaunch briefing
prelaunch briefing at Xwawchayay/Porteau Cove

We launched around 12:15PM onto calm and sunny seas, course set for the Defence Islands. About 45 minutes later we hit the gap between them, pretty much bang on our time-distance-speed prediction. 

sea kayakers crossing to the Defence Islands in Howe Sound, British Columbia
Crossing to the Defence Islands

From there, we handrailed along the shoreline to Ts’itpsm (Zorro Bay), practicing our bow and stern rudders as we went. The slight inflow wind that had picked up nudged us gently on our way.

Our class included many with prior sea kayaking experience, including Chessy, who’s previously paddled with Mike in some serious seas. She entertained us (and cooled herself off) by nonchalantly popping off both paddle and hand rolls enroute.

a sea kayaker handrolls her kayak
Chessy handrolls

We arrived at Zorro Bay to find, amazingly for a long weekend with such nice weather, that we had it all to ourselves. Some of us doubled up our tents on the pads sites to leave at least one platform open for possible later arrivals.

sea kayakers arriving at Zorro Bay/Ts’itpsm, Howe Sound, British Columbia
Arriving at Zorro Bay/Ts’itpsm. That’s me in the attractive orange Nor’western hat. Thanks to Julia for this image.

At about 15:30, we relaunched into the bay to work on bow and stern rudders and hanging draws. The shallow waters of the bay were turquoise, which combined with the sunshine to create an almost tropical vibe.

Actually performing a roll is not a requirement to pass Sea Kayaking Level 2: you’ve just got to be able to demonstrate you understand the theory. But Mike had led a rolling session during our pre-trip prep weekend, and some students had really gotten into it, among them Leah. Spotted by Chessy (she who had demonstrated hand rolls earlier), Leah pulled off a few paddle rolls herself before coming ashore.

Mike McHolm sea kayak instructing

stern rudder practice in Zorro Bay

Evening class was on knots and ropework as related to rigging tarps over tents and kitchens. Fortunately, this was all merely theoretical, as the clear skies continued.

With all this learning, we dined European-style late. The main course was a spicy dish of noodles in peanut sauce with stir-fried veggies, including wild-harvested mushrooms courtesy of Claus and Alysia (since none of us started tripping out or tripping over, we can assume they know their ‘shrooms.) For dessert, I heated a deep-dish apple pie in my Outback Oven ‘til it had a convincingly fresh-baked feel, then topped it with real, albeit aerosol-can, whipped cream. (In response to questions from the class, I did acknowledge that I’m not always sure whether I eat in order to kayak tour, or kayak tour in order to eat…)

I got to bed about 10PM. Initially it was warm enough that I merely draped my winter-weight down bag over myself duvet-style, but later in the night things cooled down enough that I burrowed into it full mummy-style, and was glad to have the option: crawling out of bed pre-chilled in the morning is not inspiring for a day of challenging paddling.

September 30, 2023

I made my way down to the beach to find warm and sunny conditions, with the water outside the bay windy with whitecaps – perfect Level 2 conditions (it’s a requirement for passing the course that students complete at least some paddling in waves with winds in the 19 knots range.) Tragically, the wind and waves died shortly after we launched at about 10:40. So all the students, who were attempting cowboy scramble re-entries (and reverting to paddlefloat re-entries if they couldn’t pull one off), got to swim in calm water.

It’s worth noting that Level 2 is the point at which instructors begin to stress test students a bit. It’s not stress for the sake of stress: it’s because, as Mike noted during class, overnight trips are getting into life-and-death decision territory, so it’s better to learn lessons from mistakes in practice than “for real”. It was in that spirit that I yanked an insufficiently-secured paddlefloat off the end of one student’s paddle during their re-entry. As I explained to them later on shore: if you think I was being harsh and unforgiving, imagine how harsh and unforgiving one metre seas would be. Fortunately the student understood my point completely, and no hard feelings resulted. 

After reviewing the bow and stern rudder and the hanging draw, we handrailed south along the shore towards Lhemlhemḵwús (Islet View) campsite. Enroute, Mike encouraged the students to head at maximum speed straight at a convenient cliff. This was not so much to test the strength of their kayaks; it was more to encourage them to deploy a low or high brace turn effectively!

sea kayak practice: a paddler uses a high-brace turn to avoid ramming a cliff with their kayak.
Putting his money where his mouth is: Mike McHolm uses a last-minute high-brace turn to avoid turning his very expensive sea kayak into very expensive kindling.

We landed at Islet View about 12:40. Shortly afterwards, a family arrived in a small RIB stacked high with camping gear and were visibly relieved to discover that the eight of us paddling riff-raff were just there for lunch. As Mike went over the shore lesson (the signs of and responses to hypo and hyperthermia), several of his friends from SKABC paddled in.

Ashore at Lhemlhemḵwúss/Islet View campsite, Howe Sound

We relaunched about 14:20, and did tows with both throwlines and towlines, working up to towing a victim who needed to be stabilized by being rafted with a second rescuer. This culminated in teams of three – two rescuers, one hypothermic capsize victim – towing a patient back to Zorro Bay, and setting up a rewarming “burrito”.

sea kayak rescue practice:  as one rescuer tows a "hypothermic capsize victim" a second rescuer is rafted up with the sometime swimmer to prevent a recapsize.
Tow me the way to go home: as one rescuer tows a “hypothermic capsize victim” a second rescuer is rafted up with the sometime swimmer to prevent a recapsize.
sea kayak rescue practice: rescuers help a simulated hypothermia victim out of her boat and onto the shore
Helping hands: the rescuers help the hypothermia victim out of her boat and onto the shore.
sea kayak rescue training: as a simulated hypothermia victim waits in the recovery position, two rescuers lay out a "burrito" for rewarming her.
Taco Time: as simulated hypothermia victim Chessy waits in the recovery position, Julia and Drew lay out a “burrito” for rewarming her.

Leah was once again keen to practice her rolls before supper, so I spotted her, occasionally offering my bow for a bow rescue. She returned the favour when I was ready to try a few. Fortunately for my instructor honour, no bow rescue was needed — all my rolls worked, though it has to be said that none of them were pretty or “demonstration quality.” Leah generously proffered the rationale that this was because we’d had a long, tiring day, and I gratefully seized on this pretext like, er, a kayaker who’s repeatedly failed their roll grabbing a friendly bow.

My drysuit insulation layers were mildly damp from a combination of sweat and slight seepage during my rolls. It was too late in the day to sun-dry them, so I used a trick from my days touring on the Northern wet coast: layering them onto the gear loft in my tent, then suspending a lit candle lantern a safe distance below. The gentle heat dries out the moisture and, as a bonus, provides a welcoming beacon for finding your tent after dark.

Drew and Julia were on supper duty, and did not disappoint: an excellent home-made chili with grated cheese, sour cream, bread and all the trimmings. I was once again the dessert chef. Tonight’s course was assorted Auntie’s Puddings. I hadn’t been able to fit the microwave oven recommended for reheating them into my skeg kayak, so I simmered them in hot water for 20 minutes instead. While that was happening I whipped up the instant custard without which no proper English dessert is complete. (I briefly thought I’d made far too much custard, but Leah and Julia actually hoarded the surplus in a water bottle overnight and added it to their breakfasts the next morning in lieu of milk!)

We were not the only mammals who dined well: as a shriek from the direction of the food cache box announced, Mike’s improvised fix to the box’s rusted-out bottom (piled-up gravel and rocks) had failed to keep out the mice. Fortunately, nothing critical was spoiled, and we moved our remaining provisions to the greater safety of the kayaks.

It was a working supper: as we ate, we covered Collision Regulations, Environmental Impact, Tool/Repair Kits and Indigenous Relations and Considerations (the latter especially appropriate as today was the National Day for Truth and Reconciliation, plus we were camped on First Nations Land generously made available as a water-access site.)

October 1, 2023

Determined not to be robbed of rougher conditions again, Mike had us all on the water shortly before 9AM. The sea state was a satisfactory brew of whitecaps and wind.

Making waves: rescue practice in rougher water
sea kayaking rescue practice: one sea kayaker offers the bow of her kayak to a capsized paddler, so the upside down paddler can roll up without having to wet exit their boat.
Bow rescue practice. For her first several capsizes, Chessy instinctively rolled up before Leah could “rescue” her. She had to make a conscious decision to refrain from rolling for this attempt.
sea kayak rescue practice: one kayaker uses the T-rescue technique to empty the boat of a capsized paddler prior to helping them reboard.
Returning the favour: Chessy T-rescues Leah in Level 2 conditions.

As expected, the class found all their maneuvers, from turns to re-entries, rather more challenging in sporty water. But when you think about it, bouncy seas are exactly the conditions in which you’re more likely to need braces, rolls or re-entries. So best to practice in realistic conditions. Enroute back to shore, the class got to use their stern rudders “for real” to keep their boats from being broached by the following seas.

We packed up camp while eating an early lunch, then launched for Porteau Cove, via a dogleg at Furry Creek. Enroute, Mike and I debriefed several of the students two-on-one.

Once we were just off Porteau Cove, a bit inshore of the buoys marking the sunken ship dive site, we did the final class exercise: an “all in” with everyone wet-exited and helping one another back into their boats.

Everyone in for the swim: an “all in” rescue at Porteau Cove

We landed, took advantage of the outdoor showers meant for the Porteau Cove divers to rinse the salt water off our immersion wear, skirts and PFDs, then packed up, including reloading several kayaks onto the yakmobile — that went a lot faster with a crowd of willing hands than it had on Thursday evening when Mike and I had been doing it ourselves at Jericho Beach Kayak. As we completed all this, we could see rain clouds moving in, proof that our timing had been perfect, weather-wise (and it was wonderful when unpacking at home not to be wrestling with wet and muddy gear).

Mike and I finished debriefing the remaining students, then said our congratulations and farewells. Holiday traffic meant it was fairly late in the day by the time we were back at Jericho Beach Kayak and offloading the boats, so we were both pretty bushed, and much overdue for showers (drysuits keep out the brine but seal in sweat and body odour with equal effectiveness). However, the satisfaction of having worked with a wonderful group of people and helped them towards new adventures kept us energized!

Putting the best face on things: all students and instructors looking alert!

Update: my fellow instructor Mike made a short video about the weekend that will give you a better sense of what dynamic water looks like.

Guiding Light: 2023 Jericho Beach Kayak staff trip to Halkomelem: səl̓ilw̓ət (Indian Arm)

Featured

One of the things I love about working as an instructor-guide with a raft of mostly younger colleagues is the chance to spark off their energy and enthusiasm. But at work, the longest paddles we typically do together are day trips. So getting away for three days and two nights up Halkomelem: səl̓ilw̓ət with many of them gave me a chance to feel like I could pay things back a little by demonstrating some campcraft, backcountry cooking and compass navigation to co-workers who might not have done a lot of kayak touring.

Read more: Guiding Light: 2023 Jericho Beach Kayak staff trip to Halkomelem: səl̓ilw̓ət (Indian Arm)

June 9, 2023

Having swung by Jericho Beach Kayak to pick up boats, we arrived at Deep Cove mid morning. I, like several others, was waffling back and forth about whether to bring my wetsuit or my drysuit on this trip. At the present, it was cool and cloudy, with showers predicted, but it was scheduled to get warmer and dryer later in the weekend. In the end, I opted for the drysuit, which proved to be the right choice. At least mostly.

Launching at Deep Cove
Heading out of the Cove. Note the marine sighting compass tucked under my decklines.
Tethering up the boats at the Twin Islands dock

As we lunched on the Twin Islands, the rain began to patter down. Shortly after we left the Islands, it upgraded to full showers, with a following wind. I’d stowed a folding sail on the back deck of my boat (I was paddling a kayak borrowed from JBK, and suspected my boss would not appreciate me drilling holes in it to mount a permanent sail, so the clip-on Windpaddle Sail it was.) My cunning plan had been to effortlessly cruise past, or at least alongside, my colleagues. But with the cloud, the wind was not the strong atabatic it would have been on a sunny day, so my sailing was significantly slower than I’d hoped. In the end, I did a series of leapfrogs – sailing until I was a few hundred meters behind the pack, then sprinting with the paddle to catch up, then taking a sailing break again, and so on. The end result was me landing pretty much with the pod at Granite Falls in the late afternoon.

Running through the wind and rain. Croker Island is faintly visible in the distance.

On this rainy Friday night, there were only a few other campers, which gave us a nice selection of sites. Some of our group doubled up tents on one pad, since we suspected the Inn would be much fuller tomorrow (we knew at least three more of our own group would be joining us.)

Landing at Granite Falls, Indian Arm, British Columbia
multi-person portage at Granite Falls

EJ, our fearless leader, had rigged the kitchen-dining tarp by the time I had set up my tent and changed into shore wear. Very necessary as the rain was falling heavily now. Audrey was my meal mate for making the group supper this first night, and was very patient with chopping vegetables (I was making this dish, but with the Chorizo fried separately to be added downstream by the non-vegetarians in our group.) I also managed to subcontract grating the Parmigiano Reggiano to Mika, which left me free to concentrate on toasting the pine nuts, frying the veggies in proper order and boiling a huge pot of pasta. It looked like a lot, but eight hungry kayakers made short work of it. Good thing I’d also brought a strawberry-rhubarb pie to heat in the Outback Oven. And hot custard to pour over it.

June 10, 2023

It continued to pour heavily through the night, so I was glad of the overtarp on my tent. The precip lightened off by the morning, but we were still glad of the kitchen tarp as we enjoyed oatmeal with a range of toppings, courtesy of Chris and Mika.

Paddling past Granite Falls

Then it was to the boats and off to the mouth of the Indian River. We’d planned to arrive at near high tide in order to get as far up the river as possible. With EJ demoing, the group got to practice paddling in currents. Though I used to run whitewater back in the day, being in an unfamiliar boat with a rather loose skirt, I opted to eddy out just below the sandbar the rest of the group made it to, and go birdwatching while they walked further upstream. During all this, we got the call on my VHF from the trio that were joining us today – Natalie, Maggie and Mark. I was pretty impressed that the handheld radios worked with us so far up the river.

Entering Indian River

After the exploration, we ran effortlessly downstream. The falling tide had made the river significantly more boney than it had been on our way in, but we got to a sandbar in the estuary without anything more serious than some sacrificed gelcoat. There Lyra and EJ laid out a beautiful buffet lunch for us. I got a chance to demonstrate a marine sighting compass and the use of a modified Douglas protractor to the group. After a bit of a learning curve with the sighting compass, the group did plot an LOP off the west side of Croker Island that put us where we already knew we were (how awkward if it had been otherwise!)

lunch at the Indian River buffet

On the way home, we both played and learned, experimenting with a variety of old and new strokes. Back at Granite Falls, as we’d expected, there’d been a massive population explosion, but everyone was being considerate of one another, and no-one was operating loud musical devices. (A sensible precaution, as it has been known for boom boxes at backcountry campsites to fall in the water, even from well up on shore. Funny that.) Natalie and Alex fed us to repletion on amazing ramen.

Paddlers in the hood

Mark is a stand-up guy!

June 11, 2023

Sunday lived up to its name, dawning clear and dry. I helped Marc and Maggie configure the campstoves to set up a pop-up IHOP, with excellent pancakes and a wide selection of toppings, including whipped cream! To tamp down breakfast, Alex led us all in some improvised yoga paddle warm-ups.

a magnetic tool with grains of local ferrous rock stuck to it.
This little magnetic stove tool is made to plunge the jet cleaner needle up and down. Turns out it’s also great for identifying ferrous rocks!
yoga posers
Sunday morning service

Natalie chills out on a water bed

Even with my lightest layers on under the drysuit, it would have been a boil-in-bag experience save for the fact I was wearing a Mustang Hudson suit, with a neck seal that could be loosened for a bit of ventilation.

We frolicked down the east side of Croker Island, with Marc and EJ giving us an on-water clinic on the use of cross-bow draws and hanging draws to slip along right next to the rock walls. Just off Silver Falls, the water was thick with Lion’s Mane jellyfish, including one monster that must have been a couple of feet across.

big ass jellyfish

As we made our way south, the kind-hearted Mika fished a winged warrior out of the water, where it had somehow crash-landed and stuck. With its wings dry, it was able to take off again from our lunch stop.

With the sun out, the inflow wind rose steadily as we clawed our way towards Thwaythes Landing for lunch. (Where was that wind a couple of days ago when I needed it to race north to Granite Falls?) Elaine and Rita laid out a zesty tortilla wrap buffet for lunch. Since I’d been lagging significantly behind the group just prior to lunch, I opted to launch earlier than them after lunch to get a head start and not hold the fleet back. (By prior arrangement, we were in touch on Channel 69 on the VHF.) Though I was nominally the navigator for the fleet, they assured me they were capable of “keeping the land on the right” until they reached Deep Cove. And so it proved.

Thwaythes Landing

By hugging the shore and finding back eddies from the wind, I made pretty good time back to Deep Cove, maintaining my 30 minute lead. The sea just in front of Deep Cove beach looked like a pond of mutant water lilies, with paddlecraft and inflatable rafts of every colour and size wafting about under varying degrees of directional control.

I tried to put my advance landing to use by running to Honey Donuts, hoping to greet the main invasion force on the beach with a box of a dozen gooey treats. But the weekend line-up was insanely long, so I instead grabbed a quick shower and fetched my car back from the long term parking.

It was evening by the time we got back to the Jericho Sailing Association, offloaded boats, and headed home in that happily weary way that ensures a sound sleep and sweet dreams.

Thanks to all my colleagues for sharing their knowledge, the pleasure of their company, and their photos!

April Showers bring… April showers

Featured

April 7, 2023

We’d laid plans for this trip with an Option A (Howe Sound/Átl’ka7tsem) and an Option B (Indian Arm/Nuth Khaw Yum Provincial Park). The predicted winds made Howe Sound sound rather too exciting, especially given that if we were crossing from Porteau Cove to the Islets View site, we’d have the wind and waves on the beam coming and going.

Rack n’ Roll: securing boats to the trusty Subaru
Read more: April Showers bring… April showers

So Indian Arm it was. Rhian and I swung by the Jericho Sailing Association compound to grab our boats, then met our accomplices, Paul and Nessa, at the Deep Cove put-in. A light drizzle washed us as we loaded and launched. 

Paul and Nessa snap a selfie at the Deep Cove put-in as Rhian and I demonstrate precision kayak maneuvers in the background.

Things cleared a bit as we made our way down the Arm, becoming what the Irish would call “soft”. Scraps of blue sky even appeared, lulling us into a false sense of security.

We paused to frolic briefly in the currents below Silver Falls, then pressed on.

Premature Exhilaration: Paul and I celebrate the blue sky. North Twin Island is visible on the horizon behind my outstretched left arm.
Sea kayak siren self-portrait: Rhian’s selfie


The rain held off as we landed at Bishop Creek (Berg’s Landing) in the late afternoon, letting us all rig both our tents and the overtarps for them. It began to foreshadow the coming deluge as we rigged the kitchen-dining tarp.

Nessa and I approach Bishop Creek/Berg’s Landing on the left. Croker Island is visible just beyond us.
Overtarps are de rigueur in heavy rain to reduce interior condensation in tents. So de rigger set’em up!
Paul and Nessa’s backcountry pied-à-terre. Happily, the grey overtarp I lent them accessorized well with their tent, else I’m sure they would have refused it.

Fortunately, the group consisted of seasoned outdoor folk, who understand that when it comes to weather, things are what they are. Plus, we had brought a lot of good cheer (mostly of the fermented-red-liquid-in-bags kind.) And, as this group’s now-traditional dessert, we heated a pie in the Outback Oven until it was as warm as though fresh-baked, and drizzled it with hot custard. 

April 8, 2023

Throughout the night, the temperature continued to fall, as did the rain. In fact, it cranked up to a volume that made last evening’s showers look like a desultory drizzle. Even landing on the tarp above the tent canopy, it drummed loud enough to preclude sleep. So I stuck in my ear plugs – not usually a recommended procedure in bear country, but honestly, unless Brother Bruin were clashing cymbals to herald his approach, I’d never have heard him over the rain anyway.

I was on breakfast duty and had massively underestimated the time needed to cook a “full English” for everyone in the group. It could only have gone slower if I’d started by planting the potatoes and fattening the pigs. Fortunately, no-one was in any hurry to leave the sheltering tarp, so the meal evolved into a leisurely “full English brunch”, washed down with endless cups of tea and coffee.

Camp kitchen, complete with cold and colder running water (under your feet)!

The ground under the kitchen tarp had gone from fairly damp last night to full swamp this morning. Fortunately everyone had waterproof pants for kneeling to cook or fill plates, and full-frame, above-the-flood chairs for actually eating.

By this point, all of us were wearing every layer we had when outside our tents, and counting our blessings that we’ll all brought winter-weight sleeping bags, pads and clothing. Entering and exiting the tents involved elaborate doffing or donning rituals that would have looked familiar to a hard-hat commercial diver. Vapour hung in the air with our every breath.

In the afternoon, Paul and Nessa, ever the bold and energetic ones, launched for a daytrip to Granite Falls. Rhian went on a wet weather photo safari, finding the beauty in the rain. I did likewise in my own way, hanging out under the tarp and admiring the way the swirling low clouds concealed and then revealed the various peaks and crannies in the fjord walls opposite our camp. And I pondered an additional point I would emphasize to the students in my Online Trip Planning Class: in the Marine Weather class, we typically talk about the importance of being dressed appropriately for whatever on-water (and possibly in-water) conditions prevail. But frankly, if everyone in our group had not been equipped with not just drysuits and appropriate layers, but winter-weight shore wear and sleeping equipment, we’ve have at best been trying to call a water taxi for the trip home and at worst needed to be medi-vaced for hypothermia.

Supper was tamped down with our also now-traditional hot Auntie’s Puddings and custard. (Are you sensing a theme here?)

April 9, 2023

Wanting to be back home at a reasonable hour for what promised to be several days of drying tarps, tents and selves, we’d agreed the night before to aim for a 9:30AM launch. Typically this means we’d actually launch nearer 10ish. But we were all apparently very motivated, and were sliding the boats off the cobbly, shelly beach at the appointed hour. Even with all four on each boat for the portage from the loading station to the water, we all walked very gingerly – one slip on the slimy, lumpy and shifty rocks would have been an excellent way to twist an ankle or break a leg.

Undamped spirits or contagious rictus? We Report; You Decide.
Rhian and Nessa model this winter’s must-have kayak cruise wear. From the high (and watertight) necklines to the little-black-cockpit skirts, they’re sure to make a splash wherever they go!

My three companions, all younger than me, set a smart pace back to base. At first, I kept up well, and was even in the lead for a bit. But gradually, I fell behind. If there had been a Captain Oates Award For Best Straggler, I’d have been a shoe-in. Fortunately, the situation was not quite dire enough for the others to suggest I go outside for some time. Besides, we already were outside.

About an hour out of Deep Cove, we got hammered by a headwind squall and blinding rain. In the low vis, I mistook two other paddlers who were bee-lining for their shoreline cottages as Paul and Nessa, and wound up paddling for sometime at a tangent to the rest of the group. But once the weather cleared, we re-united.

On the final leg to Deep Cove, the wind shifted, and I kept hoping I would get a least a sail assist to catch up with my friends. But the wind just toyed with me – repeatedly inviting me to rig the sail, glide through the water for a few seconds, then dying off. My companions were remarkably patient with all this faffing about. And even with it, we landed at Deep Cove shortly after noon.

The rain continued to fall so hard that Rhian and I simply stayed in our drysuits for the drive back to Jericho and dropping off our boats. Even with the wipers on full blast, the windshield often looked as though it were iced over. The heavens poured one last contemptuous dump on us as we offloaded the kayaks. And naturally, as I drove Rhian home from Jericho, the showers ceased and the sun began to peek coyly out from behind the clouds. That sun of a bi …!

Big thanks to Rhian, Paul and Nessa for sharing their companionship and photos!

Sea Kayak Navigation: natural ranges and pre-plotted LOPs

Featured

In a previous post, we talked about Lines Of Position and about two kinds of LOPs: the shoreline, and compass bearings taken from recognizable landmarks.

But sometimes we just don’t want to break our paddling flow to stop and take compass bearings. And sometimes exuberant waves make shooting and transferring bearings onto a chart that’s bouncing off the trampoline of a sprayskirt deck rather like working on a crossword while riding a Tilt-A-Whirl. At such times, it would be great to have “self-shooting” LOPs. Happily, these exist: they’re called ranges*. They come in two flavours: artificial ranges, which kayakers generally avoid, and natural ranges, which we embrace like the tree-huggers we are.

* Or “transits” if you’re British. They do have a strange habit of coming up with odd new words for things when there are already perfect serviceable ones in English. See truck/lorry, glasses/spectacles, trash can/dustbin, etc.

Read more: Sea Kayak Navigation: natural ranges and pre-plotted LOPs

Artificial ranges are often erected along narrow channels and tricky harbour approaches for the benefit of bigger boats. They’re typically a pair of brightly-coloured trapezoids mounted on frame towers a few hundred metres apart. When the captain of a ship sees them lined up, one directly above the other, it tells them they’re in deep water, in the centre of the marine traffic lane, right where they want to be. When the captain of a kayak sees the same thing, it tells them they’re in deep doo-doo, in the centre of the marine traffic lane, right where they don’t want to be. At best a kayaker may acquire an expensive ticket for interfering with bigger boats; at worst they might be pureed in the prop of an overtaking freighter. So take advantage of your kayak’s much shallower draft and hug the sides of any such vessel traffic lanes you must follow. (But also remember that the wake from big boats will get steeper and more spilly in the shallows.)

A photo of two navigation ranges, showing their appearance in real life.
A pair of artificial ranges. If you were piloting a ship downriver, you’d want to move far to the left to get the ranges to line up one over the other and put your craft in the deep water channel until you hit the 12A marker shown on the chart section below.

A section of a nautical chart showing how navigational ranges are indicated.
The same ranges, both circled in blue, as they appear on a nautical chart. The bright green circle shows approximately where the photo above was taken.

Natural ranges occur wherever two distinct landmarks line up from the paddler’s point of view. They’re the same sort of landmarks we’d be looking for when taking a compass bearing: the end of an island, a navigation buoy or marker, or the tip of a point.

Showing two landmarks as a natural range, creating a Line Of Position. The eastern tip of Gossip Island is lined up with Laura Point on Mayne Island.
Looking north from the shoreline of Miners Bay on Mayne Island. Laura Point, in the middleground on the right, is just overlapping with the eastern tip of Gossip Island, visible in the far background, beyond Rip Point and Burrill Point on the left.
A section of marine chart, with a line drawn showing natural ranges for determining your position.
The natural ranges from the photo above as they line up on a chart. Where the orange line meets the shoreline of Miners Bay is your location. (The large public dock you’d be floating beside would also be a good clue to your location, but you can’t always count on having such infrastructural validation, especially when you’re paddling in remote areas.)

Update March 2024: for another example of a range as an LOP, see the second half of this posting.

You can mix-and-match the intersection points of all types of LOPs to find your position. If all your LOPs are shorelines and natural ranges, you can usually count on them to be pretty accurate (islands and buoys generally don’t move around much). But if one of your LOPs is a compass bearing, it’s not a bad idea to take a second bearing off another object, just to offset errors in taking the first shot and transferring it to the chart.

The next best thing to a natural range as an LOP is a pre-plotted compass bearing. Especially when searching along a shoreline for a not-obvious-from-seaward campsite, a pre-plotted LOP can save a lot of anxious vacillation between “We should spot camp any minute now” and “We’ve overshot it and need to turn around.”

To pre-plot a compass bearing LOP, identify a landmark on the chart you’re confident will be visible as you’re approaching the target campsite in real life. Next, use a ruler or parallel rules to draw a straight line from the campsite to the landmark. Then, using either a hiker’s compass or a string-equipped Davis protractor, determine the magnetic bearing from the campsite to the landmark. (If you do all this at home or ashore in camp, it will be much easier to plot accurate bearings and draw straight lines.)

Pay no attention to the waterfall! We’re navigating by chart and compass, dammit!

For a worked example, let’s go back to the chart we used in this post. But now let’s pretend that instead of making a crossing from Elephant Point to the campsite, we’re paddling north along the shoreline of Granville Bay looking for it. (For purposes of this exercise, we’re going to ignore the fact that in real life, just north of this campsite, there’s a fourteen-hundred foot waterfall thundering down the cliffs as a subtle visual and audio clue to your whereabouts!)

A section of marine chart, with a hiker's compass used as a protractor to determine a bearing from one location to another.
How we determined the bearing from Elephant Point to camp using a hiker’s compass. The “Read Bearing Here” indicator on the compass shows 39°, which we rounded to 40° for practical purposes.

To determine the magnetic bearing from the campsite to Elephant Point with a hiker’s compass on the chart, we could just reverse the procedure shown in the photo above. We’d lay one edge of the compass baseplate running between camp and Elephant Point as before, but this time with the Direction Of Travel arrow pointing the opposite way. Next, we’d turn the compass bezel to make its meridian lines parallel to the blue magnetic North lines on the chart, then note the degrees shown at the Read Bearing Here indicator. But we’ve already done all the same sort of work to determine the bearing from Elephant Point to the campsite, as shown in the photo. That bearing was 40°.

You’ve probably heard the slang, “Doing a one eighty!” to describe turning right around to head straight back to where you came from? It’s a handy way to remember how to work out the reverse (technically called the reciprocal) bearing from B→A when you already know the bearing A→B. In this case, we know the bearing from Elephant Point to the campsite is 40°. So we add 180° (“one eighty”) to 40° and get 220° – the reciprocal bearing from the campsite to Elephant Point.*

*When our original bearing is 180° or less, we add 180 to determine the reciprocal. If the original bearing is greater than 180°, we subtract 180 to get the reciprocal. So if the original bearing had been 270°, the reciprocal would have been 90°. Why this way rather than just always adding or always subtracting? Because, for tediously complicated historical reasons, compasses use 360°circles. So unless you’re Captain Jack Sparrow, your compass won’t show a course higher than 360° or in negative degrees.

A section of nautical chart, with a Davis protractor, showing how to determine the compass bearing from one location to another.
How we determine a bearing from Elephant Point to camp using a modified Davis Protractor. Happily, the indicated bearing is 40°, same as for the compass method above. Alert readers will note that the reciprocal bearing, 220°, is also shown on the edge of the protractor, saving us from having to do the addition or subtraction described in the paragraphs above to get the bearing from camp to Elephant Point.
A section of a marine chart, with a pre-plotted bearing line from camp to Elephant Point.
A pre-plotted bearing line in green. The letter “M” after the noted 220° reminds us that this bearing is relative to magnetic North rather than true North. The arrows on the line indicate that the bearing shown runs from camp to Elephant Point.

So now we note the 220° bearing from the campsite to Elephant Point on the green line drawn between the two. As we make our way north up the shoreline of Granville Bay, we periodically take a shot of Elephant Point with our hiker’s compass or our deck compass. If the bearing we get is greater than 220° (I.E. further south), we know we’re not quite there yet; if it’s less than 220° (I.E. further north), we know we’ve overshot.  

A section of a marine chart with a pre-plotted bearing and a taken bearing south of it.
Imagine we are paddling north along the shore of Granville Bay and are at the orange circle over the end of the word “Granville”. If we were to take a bearing to Elephant Point from here, using either our hiker’s compass or deck compass, we’d get a reading of about 244°. That’s south of the 220° pre-plotted bearing to camp, so we’d know we weren’t there yet.
A section of marine chart showing a pre-plotted compass bearing and a bearing taken from north of it.
If we found ourselves at the location of the orange circle shown here, a compass shot to Elephant Point would give us a bearing of about 204°. That’s north of the 220° pre-plotted LOP to camp, so we’d know we’d gone too far.

It’s good practice to er, practice with LOPs of all kinds even in waters you know like the back of your hand. In fact, especially in waters you know like the back of your hand. That way you’ll quickly recognize any errors you’ve made. Then, hopefully having made all your mistakes in low-consequence situations, you’ll be more confident and competent when applying those skills “for reals” in unfamiliar environments. 

Sea Kayak Navigation: Plotting Your Position With A Compass

Featured

In an earlier post, we discussed how to use a chart and compass to find a compass bearing we could follow to a desired destination. But all those techniques for heading somewhere new require us to know where we are now. As any kayaker who’s ever done a longer crossing or paddled along a featureless shoreline can confirm, it’s easy to lose track of your precise location. How do we find it again? 

First, a quick detour into a concept called a Line Of Position (LOP). You’ve almost certainly used LOPs before, even if you didn’t call them LOPs. If you were wandering around a city (for example, Vancouver, British Columbia) with a paper street map, you might have known you were somewhere on Granville Street, but not sure where along Granville. So you walked down to the next corner and checked the signs for the cross street. Finding it was Broadway, you now knew your exact location: the intersection of Granville and Broadway. Each of those streets served as one LOP for you. Where the two LOPs intersected was your location.

A section of roadmap showing the intersection of Broadway and Granville in Vancouver, British Columbia. Demonstrating the concept of Lines Of Position.
Granville Street is one Line Of Position. Broadway is a second Line Of Position. Where they intersect is your location. See, you’re already a navigator!

To determine our location when sea kayaking, we do exactly the same thing: we find the intersection of two or more LOPs. The only difference is that we use lines other than streets as our LOPs.

Even for novice kayak navigators, there’s one Line Of Position that’s so obvious you’ve probably used it without even thinking about it: the shoreline. (Yes, most shorelines are curvy and crinkly rather than straight. But there’s no requirement that every Line Of Position be a straight line. In my hometown of Vancouver for example, Kingsway Road has lots of jinks and bends, but I can still use it to clearly define a position such as “the intersection of Kingsway and Broadway.”)

Bendy LOPs? No problem: where they intersect is still your position.

So, if we only ever intend to navigate along shorelines, why would we ever need a second LOP?

Imagine you and I and several friends are kayaking close alongside the southwest shore of North Pender Island, admiring the undersea flora on the rock wall and petting the passing Orca. Distracted by all this merriment, we’ve lost track of how much time we’ve spent paddling vs drifting. Plus, the tricky currents on this coast have sped us up or slowed us down unpredictably. So now all we’re sure of is that we’re somewhere between Boat Nook and Smuggler’s Nook. We need a second LOP to show us exactly where between those points.

A section of marine chart, showing the lines of magnetic North drawn in with red, to allow plotting Lines Of Position without adding or subtracting for compass variation.
A section from CHS Chart #3441. Look for Canoe Rock (below the purple compass rose) and Pelorus Pt (on the right/East side of Moresby Island). The red lines I’ve drawn in point to magnetic North, 16° East of truth North. (Why 16° East? The purple compass rose shows true North, magnetic North as of 2005, and a predicted change in the magnetic variation of 8’ Westward annually. So in in the 18 years since 2005, the variation is predicted to have reduced by 2° 24’ (18 years x 8’ = 144’ or 2° 24’). The variation in 2005 was 18 1/2° or 18° 30’. Subtracting 2° 24’ from that gives us 16° 6’ East. This matches pretty closely with the 15° 46’ East predicted for this area by the online declination calculator. We can round either figure to 16° East for practical purposes.)

To lay out a second LOP, we need to take a compass sighting (AKA a bearing) from any clearly identifiable location shown on the chart and visible from where we are in the real world. A lighthouse, the tip of a cape, one side of a known island, or a distinctive mountain peak would all be excellent options. 

Looking out to sea from Pender Island, we find a highly distinctive landmark to take a bearing from: the red-and-white marker on Canoe Rock. Even better, it’s at roughly a right angle to the shoreline. (It’s a good habit to pick your landmarks so that your LOPs meet at as near to right angles as possible; this creates a much clearer intersection point than sharp acute angles or almost parallel obtuse angles.)

Taking a bearing from a real-world object (in this case, the orange thingie representing the marker on Canoe Rock) using a hiker’s/orienteering compass. Step 1. Holding the compass as level as possible, aim the Direction Of Travel arrow towards the landmark. Pro tip: this is much easier and more accurate if your body is facing the landmark. Which means your boat should also be pointing in at least the general direction of the landmark. Notice that at this time, the compass bezel dial is in a random direction relative to the magnetic compass needle, with the N (for North) on the bezel not aligned with the red needle tip. 
Taking a bearing from a real-world object using a hiker’s/orienteering compass, Step 2. While keeping the Direction Of Travel arrow aimed at the landmark, twist the bezel dial until the meridian lines in the bottom have put “Fred in the shed” — that is, the red box on the bottom of the bezel is enclosing the red half of the magnetic needle, and the N on the bezel is directly in front of the red needle tip. Read off the degrees at the Read Bearing Here indicator. In this case, the bearing to Canoe Rock is 224°. (BTY, if this whole process feels exactly the same as taking a bearing to a visible landmark you want to paddle to following a compass course, that’s because…it is!)

Great. We have our bearing off Canoe Rock. So now what? So now, we’re going to transfer that bearing into an LOP on our chart.

A section of marine chart with a hiker's compass, bezel parallel to the lines of magnetic North. Showing how to draw a Line Of Position on a chart.
Using a hiker’s compass to transfer a bearing onto a chart as an LOP. We keep the bezel dialed to 224°, from when we “shot” our bearing to Canoe Rock. Keeping the meridian lines on the bottom of the compass bezel as parallel as possible to the red magnetic North lines on the chart, we put one edge of the compass baseplate on the Canoe Rock landmark on the chart. That baseplate edge is now a Line Of Position. Where that LOP intersects the shoreline is our location. In this case, the baseplate doesn’t quite reach to Pender Island, so we extend the LOP by eye and pencil it in. (Notice that we don’t care about where the compass needle is pointing now: we’re just using the compass bezel and baseplate as a protractor.)

Woot! We are unlost! We are right where the shoreline (the first LOP) and the bearing from Canoe Rock (the second LOP) meet. High fives everyone! 

BUT…

We took that compass bearing with a hand-held land compass from the cockpit of a kayak rocking in the waves (landing to take the bearing wasn’t an option on the cliffy shores). And we extended that LOP by eye from where we ran out of compass baseplate. So there have been lots of opportunities for errors to creep in. How can we cross-check our apparent position? By determining a third LOP.

Happily, our pod of paddlers includes the excellently-equipped Greta Geerweenie, so we can not only shoot an entirely separate landmark, we can do so using a more accurate instrument. Because Greta’s kayak boasts a deck compass, aligned with the keel line of her kayak. So to take a bearing, she simply aims the bow of her boat toward her chosen landmark (Pelorus Point on the east side of Moresby Island), and reads the bearing in degrees at the lubber line.

A model kayaker with a real, full-sized marine compass pointing towards a marker. Showing how to take a bearing on a landmark with a deck-mounted kayak compass.
Taking a bearing with a deck-mounted marine compass. With the kayak pointing towards the real-world landmark (the orange thingie now representing Pelorus Point), we read the bearing directly from the black “lubber line.” In this case, it’s 172°. (No bezel twisting required. Because instead of the needle on a hiking/orienteering compass, a marine compass has a floating, degree-marked dial that rotates to line up with local magnetic North.)

But Greta’s opportunities to flaunt her superior gear don’t end with the deck compass. Now it’s time to transfer the bearing she shot onto the chart as that third LOP. Rather than roughing it with the hiker’s compass, she whips out her modified Davis Protractor, complete with String™ that extends much further than the baseplate on a hiker’s compass.

A chart with string-added Davis Protractor. Showing how to use the string as a Line Of Position to determine your location based on a compass bearing to a known landmark.
Using a string-equipped Davis Protractor to transfer a bearing onto a chart as an LOP. Position the protractor’s centre point over the landmark we took the bearing on (Pelorus Point). Pivot the protractor until its North-South grid lines are parallel to the red magnetic North lines on the chart. Pull the string taut across the degree reading we got with the compass (172°) on the outside edge of the protractor. Where the string intersects the shoreline is our location. Reassuringly, it’s pretty much the same place as the LOP from the first landmark showed us. (And remember how we said we don’t care about where the compass needle is pointing for this step? The Davis Protractor doesn’t even have a compass needle to distract us!)

We won’t always be paddling with a Greta Geerweenie. But we still can (and should) cross-check our plotted position wherever possible by shooting at least two landmarks as bearings and bringing them down onto our chart as LOPs, even if we’re only using a humble hiker’s compass for everything. It’s also true that in the real world, our multiple LOPs won’t usually intersect with the suspiciously perfect agreement they have in this story: typically they’ll form a triangle. You’ll know you’re somewhere inside that triangle, and as long as it’s small enough, it will be good enough for navigation purposes.

A PLOT TWIST!

Clever readers (which is all of you, of course) will have realized something: once we’ve intersected two or more LOPs based on compass bearings, we don’t need the shoreline LOP anymore to know where we are. That’s exactly how bigger, deeper boats, who need to stay further from the shore than kayaks, do it. And exactly how you can do it as you graduate from simple shoreline paddling to longer crossings. There are even other compass-free LOPs you can use when away from the shore. But we’ll save those for another post.

And that “another post” is now up here.

Freshwater Get-away

Featured

September 30, 2022

Wanting a trip that was low in cost and complications, we’d opted for a fresh water adventure on Alouette Lake in Golden Ears Park. This avoided the time and deadlines of ferry trips, and let three of us revisit a campsite we hadn’t been to in many years. The expedition consisted of myself, my friend Rhian, and Paul and Nessa, two longtime friends I hadn’t seen in person since before the pandemic.

Rhian and I met the other two expeditioneers at the boat launch on Alouette Lake about noonish. As anticipated, with all the faffing about, we didn’t launch until about 1:30 – just in time for the afternoon wind to have ramped up in our favour.

The fleet ready to launch. The Narrows is visible in the distance as the gap between the taller mountain on the left and the much lower hill on the right. Photo courtesy Paul Richards
Continue reading

Shoulder season on the Sound: Hotham Sound

Featured

September 30, 2021

During the drive to Earl’s Cove, heavy rain showers coated the winding road with sheets of water a centimeter deep at times. It was uninspiring, but by the time we arrived at the ferry terminal, it had cleared.

As we approached Saltery Bay on our second ferry ride of the day, we could see Freil Falls (AKA Harmony Falls) in the distance off the starboard side. Shortly afterward, the ferry crew announced whales cavorting off the port side. I snapped a couple of photos of the “you can’t quite make it out, but this black blur is a whale” variety.

The Falls in the distance
A humpback whale spyhops in the distance

By the time we’d landed it was late afternoon. Packing the boats for the first time on any trip always involves a couple of hours of faffing about, especially when you have to go park the car several hundred meters from the put-in after offloading. So we opted to car camp at Mermaid Cove that night, and make a single hop, all by daylight, to our intended destination at Elephant Point the next day.

Continue reading

VHF Marine Radio: A Lifeline for Sea Kayakers

a chart showing the Canadian Coast Guard coverage area for DSC equipped marine VHF radios
The DSC system covers most places a sea kayaker would want to go on the BC coast. These antennas are not like cellphone repeater towers: they will let you communicate with the Coast Guard; they will not retransmit your calls to other VHF users. [From https://www.ccg-gcc.gc.ca/publications/mcts-sctm/ramn-arnm/part4-eng.html ]

“Hello? Hello? Is anybody out there?” The call came faintly over my handheld radio, secure in its holster on the shoulder of my PFD. No details on what they were hailing about: was it a life-threatening emergency, were they wanting weather information, or were they simply lonely and thought marine VHF worked like CB radio for casual chats with random strangers? Whatever it was, the only thing they had communicated was that they didn’t know what they were doing. I just had time to hear the Canadian Coast Guard respond before my attention was taken up by one of the guests in the kayak tour group I was leading.

Calls like that underscore why it’s common sense, as well as the law, to get your Restricted Operator’s Certificate, Maritime (usually shortened to ROC [M] and pronounced “rock ’em”) before using a marine radio. It’s not a black art: a few hours of study and a short exam will get you in the game, all ready and legal. It’s just that, as in other fields, a specialized vocabulary and specific protocols allow quick and unambiguous communication. Had that muddled radio user known them, it would have been clear from their first transmission what the nature and purpose of their call was.

But, I hear you ask, why would I, a humble sea kayaker, want a marine VHF in the first place?

Some sea kayakers might feel it’s a bit pretentious to sport a full-fledged marine radio—after all, we’re not large craft. But I’ve always treated sea kayaking as real seafaring, albeit with everything—boats, crossings, crew size—scaled down. So a miniature version of the “big boys’” radio makes perfect sense to me. 

Other paddlers might feel a radio is superfluous: they have their trusty cellphone in a waterproof baggie. And you can indeed reach the Canadian Coast Guard by dialing *16 on your cell. But shockingly, the Coast Guard isn’t always going to have a rescue boat just around the corner from where you are. In many, if not most, cases, they will be getting on their VHF radio to see if there might be a nearby good Samaritan who could help you faster. Putting out a call for help on a marine radio allows you to communicate directly with any “vessels of opportunity”, eliminating the need for the Coast Guard to act as a middleman.

Then there’s also the fact that if you’re voyaging to the remote outer and North coast parts of BC, your particular cellphone carrier might not have coverage in that area. But as long as you’re within radio range, you’ll be able to talk directly to other boats. And thanks to a series of strategically placed antennas on high ground up and down the coast, there are very few areas on the BC coast (except far down some of our deep fjords) where you wouldn’t be able to contact the Coast Guard directly (see map).

As a further bonus, thanks to another network of land-based antennas, you should be able to receive marine weather broadcasts on your VHF weather channels pretty much anywhere on the coast—very handy when you’re off the cellphone grid and can’t access the marine weather website.

A marine VHF is certainly useful for emergencies, but even more useful for preventing emergencies. Some years ago, I was leading a small group of coworkers on a kayak trip from Prevost Island south to Portland Island in the Gulf Islands. Partway through the crossing, a BC ferry appeared out of the western end of Active Pass, en route to Swartz Bay. I knew the late afternoon sun would be reflecting off the water around us and dazzling the eyes of anyone on the ferry’s bridge. So I hailed the ferry on my VHF, gave them our position from my GPS, and herded my fellow paddlers into a tight group so the ferry wouldn’t have to slalom through us. Similarly, when doing a solo crossing of Johnstone Strait, I’ve made contact with a tug towing a barge to clarify its course and intentions and to confirm they were aware of my presence (something not to be taken for granted when you are a very small object in very big waves, and the helmsperson on the tug may be multitasking).  

Even for routine on-water communications, radios are superior to cellphones. Simply pushing a button and talking is a lot faster than dialing and then waiting for the call to go through and be answered. As a kayak guide, I’m often with large groups, working with several colleagues. Any radio call one of us makes is heard by all the other guides—very handy since we’re often doing the marine version of herding cats. Nor do you need to be a pro guide to benefit from these “everyone in the loop” communications: it’s equally useful for club outings, or even when it’s just you and your paddle buddy. 

So now that I’ve hopefully sold you on the idea of getting a ROC (M) and a radio, which radio should you get?

To DSC or not to DSC—that is the major question

DSC, or Digital Selective Calling, is a feature that uses a dedicated channel to let radios sync with one another digitally, and so perform all kinds of cool tricks.

Assuming the party you want to call is also using a DSC radio, and that you know their MMSI (Maritime Mobile Service Identity) or MI (Maritime Identity) number, you can call them directly, without having to hail them first by voice on Channel 16. It looks and feels a lot like calling someone from your list of contacts on a cellphone. (Although, as I caution people in my ROC [M] courses, unlike a cellphone, your conversations aren’t private: anyone who’s tuned into the channel you’re using can hear you.) 

If you do need to put out a call for help, pushing the red DISTRESS button on a DSC VHF will start digitally broadcasting your Mayday, your MMSI/MI number, and your position in latitude and longitude. Any DSC-VHF-equipped boat with its radio on and in range will receive it, as will the Coast Guard (see the coverage map above). Ideally, you’d follow up pushing the DISTRESS button with a voice Mayday on Channel 16, but I’m sure you can imagine scenarios in which all you have time to do is push the red button, then cope with the situation at hand. In such cases, it’s reassuring to know the radio is automatically squawking out your digital Mayday and updated location every few minutes.

Downsides to DSC radios are that they are more expensive to buy and have a shorter battery life due to powering the integrated GPS (though on many models, you can reduce power consumption by slowing down the position update rate).

So do you want a DSC or non-DSC radio? My answer is to get one of each. When paddling or instructing in my home waters of English Bay, Vancouver, I use my non-DSC radio since I’m confident of my ability to give my location clearly in reference to local landmarks. That puts the highest daily wear-and-tear on my less expensive radio. For touring, I carry the more expensive DSC radio for its ability to send out my location accurately when I’m in less familiar waters and/or further offshore.

Most radio manufacturers make the instruction manuals for their products available on their websites. So you can browse the manual for the model you’re considering and see if it has the features you want and if the menu works in a way that makes sense to you.

If you are buying a DSC VHF, you’ll need an MMSI or MI number to activate the DSC features. Industry Canada will only issue those for radio models that have been IC-approved. Plus, radios for use here need to have the appropriate CAN, USA, and INTERNATIONAL operating modes. So while it’s OK to order radios online, it’s best to do so from stores that have a bricks-and-mortar presence in Canada so you can be sure their products are ready for use here. I had a student in one of my ROC (M) classes who’d ordered a DSC handheld from one of those mysterious overseas sites. It arrived without IC approval or the proper mode functionality, so they wasted their money. (A note to American readers: please adjust the above info for your country. And if you’re paddling in Canadian waters, your radio will need to have a CAN mode for you to talk to users here. This has to do with channel frequencies and simplex-duplex channels.)

Waterproof…ish

Almost all handheld marine VHFs are advertised as being “waterproof”. But that seems to mean something less demanding to ordinary boaters than to kayakers. The typical use for a handheld might be on the decks of a larger boat in the rain, or perhaps in a dinghy on trips away from the mothership. The worst case scenario there might be the dinghy pilot dropping the radio in a few inches of bilge water for ten seconds. But if a kayaker has to do a wet exit with their VHF in a PFD pocket, the radio gets pushed several feet below sea level during the ejection phase, and might remain a foot or more underwater for a long time if reboarding is difficult or impossible. 

Waterproofness is measured on an IP scale. IP7 is the minimum for a sea kayaker; IP8 would be great if you find such a radio with all the other features you’d like.

There are custom-made waterproof radio baggies available, but I find them awkward. They make it tough to see the screen and a battle to operate the controls. As a final insult, the baggie clips often prevent the radios from fitting in PFD pockets.  So I carry my radio naked and accept that the price of greater accessibility is that it will eventually die from saltwater exposure (usually just after the two or three-year warranty has expired). 

Keeping your handheld at hand

Some paddlers carry their radios under their deck bungees or in the glove compartment hatch on the front deck. I’m not a fan of either: if you became separated from your boat after a wet exit in big waves and high winds, that’s when you might most want a VHF. 

Because I’m routinely transmitting with my radio, I like having a radio pocket or case on my PFD shoulder that lets me quick-draw and quick-reholster. It baffles me that many sea kayaking PFDs don’t come with radio-specific pockets with pass-throughs for antennas. And that a certain kayak personal equipment company, whose products are otherwise intelligently designed, persists in putting the radio pocket on some of their PFDs dead centre at the waist front where: 1. The antenna is perfectly positioned to go up your nose; 2. If you’re swimming, both the radio speaker and antenna are underwater; and 3. The radio is subject to maximum crushing force under your body as you slide along the back deck after a seal flop or heel hook re-entry.

a photo of a holster for a marine VHF radio, mounted on a sea kayaking PFD

My current radio holding hack is a Nite Ize cargo holster, with the top flap cut away for antenna clearance, and a dollar-store hook-and-loop strap sewn on that can be released or secured one-handed. It stretches to fit either my DSC or non-DSC radio snugly, and the rotating back clip secures easily to the shoulder strap of my PFD. I like having the radio, especially the antenna, at least mostly above water in its holster in case I dump, especially if I’ve pushed the DISTRESS button and need the radio to be automatically calling for help while I thrash for shore or cling to my upturned boat.

But if you’re not constantly transmitting with the radio, the removable belt clip that comes with it should be fine for clipping to the webbing or somewhere on your PFD. Whatever system you use, add a lanyard and hook to prevent losing the radio if it should slip from your hands. I prefer the Scotty nylon snap hook over metal carabiners since it won’t rust or bang destructively against my radio.     

A part of many layers

If you’re familiar with the Swiss-cheese model of accident causation, you know that the more layers of equipment and/or skill-based defences you have, the more opportunities there are to break the chain that can lead to catastrophe. A VHF radio can be part of many of those defences: in the outer layers, it lets you access marine weather reports that help you make go/no-go decisions; in the middle layers, it lets you communicate with kayakers and other boaters to prevent confusion; and in the inner layers it lets you call for help if all else fails.

In more than three decades of carrying handheld VHFs for sea kayaking, I have never needed to send a full-on Mayday call. And I couldn’t be happier about that. But I’m also very happy to know that if the need should ever arise, I have both a radio and the knowledge to use it effectively. I think you should, too!

Philip Torrens is a long-time sea kayaker. He instructs on-water, onshore, and online classes for Jericho Beach Kayak, including the course to get your ROC (M). He’s the majority owner of WestCoast Paddler, an online community for kayakers. He also blogs about kayak trips and techniques at https://philiptorrens.com/

Crossposted from https://www.bcmarinetrails.org/vhf-marine-radio-a-lifeline-for-sea-kayakers/.

WestCoastPaddler meet-up

Prologue: Back in the day, all the available members of Westcoastpaddler used to have an annual meet-up on Portland Island on the last weekend of April. What with COVID and one thing and another, it had been years since this had happened. So as co-owner of WCP, I was very excited when we decided to renew the tradition this year.

April 25, 2025

I drove into the long term parking at Tsawwassen ferry terminal shortly after 9AM. It might have seemed ridiculously early for an 11AM sailing, but I like to have time in hand to deal with curveball crises. Which proved to be a good idea: as I pulled my kayak cart wheels out, I was hit by a letdown feeling: both tires were so flaccid that they’d have rolled right off the rims under the load of my kayak and the weekend’s cargo. After a frantic few moments, I remembered I had an electric pump for my car tires in the back – and fortunately the valve fitting was also right for the kayak wheels. With the tires once again fully tumescent, I heaved the boat on the cart, and the cargo into the boat.

Wheeling up to the foot passenger wicket, I spotted a beautiful skeg kayak on a much more compact cart. And soon found Alana in the line up. We brunched on burgers on the ferry and compared notes. At Swartz Bay, Alana wheeled off towards the public dock to launch; I rolled over to the ferry to Fulford Harbour.

My cunning plan was to put in at Fulford Harbour, supposedly upwind from Arbutus Point based on the forecast, raise my kayak sail and glide effortlessly down to camp. Like many cunning plans, it hit several snags. Firstly as I launched, I discovered the metal bracket guiding the rudder lift/lower line had broken off, so I couldn’t raise or lower the rudder from the cockpit. But that was rather a moot point since (secondly) as soon as I put my feet on the foot pedals, the swaged copper stopper holding the right rudder cable end popped off. So I had no steering anyway for my non-deployable rudder. Fortunately, I’d upgraded the foot pegs from the “slidey” type that were OEM for a vintage boat like mine to the gas pedal ones that stay in place even with broken cables. So I could still brace properly in the boat. But it did mean that if I were sailing, it would require a lot of nimble work with my paddle to steer, because no rudder. But that issue went away as I discovered (thirdly) that the wind was SE rather than the promised NW. No sailing for me. Reduced to paddling – the horror! The horror!

Still the sun sparkled on the bright blue sea, and I had a very pleasant crossing, threading through the shallows on the north side of Russell Island, over the white shell bottom.

Otter in the water.
Russel Island on the horizon, with Portland Island visible behind.

With no rudder in the water, the Expedition kayak had a tendency to weathercock once I was out in the main channel. But that wasn’t entirely bad, as I needed to ferry between 30 and 40 degrees to windward to counter the downwind drift. (I was detecting and correcting for drift by using the tip of Arbutus Point and the high flat peak of Moresby Island behind it as a range.)   

After a couple of happy hours, I arrived off Arbutus Point to find, as expected, Alana was already in residence. Based on previous soggy experience, I lurked offshore while the wake from a recently passed BC ferry dissipated. (Surf landings in loaded boats are rather too exciting.) 

There were a few other kayaks already on the beach, but none of their owners were here for the WCP meeting – or even knew what it was! So Alana and I supped together with our respective meals, and hit our tents fairly early as it was cool and buggy.

Night, night.

It was while I was seated on the edge of my sleeping pad, writing up my journal, that the first foreshadowing of a restless night emerged: with a muffled twang, one of the internal battens in the pad parted. A small hillock now bulged up out of the formerly featureless plain of the pad. Oh, well, not too bad, right? Wrong. As I lay abed, there occurred a slow but relentless progressive failure as each torn batten put more load on its neighbour, leading it to tear in turn. My mat transformed itself first into a sort of half-inflated life raft—with my feet at the high end and my head on the ground, naturally—and then finally into a pneumatic log. After an indeterminate period of trying to drape myself over this squashy cylinder and being regularly bucked off just as I dozed off, I gave up, deflated the mat, and slid a spare fleece top between my body and the ground. But it wasn’t like the venerable pad owed me anything: it was more than a dozen years old, and the cozy companion of many a night. 

April 26, 2025

Over my breakfast of tinned hash and fruit cocktail, I discovered a third WCPer had infiltrated Arbutus Point under cover of darkness last night, and slept commando-style beneath the stars. (Many of you will know Alex from the amazing adventures and photography he has shared over the years at Alexsidles and on Westcoast Paddler.)  

Alex on the water

Later in the morning, Alana and Alex decided to join a pair of the other paddlers (Liam and Jane, also kayak guides as it turned out) on a quest for homemade ice cream in Fulford Harbour. 

I had a bit of cutting and chafing under my left arm (later determined to be caused by the very deep cockpit and high seatback of the Expedition kayak pushing my PFD higher up my body than in my other kayaks, and rubbing the lower edge of the arm hole against my armpit. I have an alternate PFD with a shorter torso I’ll use on future trips with the Expedition.) Plus, I wanted to see if I could fix the rudder lines and cable on my boat. So I puttered happily on the beach as the others paddled off. 

First, I improvised a guide for the rudder raising and lowering line by running it through the tent pole repair sleeve from my repair kit and duct taping that to the V-cradle for the previous rudder on the back deck. With the tape looped right around and under the hull, it was pretty fugly. But functional.

How to hack a line guide.

Next, after a bit of hesitation, I dismounted the right pedal and housing from the hull, then completely disassembled it in order to rethread the cable through it. I worked as carefully as any surgeon to ensure I didn’t drop any of the nuts, bolts or screws into the concealing sand. By adjusting the loop where the cable runs around the tiller at the rudder, I freed up some slack at the foot pedal end, which I then tied into a figure 8 stopper knot to replace the missing swaged copper stopper.    

I was just congratulating myself on the success of these field repairs when the Fulford Harbour Foursome hove back into view on the horizon. Per an earlier promise, I donned my drysuit and waded into the shallows with my GoPro to video Alana working through her rolls and static braces. I congratulated her on pulling off rolls better in quality and variety while in her first trimester than I ever could while non-pregnant. “Second trimester” she casually corrected me. Which of course made me feel much more adequate. 

Alana on the water.

As Alana was changing into her shore wear, a lone kayaker appeared. This proved to be Mick, which was a welcome surprise as I’d originally expected him to be there on the Thursday and leaving on the Friday, so we thought we’d missed him. So now we were four WCPers.

It turned out Mick had managed to leave the bag with his intended dish for the potluck at home. And that turned out to be a good thing. Because with just my veggie pasta dish, Alana’s corn salad and Alex’s zingy tofu offering, we had so much surplus that we had to accost our neighbours Liam and Jane and foist food upon them – not just for supper, but also leftovers for their lunch the next day!

Saturday night supper!

Armed with my carefully sun-dried sprayskirt as an improvised sleeping mat, I slept much more comfortably than last night.

Sunset over Saltspring Island

April 27, 2025

Over breakfast and coffee, I chatted with Mick and Alex. It turns out we all three share an interest in traditional Polynesian and Micronesian methods of ocean navigation, so the conversation flowed freely.

Alex and Alana launched together about mid-morning for Swartz Bay. Mick was staying another night, so I bid him adieu as I launched shortly before noon.

Alex and Alana set off.

I had to paddle only a few hundred metres to escape the lee of Portland Island before I was able to hoist the sail. (I was so glad to have invested the time to fix the rudder and foot peg cable!) At first I was merely ghosting along, but the wind and my speed increased as I went. Once I’d opened the mouth of Fulford Harbour, I could have sailed in a straight shot down to the public wharf and ferry dock. But I was having far Too Much Fun, so instead I zigzagged downwind in a series of ever-speedier broad reaches.

Fair bids the wind for Fulford Harbour!

I got some good video clips, but no footage of the most exciting sailing since my hands were literally full. As the wind sped up between the contracting hills at the far end of Fulford Harbour, I had to lean to the windward side of the kayak (the paddler’s equivalent of the sailor’s hiking out). As I’ve done before in high winds, I also lay my paddle on the water on the windward side in what I call a flying brace: with the leading (forward) edge of the blade angled slightly upward, the blade is continually lifted by the forward motion of the boat as it would be during a sweep brace, so the paddle becomes a hydrofoil outrigger I can lean aggressively down on if a gust threatens to capsize me to leeward.

I stopped to furl the sail a hundred or so metres upwind of the public wharf, so I’d have had some searoom to sort things out if they’d gone sideways. But fortunately for my pride, all went smoothly.

I pulled alongside the public wharf about 1:15PM. Even with an unhurried remount of the boat onto the wheels, portaging the cargo separately up the dock ramp, then reloading the boat, I was able to stroll on the 1:50 ferry just behind the last car, as if the ferry had been my own personal transportation just waiting for me before departing.

Farewell to Fulford Harbour – for now.

Great to have relaunched the get-together tradition. Hoping more WCPers can join us next year.


Four Day Getaway: An Escape To Átl’ka7tsem/Txwnéwu7ts (Howe Sound)

Prologue: this spring, I scored an ancient Current Designs Expedition kayak at the Jericho Sailing Association’s bailiff’s sale (where they auction off boats that have not had the storage fees paid in a while.) For the princely sum of $240, I got a 1992 boat, old enough that it had been made in British Columbia, before Current Designs was sold to an American company and the manufacturing moved out of BC.

Obviously, a boat that old was a fixer-upper, and I did spend a fair bit of time patching gouges, swapping out the sliding footpedals and guillotine-like aluminum rudder blade for gas pedal pegs and a light, low-drag SmartTrack rudder blade. I also added sail mounts and found a deck compass that could be modified to fit the existing base from the long-lost original compass.

After sea trials to confirm the boat would float (and sail!), it was time to take it on a multi-day voyage. 

September 21, 2024

I intentionally arrived at my put-in at Xwawchayay/Porteau Cove in mid afternoon, so that by the time I launched the afternoon inflow winds would be tapering off.

As I packed, one of the onlooking tourists wandered up to me and shot off a long paragraph in what I recognized as German. I had to tell her in English that I didn’t speak German. She switched to English. Her confusion had come from the fact that the spare paddle halves on my kayak deck were clearly labeled “Werner”. But that’s a brand name, not my name. I conscripted her husband to take a prelaunch photo of me, and exhausted my entire German vocabulary to thank him: “Das is gut, donkey-shine!”

ready to launch my sea kayak at Porteau Cove, British Columbia
Out To Launch

I also briefly puzzled them by soaking down in the outdoor diver’s shower just before stepping into the boat (it was so I wouldn’t overheat in my drysuit on this sunny, warm afternoon.)

I launched just before 4PM. The fully loaded boat punched easily through the oncoming waves, scattering sun-silvered droplets across my bow. I was fighting the tail end of the inflow wind. As hoped, as I approached the southern tip of Lhaxwm/Anvil Island, the wind eased.

paddling South down Howe Sound, British Columbia

I had the golden hour pre-dusk light bathing Christie Islet as I crossed Ramilles Channel to Gambier Island. I landed at the Inaka Lhaxwm/ Ramilles Channel Recreation Site just before 7PM, to find two other paddlers already in residence. They had, naturally enough, taken the primo tent site with a large flat pad. Since I knew from talking with them they’d be leaving the next day, I set up my tent on a rather lumpy section of the path. 

Because I was on a shorter trip, I’d tried something different for my first night supper: a few days before the trip, I’d hit the Chinese takeout buffet at our local T &T market, and filled a container with a selection of my favorites. I’d frozen the container at home and kept it in a cooler bag in my car until just before launching, so it stayed safely cool until I reached camp. As I set up my tent, I reheated my supper in my Outback Oven (a great outdoor cooking gadget that is sadly no longer made.) A delicious novelty to be feasting on Chinese buffet in camp, especially those crispy spring rolls. 

Moderate alarms and excursions in the night. I’d been reading in bed, and initially attributed the slight twitches on my legs to muscle spasms. They turned out to be a small mouse scampering over me in search of the egress. After an exclamation (which it turned out was loud enough for my site mates to have heard), I evicted him. I’m sure we both slept better for it.

After that, I slept well, occasionally catching traffic noises from the Sea-To-Sky highway a few miles to the east.

September 22, 2024

In conversation with my two site mates over coffee, it came out that one of them has taken several courses from my employer, Jericho Beach Kayak, from fellow instructors I know well.

As they launched for their trip back to Lions Bay, I took a few photos to email them later (I know from experience it’s always nice to have pictures that include you taken from a bit further away than arm’s length.)

two sea kayakers in Howe Sound, British Columbia, with Anvil Island in the background


As soon as they had packed up their tent, I pounced on the primo pad for a property upgrade, literally leveling up from my lumpy site of the night before. I spent a happy hour cunningly rigging a super cozy campsite with a tarp over my tent (so nice to have a full porch in front of the tent where you can kneel out of the rain while entering or exiting). I also rigged a large tarp over the picnic table. Thanks to having brought a telescoping tarp pole, I was able to rig the seaside axis of this tarp in a high A-frame, giving me a million dollar view of Ramillies Channel and Anvil Island through the cedar branches. Whether by accident or design, the table is positioned so those trees conceal the cottages on Anvil Island. And the now steady rain created white noise (or perhaps wet noise), drowning out any traffic noises. The two effects combined to create at least the illusion of deep wilderness. Very cool, especially just an hour’s drive from downtown Vancouver.

a tent with a sheltering overtarp to reduce internal condensation
a view of Anvil Island, Howe Sound, British Columbia, from under a tarp on Gambier Island


With a good morning’s work of homesteading done, I settled down to enjoy a brunch of tinned hash and buttered bagel.

As I heated up water for an apres-brunch shower, an open aluminum skiff drifted into view a couple of hundred metres away, with a pair of fishers trolling their rods. Funny how your outlook on exposure changes with age. A half a lifetime ago, when I actually had a body worth ogling, I was pretty self-conscious about it. Today, my take is that if someone is so deprived of stimulation that the sight of my pudgy pink body in the distance is enough to drive them into some sort of erotic frenzy, it would be almost unkind to deprive them of this outlet. So I showered in full view without shyness. 

Since there seemed little likelihood of much sunshine–and this site is in the shade much of the time anyway–I set up my candle-powered clothes dryer in the tent. This is basically a three candle lantern, set carefully far enough below the tent gear loft not to melt or burn clothing. I then stacked my drysuit liner in the loft, so the rising hot air would dry it and save me having to climb into clammy layers next time I wore it. 


I set out my wok to collect rainwater draining off the tarp. I’d be leery of using tarp run-off for cooking or drinking, but I know from experience it will be fine for washing dishes or self.

In addition to my food, I’ve got my drysuit stored in the critter-proof aluminum cache. Nice to know it’s out of reach of salt-seeking rodents. (Years ago, I had the sweat-seasoned armpits chewed out of a doffed and inverted paddling jacket by mice in the time it took me to eat lunch.)

I spend the rest of the afternoon reading and zoning into that lovely zen state where what Buddists call “the chattering monkey” finally shuts up. 

My book is The Ancestor’s Tale, by Richard Dawkins and Yan Wong. It’s a revised edition of the book I read years ago on a circumnavigation of Princess Royal Island.

I supped on tinned beans and molasses. With plenty of rainwater and fuel available, I was able to give the dishes a thorough wash, and not the mere lick-and-a-promise of typical camp cleaning.

I am being buzzed by the occasional mosquito. My mild annoyance is tempered with gratitude that it’s warm enough this late in the season for them to be conducting flight operations.

September 23, 2024

I awoke to low cloud, steady rain and limited visibility. Anvil Island is only a faint shadow looming through the rain. If this persists tomorrow, there won’t be the strong Northbound inflow wind typical of sunny days, and I won’t get my hoped-for glorious free ride back to Porteau Cove, courtesy of my sails. On the plus side, the water would be calm. Navigation would be no problem: in addition to my GPS, I’ve got a hiker’s compass, deck compass and a chart with many of the crossings pre-plotted. I’d aim for Anvil Island, follow its eastern shore to the northern tip, then paddle a compass course aiming off so I’d hit the east shore of Howe Sound south of Porteau Cove, turn left to go North and handrail along the shore to the Cove. 

I’m very glad of my folding travel chair. It’s much more comfortable for my not-fully-evolved-for-bipedalism back than the unsupportive bench of the picnic table would be. As always, I’m also happy to have brought what some would have considered a rather selfishly oversized tarp for a solo camper. But on rainy days like these, it’s nice not to have to crouch and prowl under a low, tiny roof. Instead, I have a high ceiling with plenty of head room, and a rain-free area that’s about equivalent to a reasonably-sized room at home. The tarp’s translucent yellow colour creates a warm, vaguely sunlit feel beneath it even on dark days. Add unlimited stove fuel, herbal tea and a good book, and it’s all very cosy.

As I fried up my brunch of pancakes and bacon, I flashed back more than half a century to (under)cooking fatty bacon purloined from mom’s fridge on top of a hobo stove. I’d made this chimney-like contraption out of a large apple juice can following directions from Boy’s Life magazine. It’s a surprise I didn’t die from trichinosis, taking my too-trusting younger sister with me.

There are lulls in the rain during the afternoon. I take advantage of them to explore the site a bit more, finding a second tent pad further in the trees along the path to the east (it would have been too much in the personal space of my site mates to have pitched my tent there on the first night.) Further east still, there’s a beach-access-only site. I’d already noted another cleared site just below the outhouse, but that would be a last resort only option for me: it’s up a steep and slippery climb, which would be even more awkward when portaging gear. Plus, who wants to be serenaded by the sounds of their site mates’ bodily functions in the night?

Although I have other options in my larder, I opt for quick, easy and spicy Korean ramen noodles for supper, with a fruit cup cocktail for dessert to ward off scurvy.  

a spider's web, backlit, with a sea kayak visible on the beach behind it

Shades of Robert The Bruce, I fall into a reverie watching a spider whose web hangs off tree branches just beyond my tarp. He’s been patiently sitting in the centre of his web all day. More insects are buzzing about in the gloaming, and soon a hapless fly hits the trap. The spider instantly scuttles towards its victim. We need to avoid anthropomorphizing other animals, but I can’t help but wonder if insects feel something akin to terror when caught like that? Obviously, they wouldn’t experience the full gamut of human emotions, but neither can they be merely the Cartesian automata that ol’ René imagined. But just where on the continuum would they fall?

a tent and its covering tarp glow from the internal light

September 24, 2024

a foggy beach on Gambier Island, British Columbia, with Anvil Island faintly visible in the background

Heavy rains in the night, but I awake to blue sky visible above a low fog. Confident it will burn off, I take my time breakfasting and breaking camp, and launch a bit after 11AM. With visibility now clear, I opt for a dogleg detour to check out Christie Islet. As a Migratory Bird Sanctuary, off limits to boat landings, it swarms with seagulls, cormorants, and seals.

cormorants on the cliffs of Christie Islet, British Columbia

Turning north, I briefly put up my forward, Pacific Action sail. But though I am filled with hope, it is not filled with wind. I am reduced to actually having to paddle my kayak again. The horror! The horror! But I’ll soon be amply recompensed for this loss. As I’d been admiring the birds on Christie, I’d noticed out of the corner of my eye a jetski stopping in the middle of Montagu Channel, north of me. I’d wondered if they’d had a breakdown. As I altered course to swing close and offer to use my marine VHF to call for assistance if they needed it, I discovered the real reason they were stopped: a mother humpback whale and her calf were putting on an amazing show of synchronized swimming, plunging deep, under long enough that they must have been feeding on the seafloor more than two hundred metres below, surfacing with loud huffs and vast plumes of steam, and repeating the process as soon as they’d caught their breath. 

the tail of a diving Humback whale, with her calves visible on the surface behind her. Howe Sound, British Columbia

The jetski leaves soon after, but I stay, entranced. An occasional other boat joins me, grabs their requisite social media selfies, then zooms away. But everytime I try to get out, those whales pull me back in. I linger for about two hours, paddling a bit north, drifting south again as I stop to watch them surface, rinsing and repeating. It was magical, visiting with my cousins a few tens of millions of years removed.

a Humpback whale prepares to dive. Howe Sound, British Columbia'
The arc of a diver: moma Humpback prepares to sound
Humpback whales in Howe Sound, British Columbia

Eventually, I did have to go. I even got to paddle sail for a short while. And I approached Brunswick Point, more whales! Too far away for worthwhile photos, though.

By now it was late afternoon, and the need to pump my personal bilges was becoming ever more urgent. Not wanting my drysuit to become a wetsuit, I landed at the south end of Porteau Cove park, where the walk-in camping sites are, clipped the painter of my kayak to a convenient tree root, and scuttled to the outhouse. Much relieved, I reboarded to paddle the remaining few hundred meters to the boat ramp takeout. 

My timing was perfect: the wind was increasingly downchannel as I packed my car and reloaded my trusty kayak, and the rain began to fall just as I finished and got behind the wheel. An excellent four day getaway.

Epilogue: I don’t know whether the original owner of my new-to-me boat simply aged out of kayaking, or whether they’ve gone to the great sea in the sky. Either way, I like to imagine they’d be happy to know their boat is getting out and about once more. Just goes to show that even old sea kayaks–and old sea kayakers–are still good for a few voyages yet!   

PSA (Paddler’s Service Announcement): If you are not already a member of the BC Marine Trails Association, you totally should be. Not only does this group inventory all the water accessible campsites along the BC coast, they also help create them, including negotiating access to First Nations land (such as the Inaka Lhaxwm/Ramilles Channel Recreation Site where I camped on this trip. It’s part of the Sea To Sky Marine Trail.) This negotiated access is increasingly important as Canada works its way towards justice regarding the unceded traditional territories of the various First Nations. Thanks to Sḵwx̱wú7mesh Úxwumixw/Squamish Nation for allowing access to their lands, to the BCMTA for helping create these campsites, and to SKABC for maintaining them.