
In a previous post, we talked about Lines Of Position and about two kinds of LOPs: the shoreline, and compass bearings taken from recognizable landmarks.
But sometimes we just don’t want to break our paddling flow to stop and take compass bearings. And sometimes exuberant waves make shooting and transferring bearings onto a chart that’s bouncing off the trampoline of a sprayskirt deck rather like working on a crossword while riding a Tilt-A-Whirl. At such times, it would be great to have “self-shooting” LOPs. Happily, these exist: they’re called ranges*. They come in two flavours: artificial ranges, which kayakers generally avoid, and natural ranges, which we embrace like the tree-huggers we are.
* Or “transits” if you’re British. They do have a strange habit of coming up with odd new words for things when there are already perfect serviceable ones in English. See truck/lorry, glasses/spectacles, trash can/dustbin, etc.
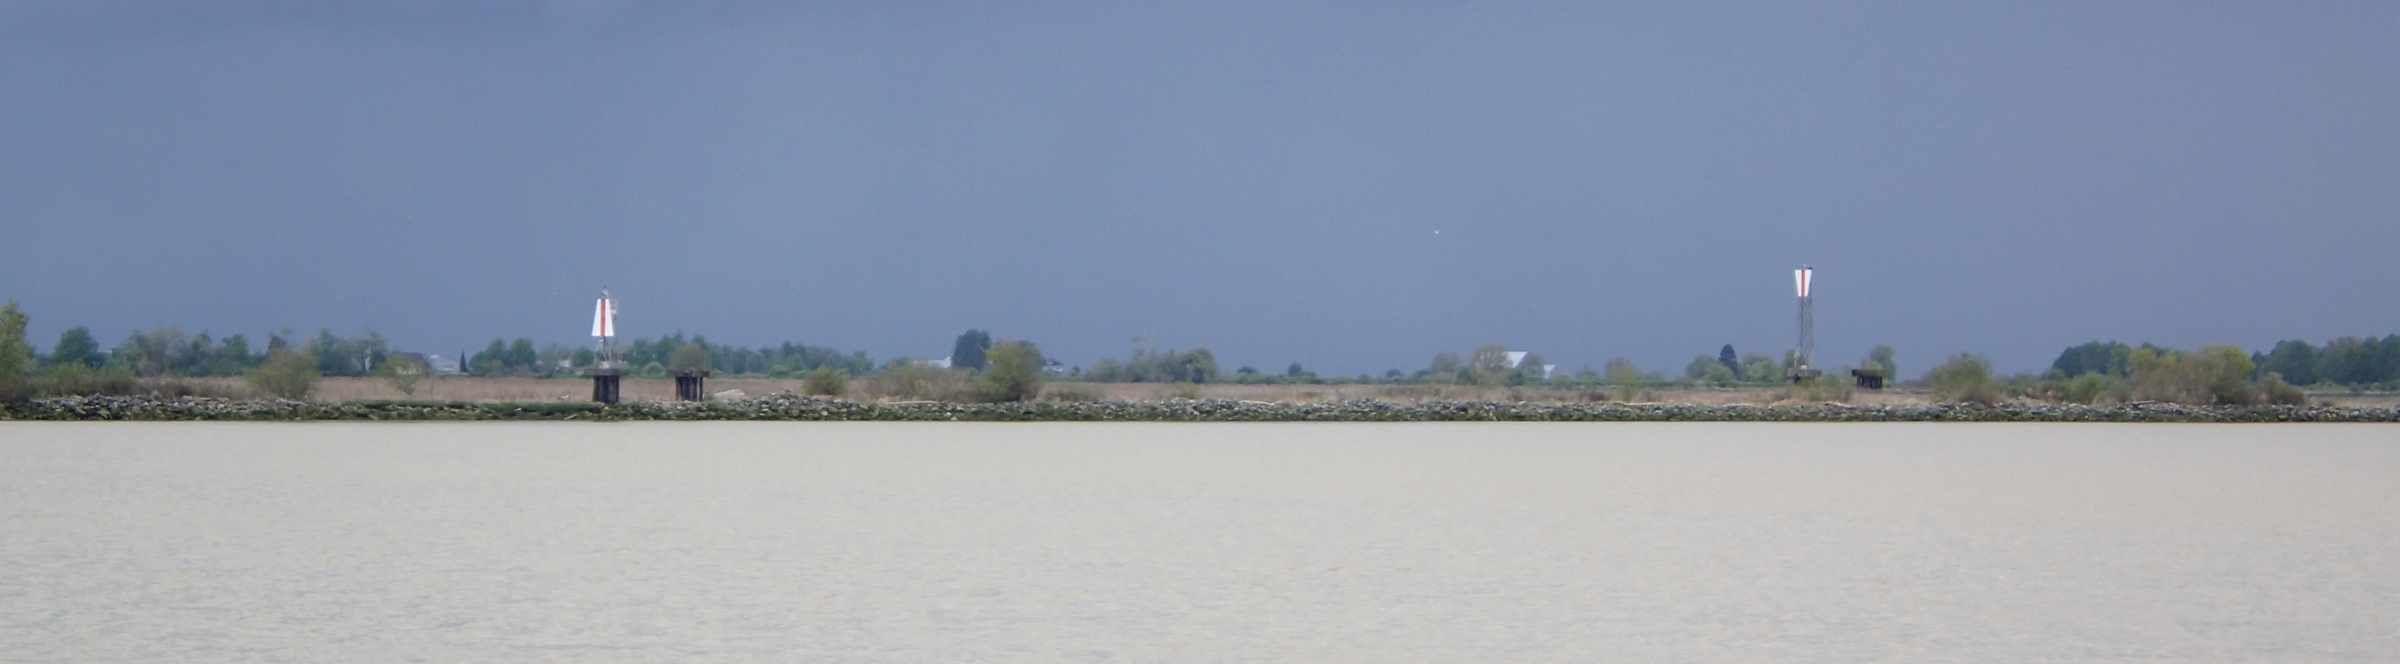
Read more: Sea Kayak Navigation: natural ranges and pre-plotted LOPsArtificial ranges are often erected along narrow channels and tricky harbour approaches for the benefit of bigger boats. They’re typically a pair of brightly-coloured trapezoids mounted on frame towers a few hundred metres apart. When the captain of a ship sees them lined up, one directly above the other, it tells them they’re in deep water, in the centre of the marine traffic lane, right where they want to be. When the captain of a kayak sees the same thing, it tells them they’re in deep doo-doo, in the centre of the marine traffic lane, right where they don’t want to be. At best a kayaker may acquire an expensive ticket for interfering with bigger boats; at worst they might be pureed in the prop of an overtaking freighter. So take advantage of your kayak’s much shallower draft and hug the sides of any such vessel traffic lanes you must follow. (But also remember that the wake from big boats will get steeper and more spilly in the shallows.)

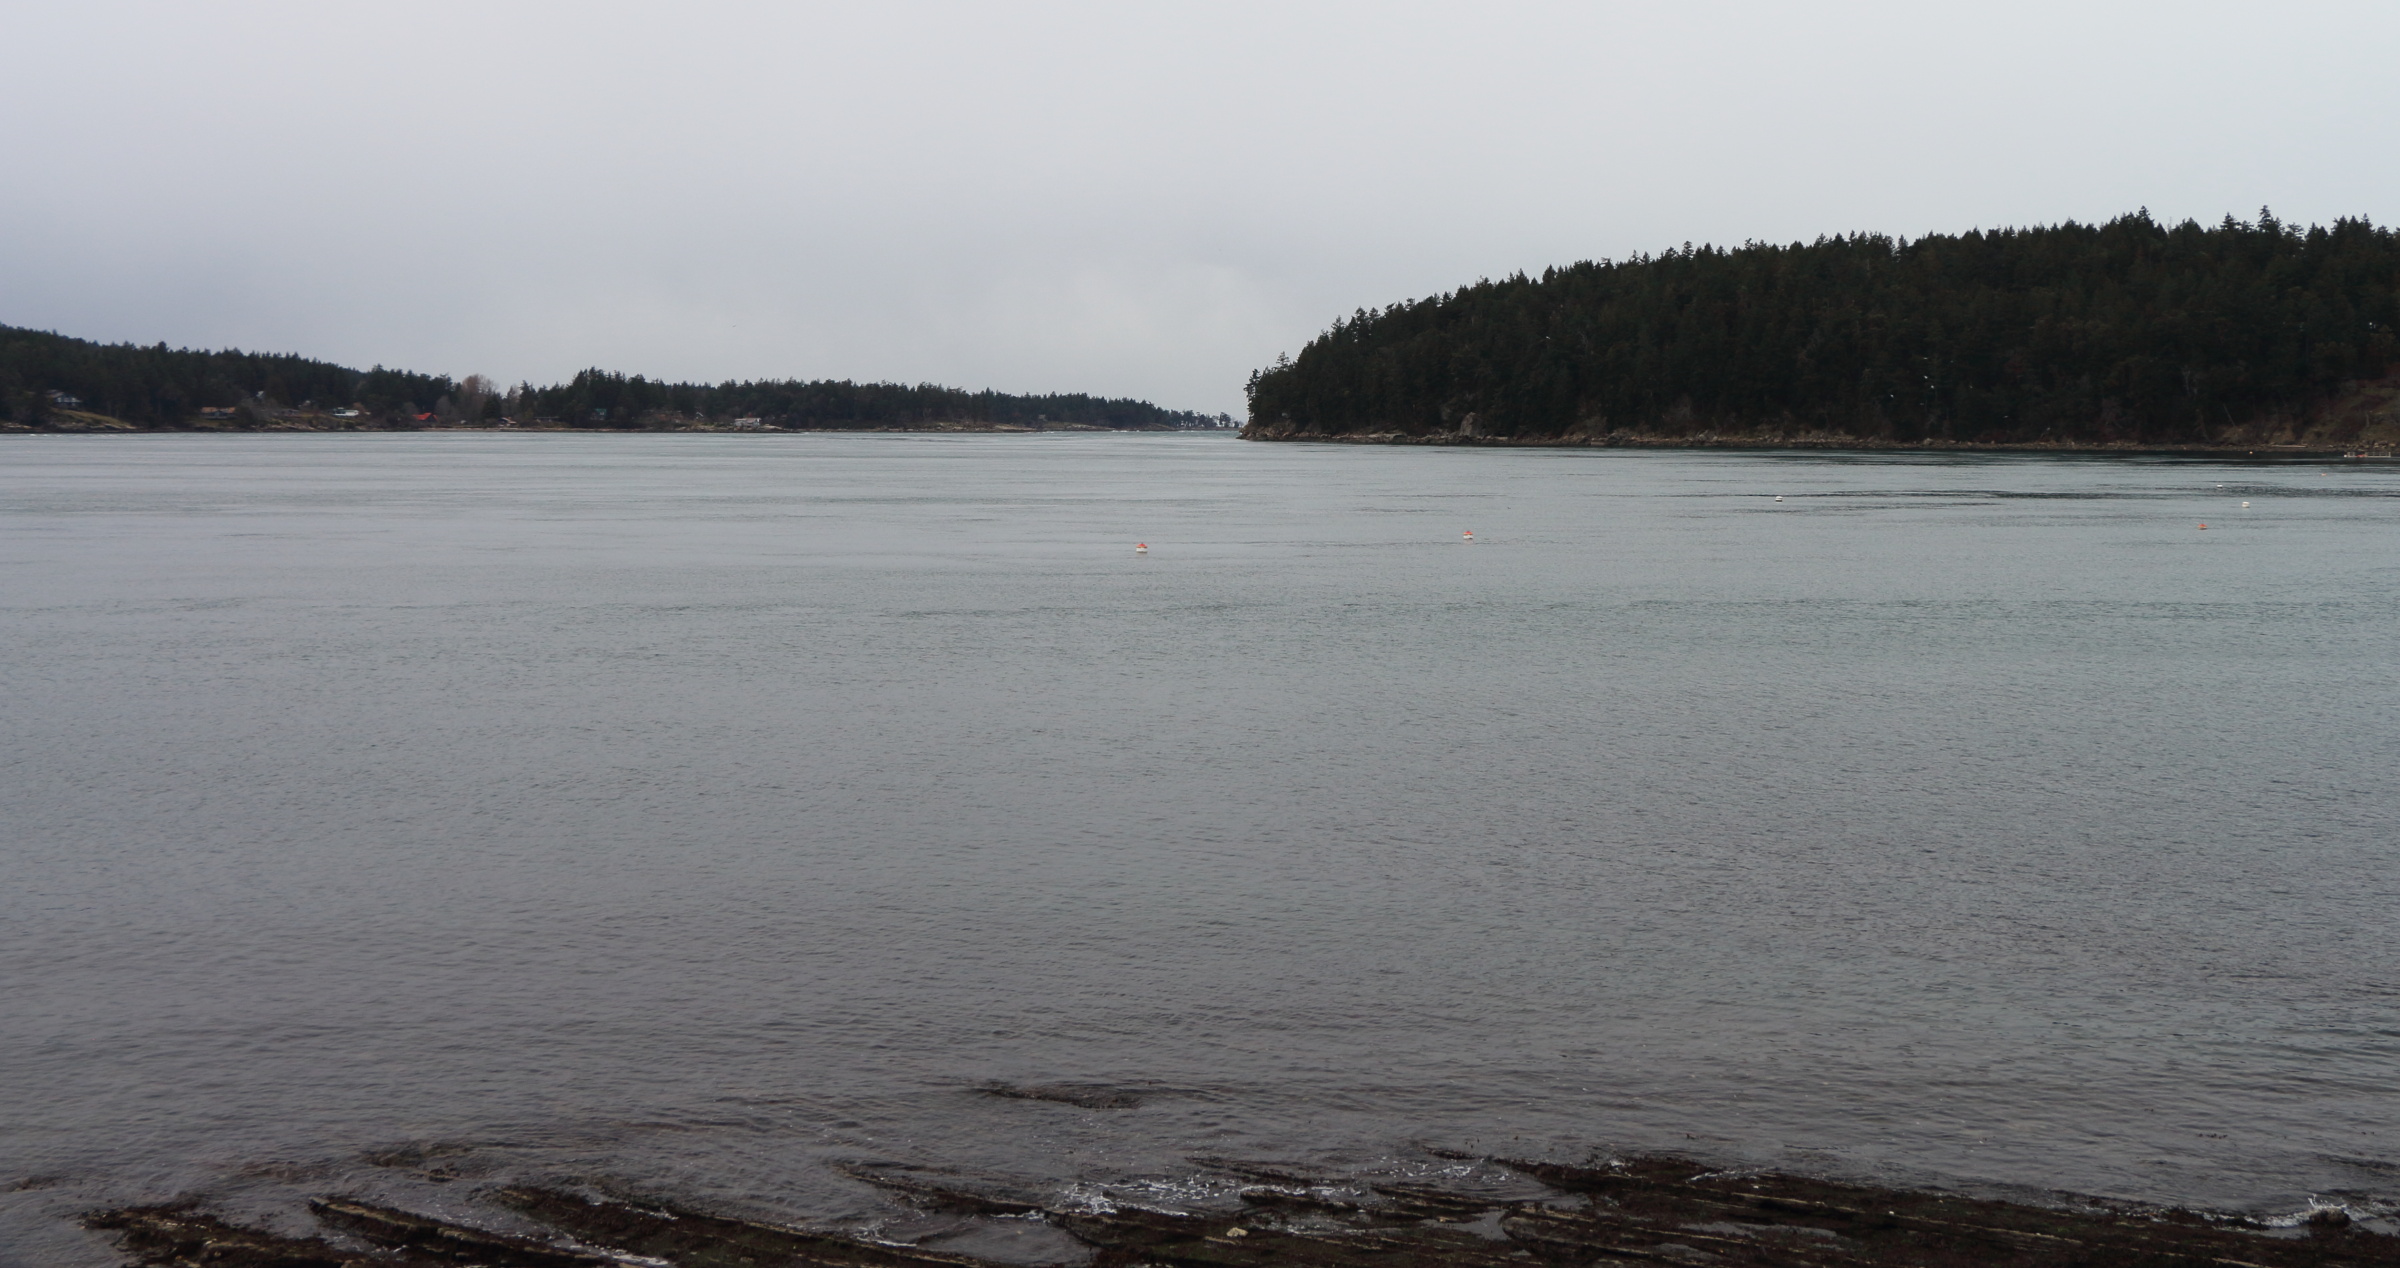
Natural ranges occur wherever two distinct landmarks line up from the paddler’s point of view. They’re the same sort of landmarks we’d be looking for when taking a compass bearing: the end of an island, a navigation buoy or marker, or the tip of a point.

Update March 2024: for another example of a range as an LOP, see the second half of this posting.
You can mix-and-match the intersection points of all types of LOPs to find your position. If all your LOPs are shorelines and natural ranges, you can usually count on them to be pretty accurate (islands and buoys generally don’t move around much). But if one of your LOPs is a compass bearing, it’s not a bad idea to take a second bearing off another object, just to offset errors in taking the first shot and transferring it to the chart.
The next best thing to a natural range as an LOP is a pre-plotted compass bearing. Especially when searching along a shoreline for a not-obvious-from-seaward campsite, a pre-plotted LOP can save a lot of anxious vacillation between “We should spot camp any minute now” and “We’ve overshot it and need to turn around.”
To pre-plot a compass bearing LOP, identify a landmark on the chart you’re confident will be visible as you’re approaching the target campsite in real life. Next, use a ruler or parallel rules to draw a straight line from the campsite to the landmark. Then, using either a hiker’s compass or a string-equipped Davis protractor, determine the magnetic bearing from the campsite to the landmark. (If you do all this at home or ashore in camp, it will be much easier to plot accurate bearings and draw straight lines.)

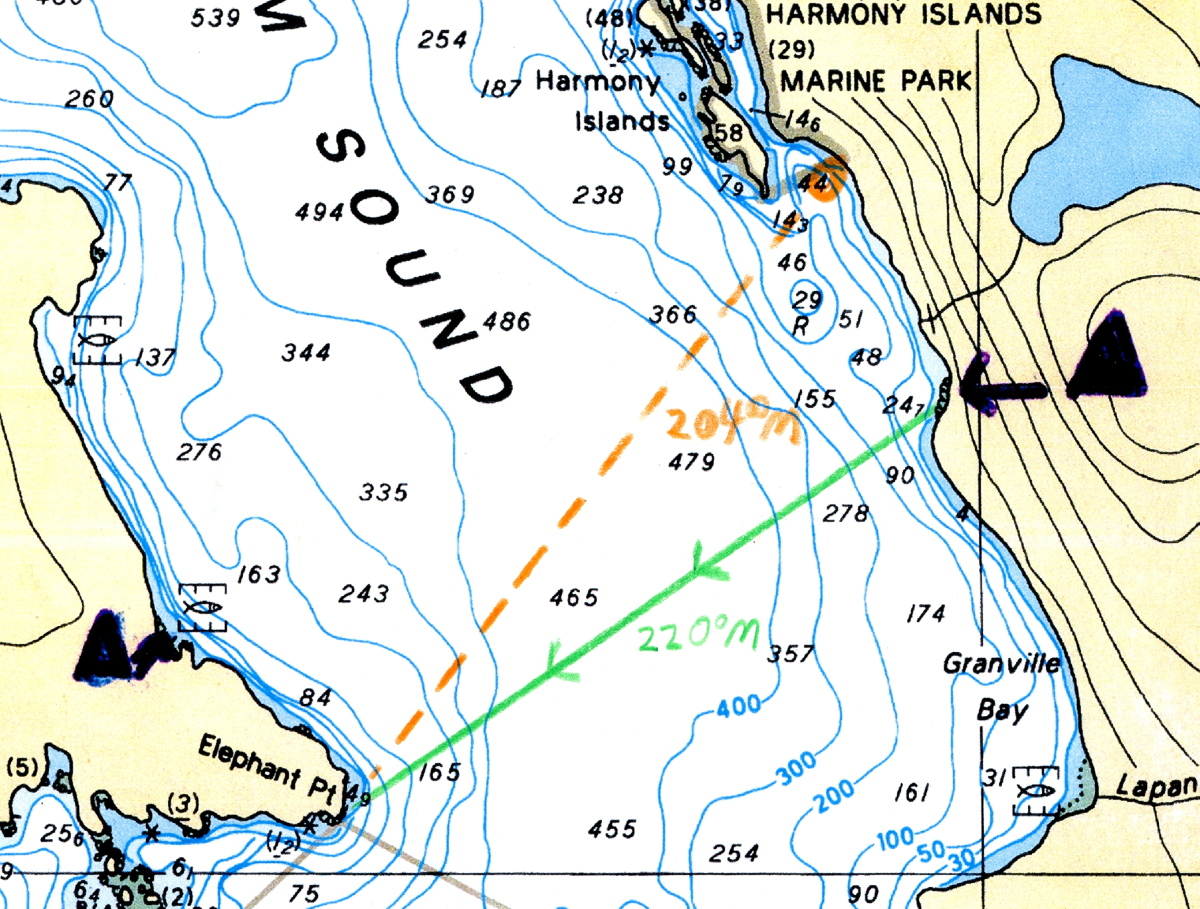
For a worked example, let’s go back to the chart we used in this post. But now let’s pretend that instead of making a crossing from Elephant Point to the campsite, we’re paddling north along the shoreline of Granville Bay looking for it. (For purposes of this exercise, we’re going to ignore the fact that in real life, just north of this campsite, there’s a fourteen-hundred foot waterfall thundering down the cliffs as a subtle visual and audio clue to your whereabouts!)
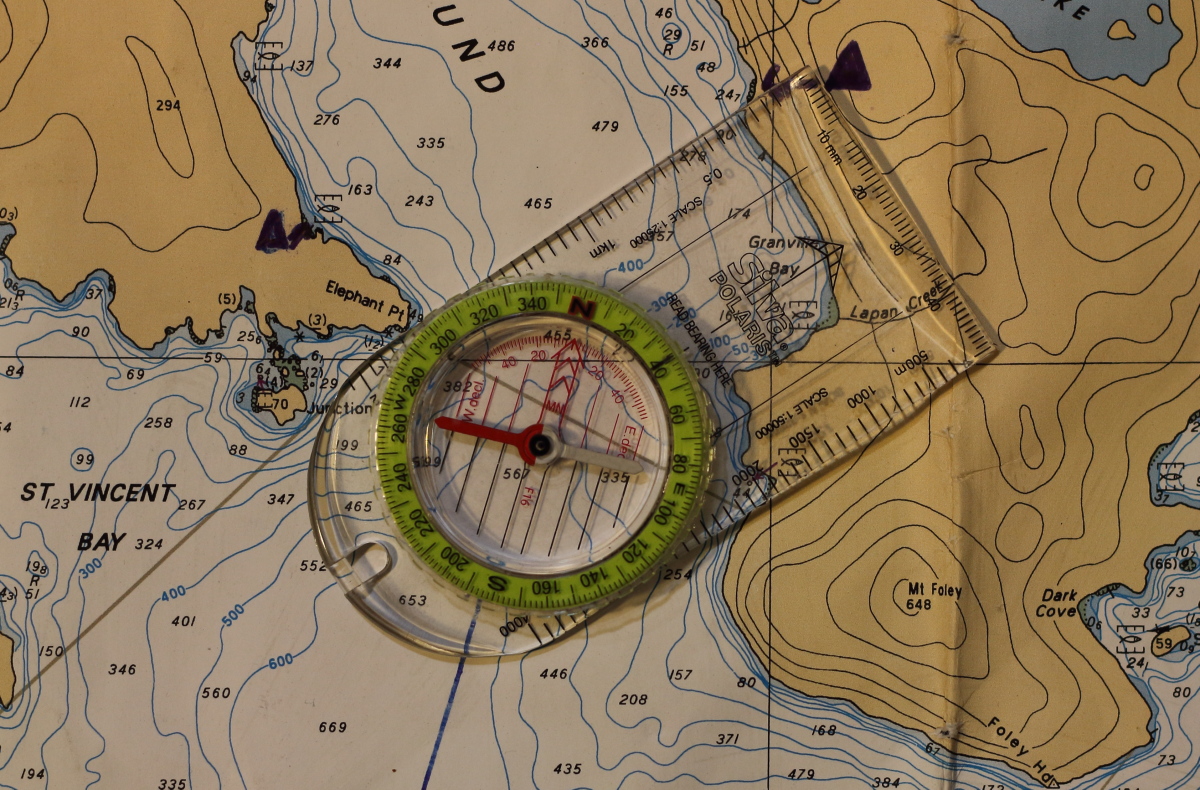
To determine the magnetic bearing from the campsite to Elephant Point with a hiker’s compass on the chart, we could just reverse the procedure shown in the photo above. We’d lay one edge of the compass baseplate running between camp and Elephant Point as before, but this time with the Direction Of Travel arrow pointing the opposite way. Next, we’d turn the compass bezel to make its meridian lines parallel to the blue magnetic North lines on the chart, then note the degrees shown at the Read Bearing Here indicator. But we’ve already done all the same sort of work to determine the bearing from Elephant Point to the campsite, as shown in the photo. That bearing was 40°.
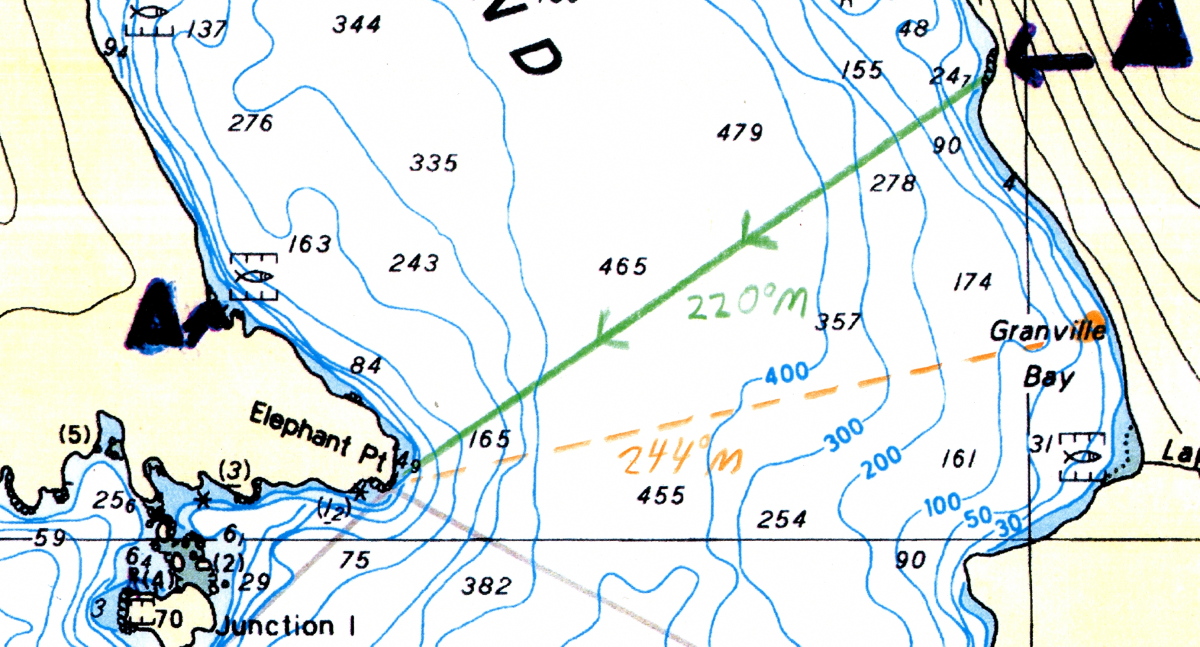
You’ve probably heard the slang, “Doing a one eighty!” to describe turning right around to head straight back to where you came from? It’s a handy way to remember how to work out the reverse (technically called the reciprocal) bearing from B→A when you already know the bearing A→B. In this case, we know the bearing from Elephant Point to the campsite is 40°. So we add 180° (“one eighty”) to 40° and get 220° – the reciprocal bearing from the campsite to Elephant Point.*
*When our original bearing is 180° or less, we add 180 to determine the reciprocal. If the original bearing is greater than 180°, we subtract 180 to get the reciprocal. So if the original bearing had been 270°, the reciprocal would have been 90°. Why this way rather than just always adding or always subtracting? Because, for tediously complicated historical reasons, compasses use 360°circles. So unless you’re Captain Jack Sparrow, your compass won’t show a course higher than 360° or in negative degrees.


So now we note the 220° bearing from the campsite to Elephant Point on the green line drawn between the two. As we make our way north up the shoreline of Granville Bay, we periodically take a shot of Elephant Point with our hiker’s compass or our deck compass. If the bearing we get is greater than 220° (I.E. further south), we know we’re not quite there yet; if it’s less than 220° (I.E. further north), we know we’ve overshot.
It’s good practice to er, practice with LOPs of all kinds even in waters you know like the back of your hand. In fact, especially in waters you know like the back of your hand. That way you’ll quickly recognize any errors you’ve made. Then, hopefully having made all your mistakes in low-consequence situations, you’ll be more confident and competent when applying those skills “for reals” in unfamiliar environments.

Pingback: Guiding Light: 2023 Jericho Beach Kayak staff trip to Halkomelem: səl̓ilw̓ət (Indian Arm) | Kayakwriter's Blog
Pingback: Sea Kayak Navigation: thoughts on GPSs and smartphone navigation apps | Kayakwriter's Blog
Pingback: Sea Kayak Navigation: LOPS at sea | Kayakwriter's Blog