In a previous post, we talked about how to use the shoreline and compass bearings taken on recognizable landmarks as Lines Of Position to determine our location. At the end of that post, I mentioned that when you’re away from the shoreline, you can use compass bearings alone to determine your position. Here’s a real-life worked example:
Recently, I was paddling in Ayyulshun’/English Bay and headed a bit out past Point Grey into the eastern edge of the Strait Of Georgia. Just for fun, and because the landmarks were nicely down sun for photos, I “shot” my position using my bow compass.
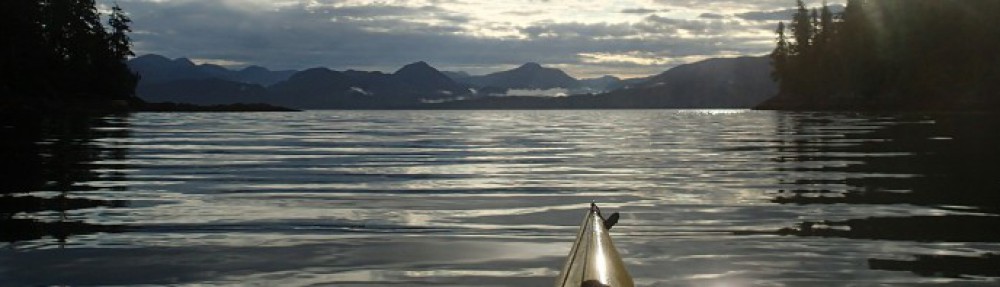
First, I aimed the bow of my kayak at the Point Atkinson Lighthouse. It’s the white upright object visible at the shoreline in the photo below. Looking at the red lubber line visible in the dome of my bow compass, we can see that the magnetic bearing to the lighthouse is 335° (or close enough to that for practical purposes). That gives us one Line Of Position.

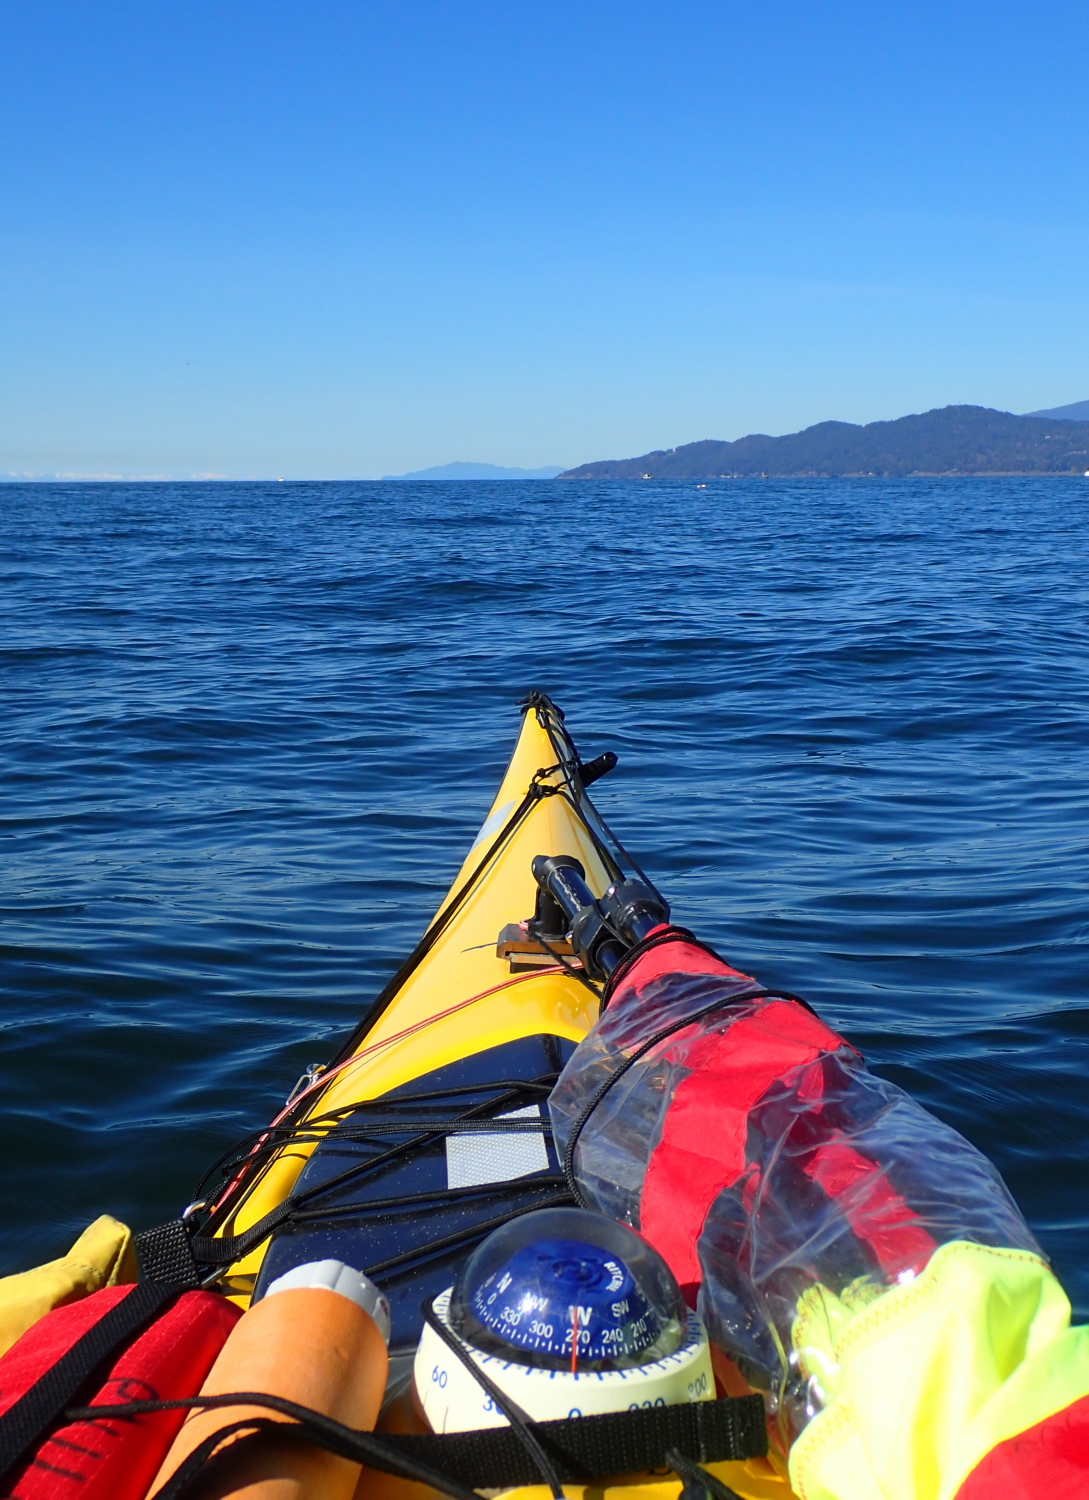
Next, I swung my boat to point at the southern end of Bowen Island. As you can see in the photo, the bearing to that point was about 272° magnetic.
(From sheer force of habit, I automatically chose two landmarks that were—very, very roughly—90° apart from my point of view. As I’ve mentioned in previous postings, this is good practice, since it means that when you plot the corresponding LOPs on your chart, they’ll meet at a more-or-less right angle, which makes for a much clearer intersection point than an acute or obtuse angle.)
While on board the kayak, pinning down my modified Davis protractor and pulling out the protractor string while simultaneously holding my camera above the chart case would have required more hands than I happen to be equipped with. So instead of plotting my position in real time while at sea, I opted to do so back at home, with a flat, unbagged chart and a camera tripod. (But since you—probably—wouldn’t be flailing around with a camera at the same time as you’re navigating, you can work your plot at sea.)
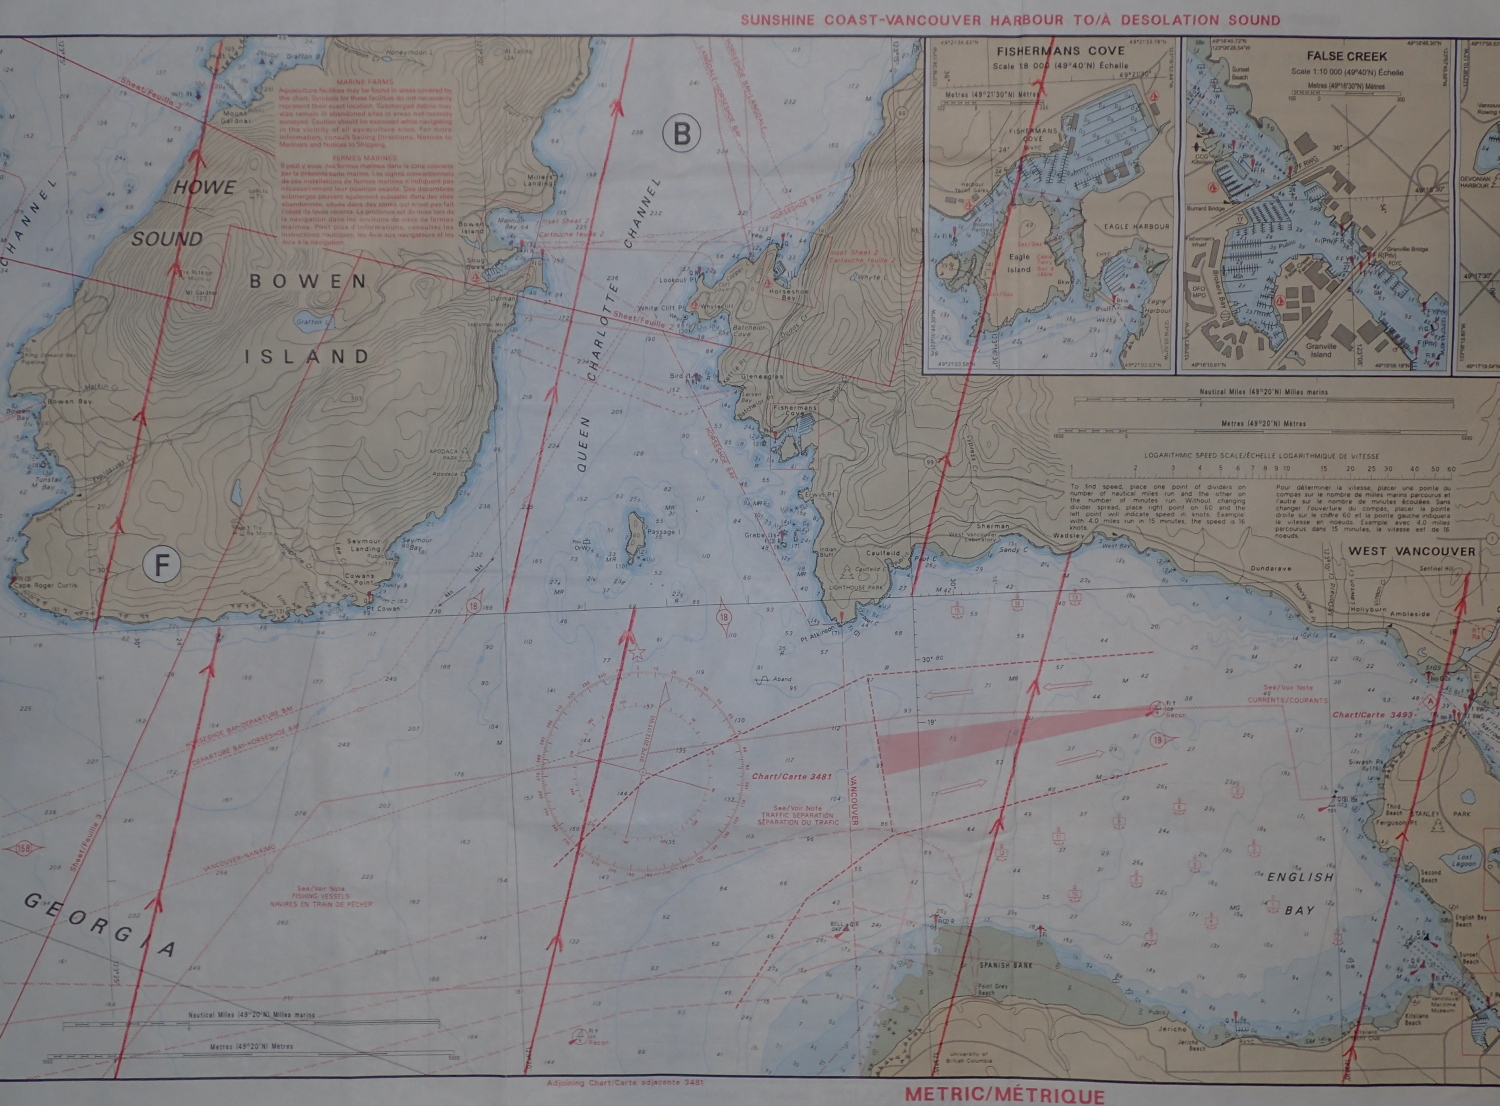
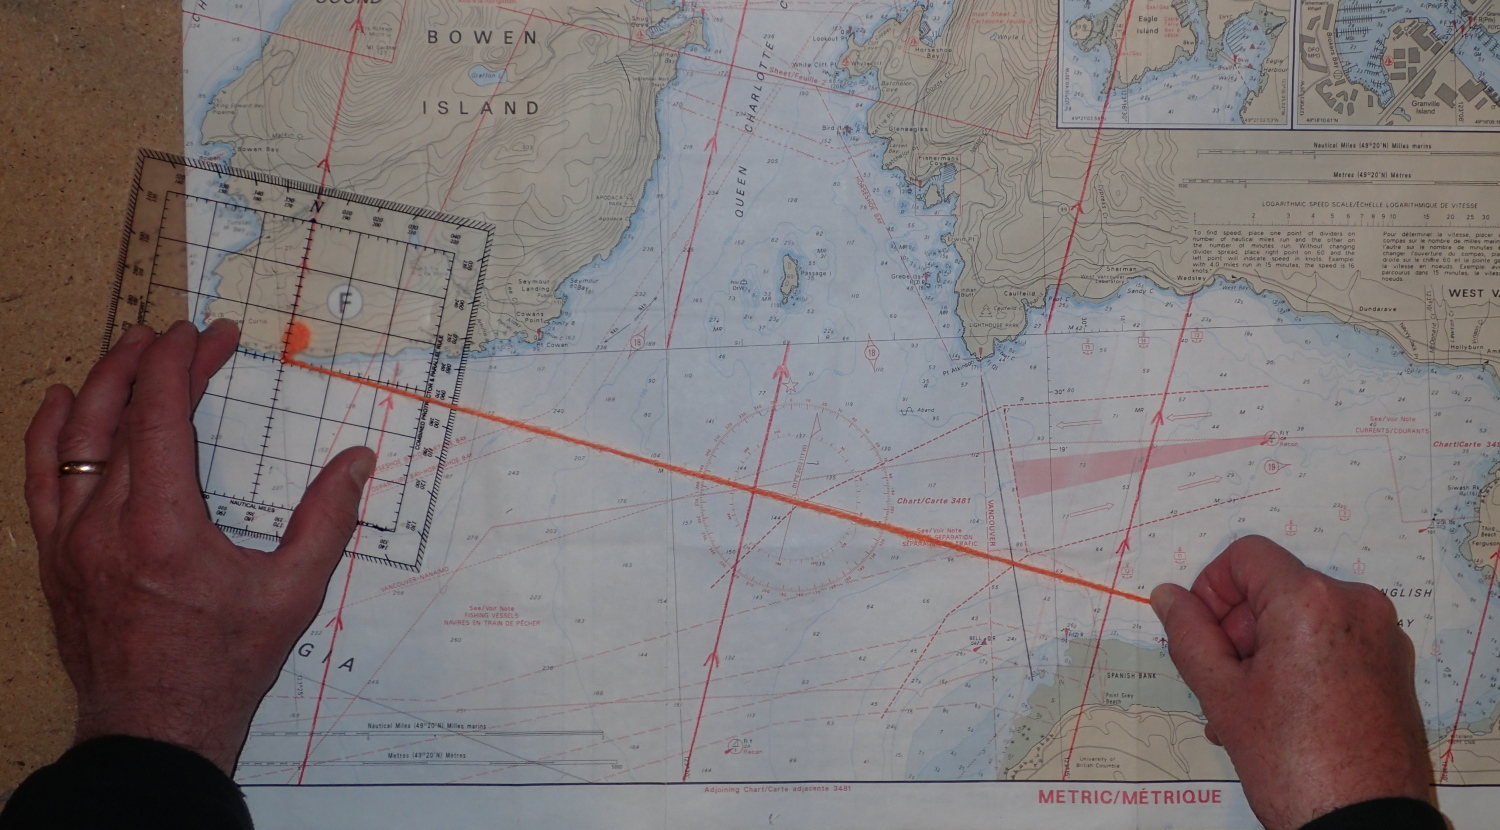
To plot my first Line Of Position, I laid my Davis protractor on the chart with its centre over the Point Atkinson Lighthouse. I pivoted the protractor until its North-South lines lined up with the magnetic North lines I have drawn (in red) on the chart. Then I drew the protractor string across the 335° indicator on the protractor’s outside edge. I lightly penciled in this LOP on the chart.
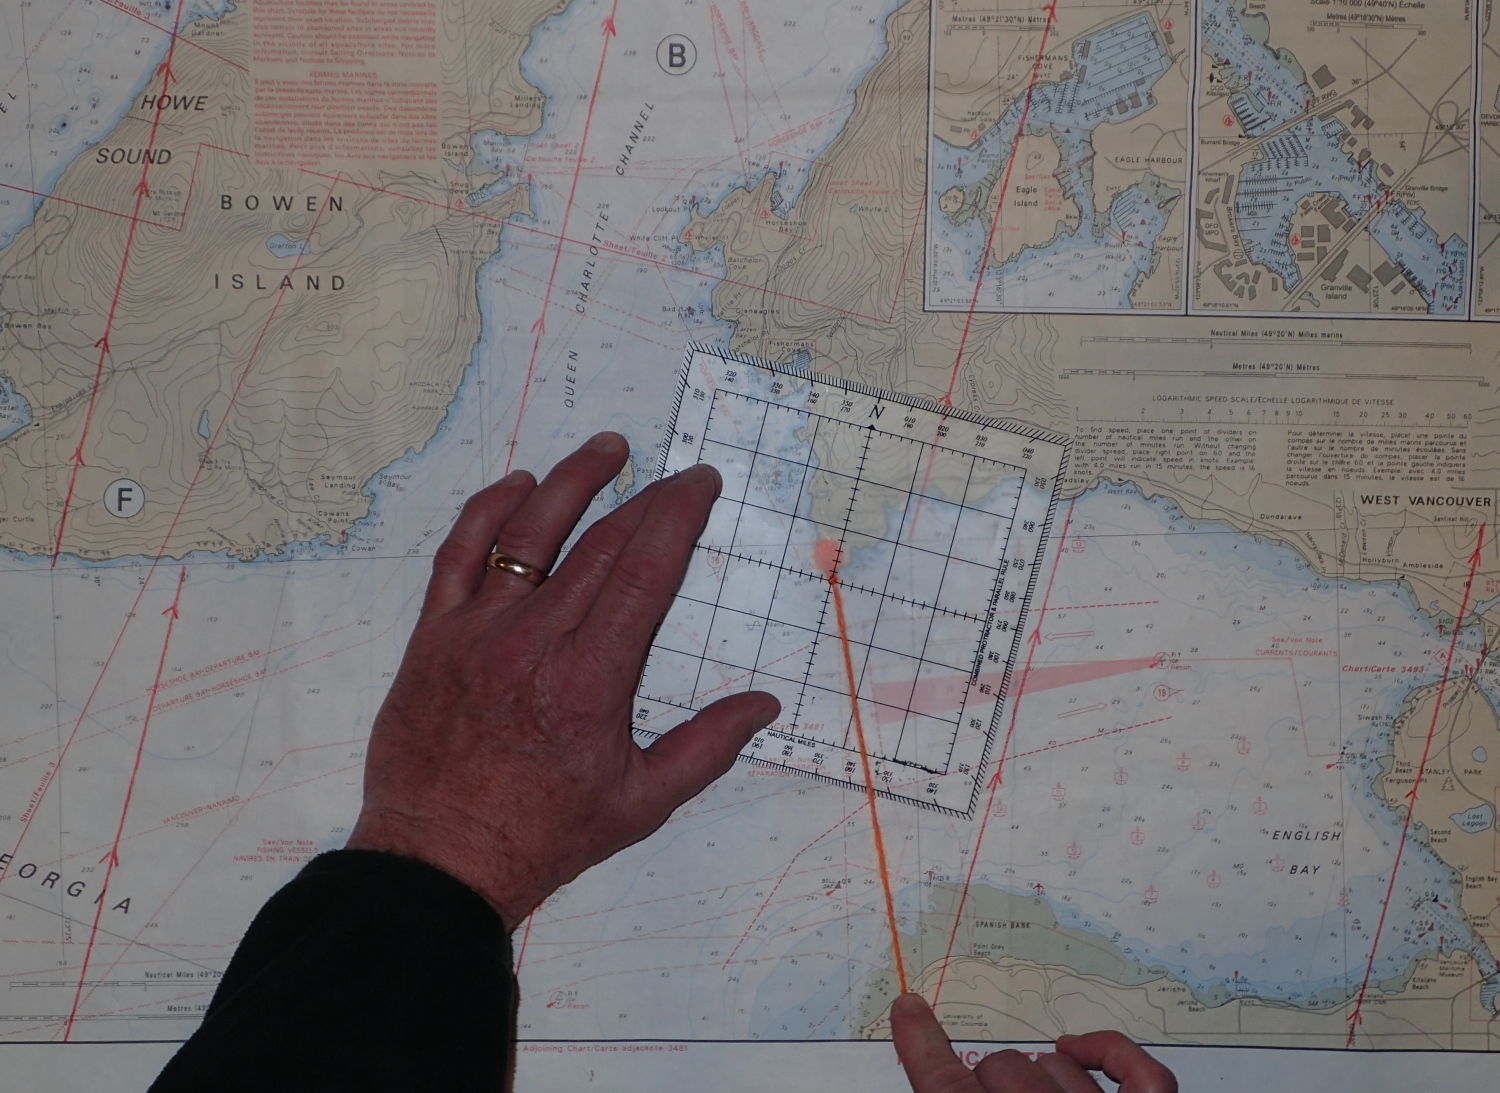
I repeated the process for the second LOP plotted on the southern tip of Bowen Island, this time pulling the string across the 272° on the protractor’s edge. Where the orange protractor string overlaps the pencil line of my first LOP is (or was) my position.*
*Strictly speaking, finding your whereabouts by this process is called resection. But it’s more commonly, if erroneously, referred to as triangulation. So if you talk about “triangulating”, you’re more likely to be understood by your less pedantic fellow paddlers. But if you’re the sort who delights in correcting your campmates with “Well ackchyually, unless it’s from the Champagne district of France…” in your primest Thurston Howell The Third accent, why not baffle them all with resection?
With the bow compass swinging in the swell and the limits of reading it, there will be some error in my plotted position. So if I’d needed higher accuracy—if for example I were hoping to avoid some nearby reef lurking in ambush just beneath the surface—I could have shot a third landmark and plotted a third LOP.
As noted, I waited until I was home to plot the LOPs I’d shot on my chart. How would I have done it out on the water? Rather than take my chart out of its waterproof bag, I’d have used the protractor outside the chart bag, and marked the first LOP directly on the chart bag with a chinagraph pencil (which are also excellent for jotting notes directly on the deck of your kayak—such as the changing compass bearings to your landfall, so you can detect the direction you’re being drifted).
Since I was already on the water, I took advantage of the chance to photograph another example of using two objects as a range for an LOP.


Even when far from shore, you can mix-and-match different kinds of LOPS—compass bearings and/or ranges—to determine your position. So it’s perfectly possible to be “all at sea” in the literal sense without being so in the metaphorical sense of being lost.
