So let me start by acknowledging that over the years I’ve spent a ridiculous amount of time and money on the various incarnations of my electric bilge pumps. At this point, it’s as much about the intellectual challenge and the fun of problem solving as getting water out of my boat. But as far as obsessions for old men go, it’s pretty harmless. Plus, if you can save some cash and avoid heading down dead ends by learning from my experiences, I’m happy for you.
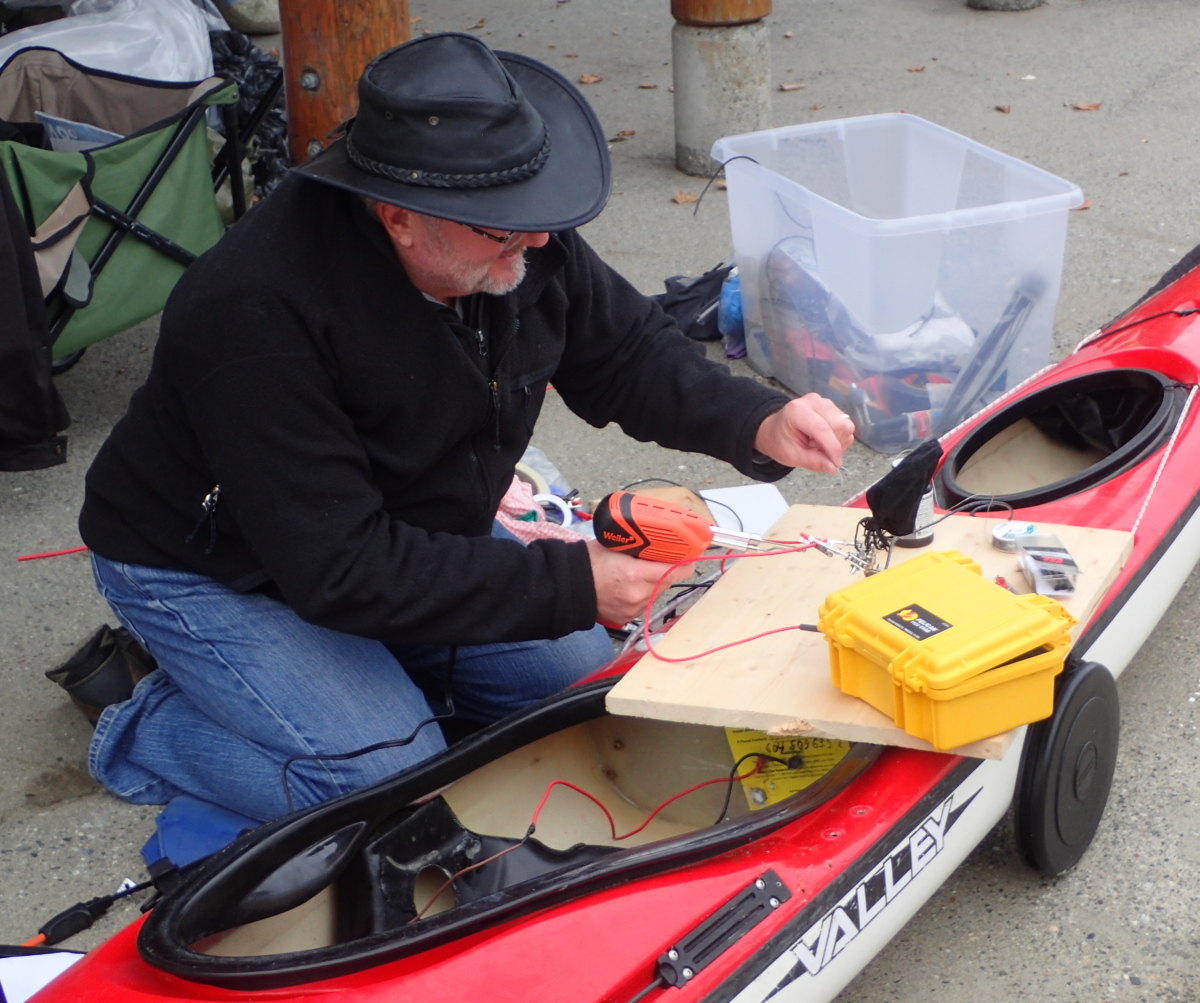
This latest upgrade wound up becoming The Pump of Theseus: a new battery, a new battery box, and a new switch system. I also replaced both the base and backrest of my existing seatback. Still, a couple of feet of the positive and negative wires where they pass through the bulkhead into the dayhatch compartment were retained. So it’s kinda, sorta the same system, right?
Let’s walk through the components I replaced and why:
THE BATTERY
On previous systems, I’d used battery holders to stack AA batteries in series to add up to the voltage needed for a 12-volt bilge pump. I had a couple of reasons to do so at the time: I was doing longer (multi-week) trips and wanted the option to recharge the batteries in the field with my solar system and/or to swap out the rechargeable AAs with alkaline batteries from my other gear if needed. These days, I’m mostly doing shorter (long weekend) trips. In any case, I wouldn’t be doing longer trips in my skeg boat: I’d use my more capacious rudder kayak. Most significantly, over time, the thin wires from the 9 volt connector clips I’d used had sometimes corroded through – not from getting submerged, but simply from the salt air that entered the battery box when I opened it at the seashore.
At the suggestion of my friend and kayak addict co-enabler, Michael Verkerk, I switched over to a pre-fab 12 volt battery pack from Bioenno. This unit does require a wall charger, but as noted, I’m doing shorter trips these days, so the charge should last through any 2-3 day paddle I do with this boat.
THE SWITCH
In the last couple of systems I built, I‘d used magnetic relay switches, “potted” with marine sealant in a length of PVC plumbing pipe to make them watertight. And Michael had kindly made me a present of a new relay switch. But when I set up the system for a dry run on shore, I found the switch kept freezing in the closed (turned on) position after a pass with a magnet. Once the completed system was installed in the boat, I’d have had no other way to turn the pump off, short of opening the battery box and disconnecting the battery – something that would range from awkward to impossible at sea. And that would pretty much make the pump system a one-shot gadget, not reusable until I’d landed and replaced or recharged the depleted battery.
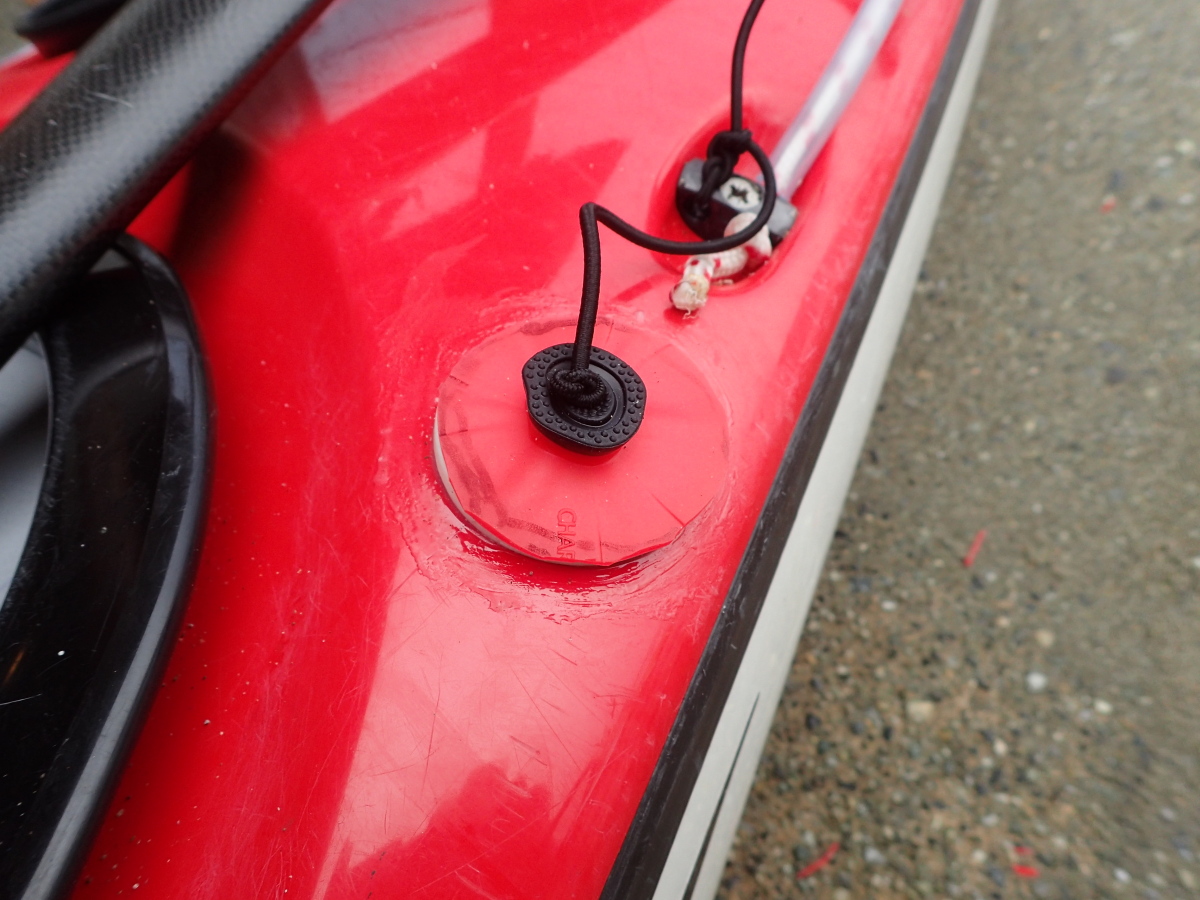
So I went back to the future on the switch, using an air button and air switch designed for use around hot tubs and pools, as I’d done on an earlier pump system.

I knew from my previous experience with air buttons that they will rapidly jam with sand around the beach, so I used keyhole saws to cut a plastic ring from one of my favourite forms of raw material stock: a dollar store kitchen cutting board! This ring was sized to hold a protective neoprene cover over the air button.


THE BATTERY BOX
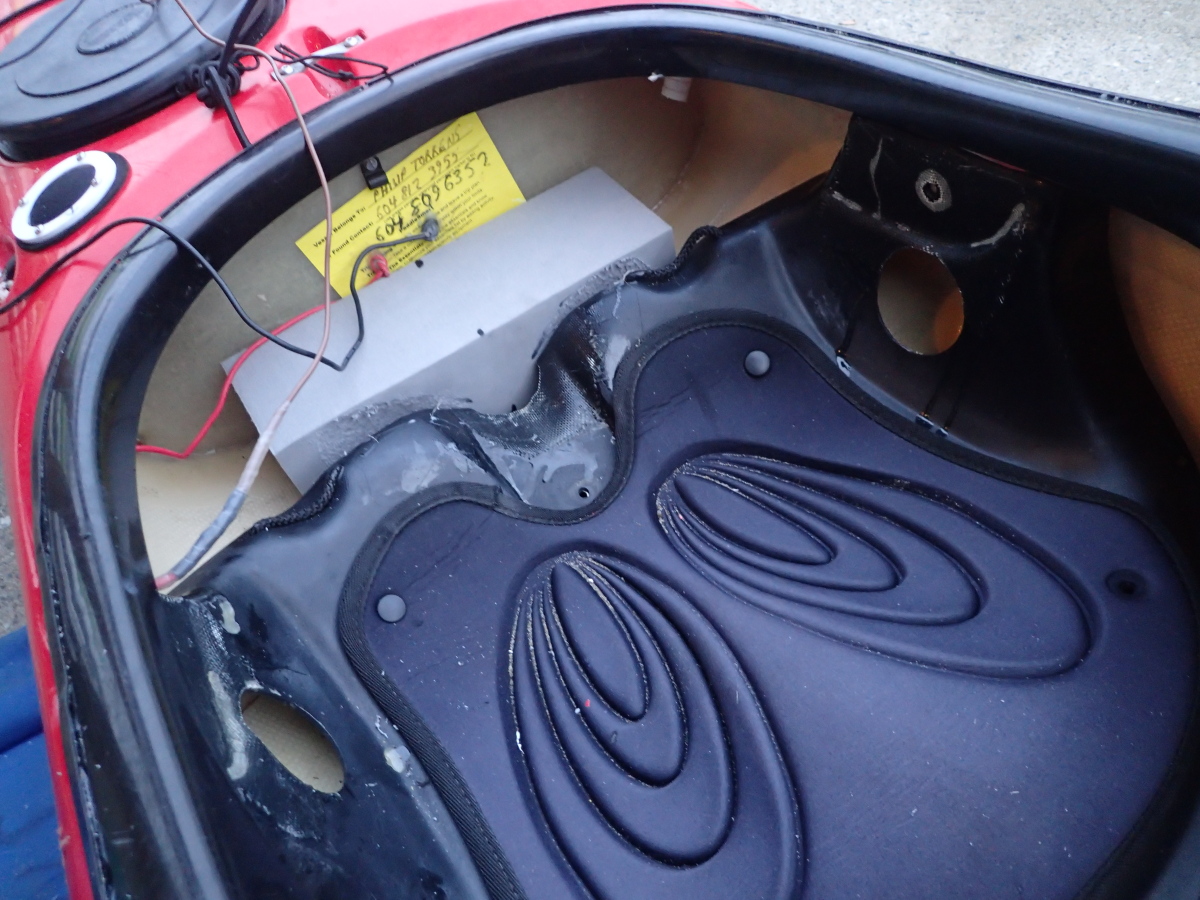
The new, larger battery and the air switch required a larger box, a Pelican 1120 Protector Case.


Some dryland experiments with one-way valve, backflow preventers I’d previously used in the pump discharge hose confirmed two things:
- They didn’t really prevent water that entered at the mushroom head from flowing backwards through the pump and into the kayak cockpit when the pump was turned off. Clearly this is because the valve is intended to be installed where the hose and mushroom head are ideally running downhill–or at least horizontally–away from the valve. The tight quarters and low freeboard of my kayak leaves the hose curving uphill to a vertically-mounted mushroom head. As a result, the one-way valve is sitting at the bottom of a water column if the hose is down-flooded by waves.
- The one-way valve also seriously reduced the water output from the pump.
So I abandoned the one-way beak valves and reverted to another hack I’d used in previous systems: a custom-whittled foam “cork” at the mushroom head. It’s sized to be snug enough to prevent waves down-flooding into the boat, but loose enough for water pressure to blow the cork out of the mushroom head pop-gun style when the pump is activated. It’s on a tether to prevent loss.

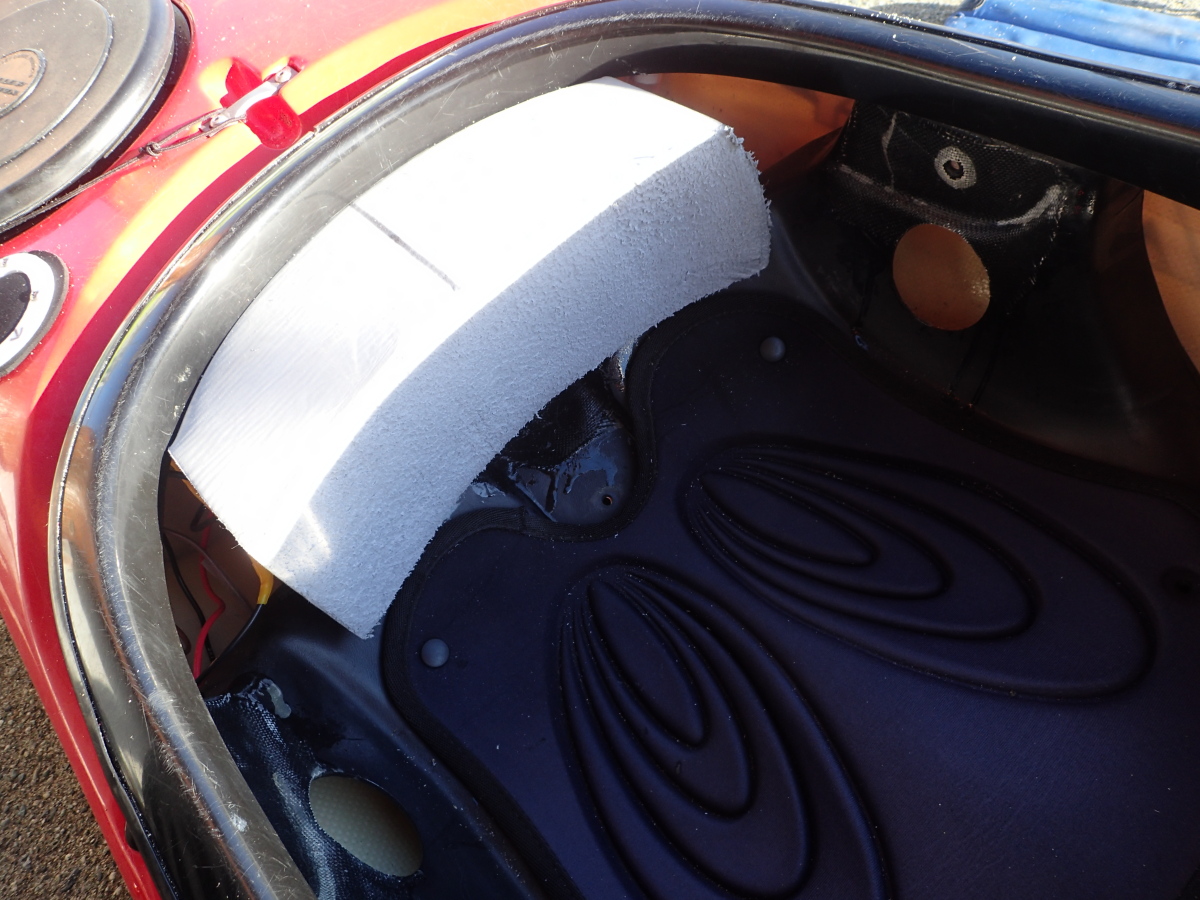
Since I was rebuilding anyhow, I also rebuilt my minicell foam seat back. I’d been happy with the support of the old one, but the actual back brace had tended to get sheared off over time as I dropped into the cockpit. I’d needed to reglue it a few times. So in the new version, the back brace is a single piece of foam that extends all the way back to the bulkhead, and rests on the lower foam piece (which also houses the pump). I’d expected to need to glue these two new components together, but found to my pleasant surprise that they press-fit solidly into place under the rear coaming. This will make accessing the pump for cleaning and maintenance much easier.
So how did it all work out? Here’s the video of the first dryland test. Stay tuned: I’m already scheming on further upgrades for the air button cover and the cork!
UPDATE: DECEMBER 17, 2023
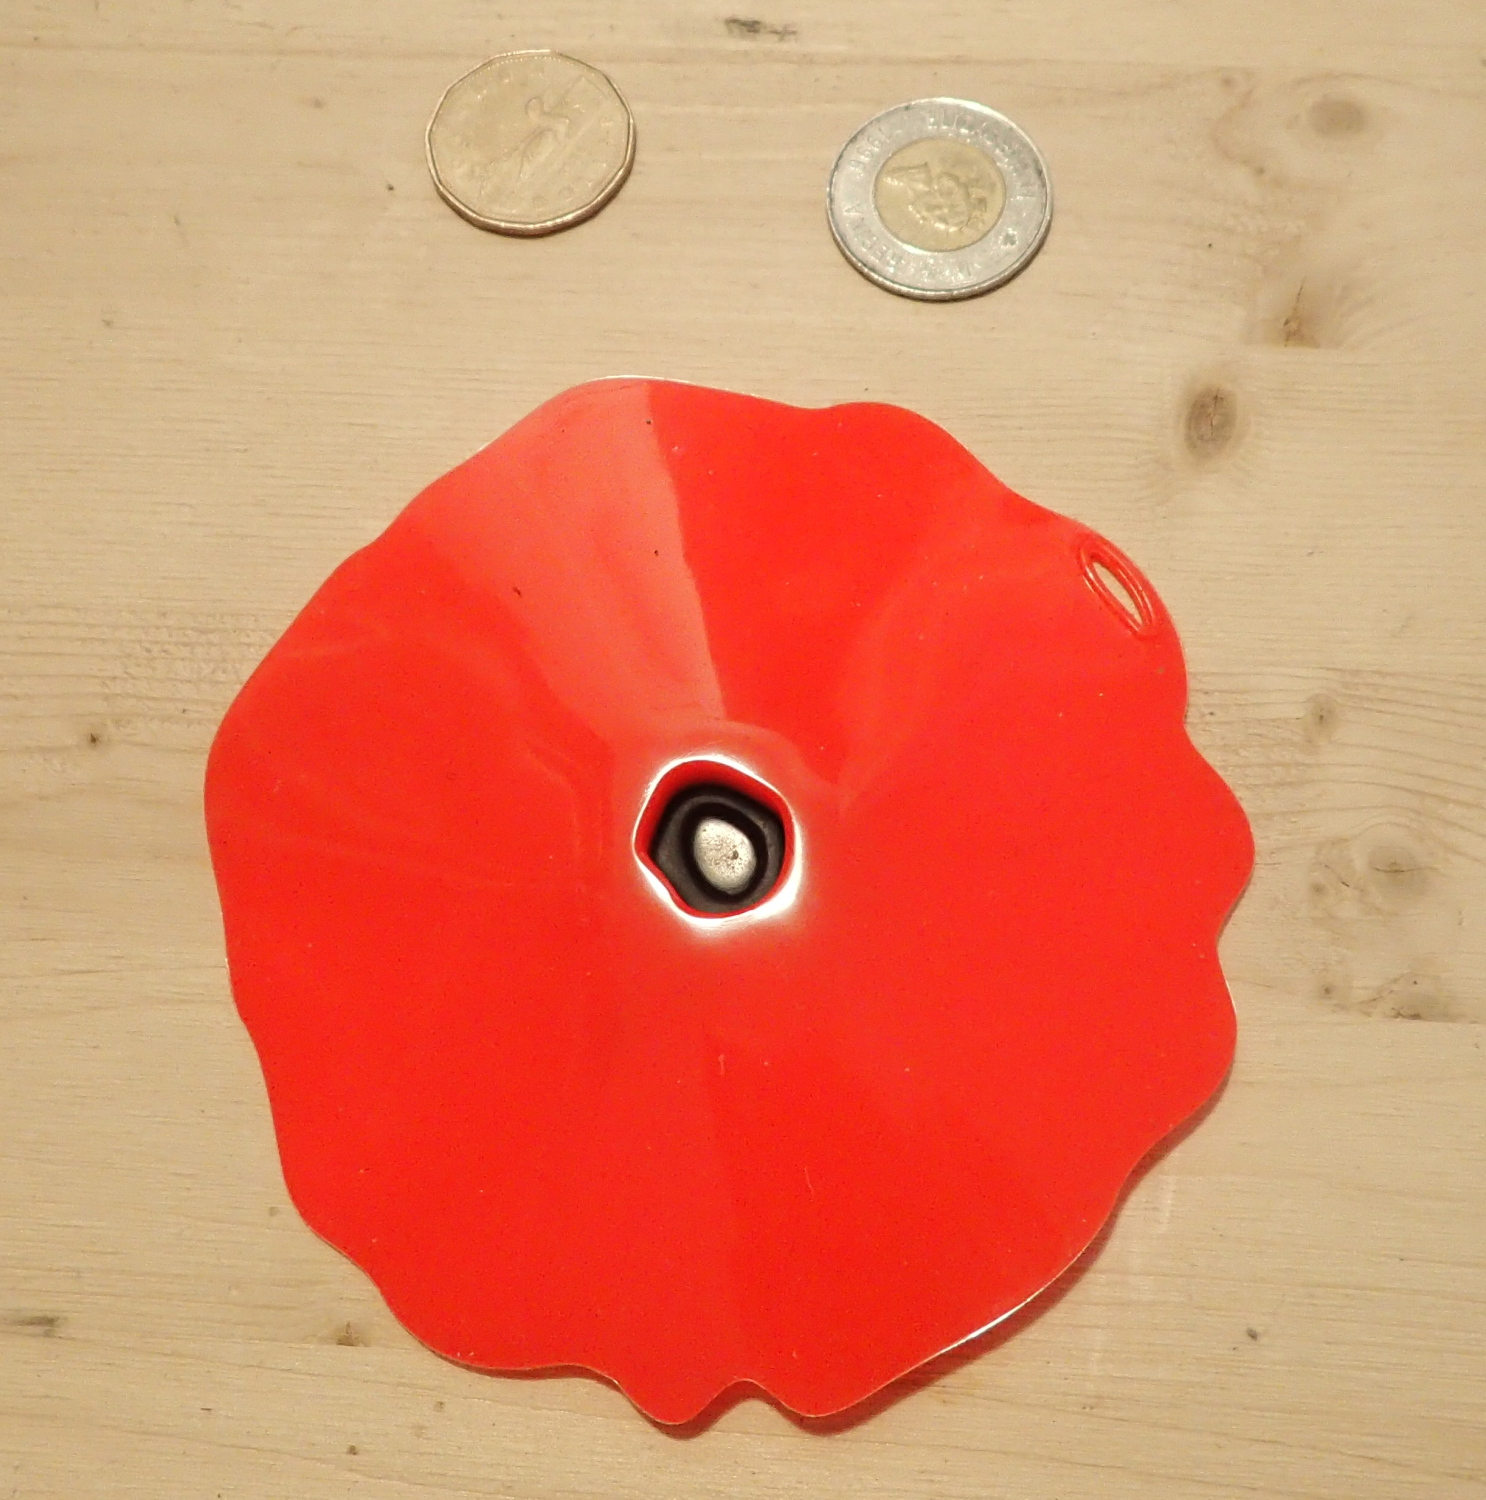
So when wandering through a kitchen specialty shop a few days ago, I stumbled across these red flexible silicone thingy-ma-bobs. The manufacturer was foolishly marketing them as stick-on drink lids for glasses and mugs, to keep your bevies hot or cold, as the case might be. But any preceptive paddler could easily discern they were actually cut-to-size covers for the air switch of your electric bilge pump system and splash lids for the mushroom head cork on the pump outlet. So I replaced the previous neoprene cover with the new silicone – it should be more watertight. Plus it accessorizes better with the colour of my kayak. And, as any of my friends will tell you, I’m nothing if not fashion forward.